


1999 BERNINA Of America
Section B - page10
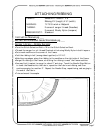
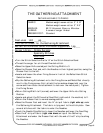
QUILT-AS-YOU-GO
Bernette Advanced Guide Workbook Supplement
pg.____
Serger Library – Simply Serging
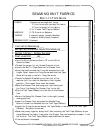
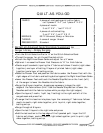
•Turn the Stitch Selection Dial to “A’ on the Stitch Selection Panel.
•Thread the serger for a 4-thread Overlock stitch.
•Attach the Right Hand Seam Guide and adjust for a ¼” seam.
•Optional: Increase the Presser Foot Pressure to “H” for thick fabrics.
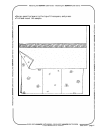
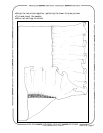
•Create a quilt sandwich, layering the 4” fabrics as follows: 2 muslin (right sides
together), one layer of batting, 2 layers of printed fabric (right sides
together) and a layer of batting on top.
•Raise the Presser Foot and position the fabrics under the Presser Foot with the
right edges of the fabric and batting butted against the Right Hand Seam Guide.
•Lower the Presser Foot and touch the Needle Stop Button on the front (left)
of the serger to lower the Needles into the fabric.
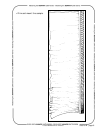
•Serge the 6 layers together, stopping as necessary to keep the right
edges of the fabrics even. (Hint: Use the Needle Stop Button to lower the
Needles and hold the fabrics in place while you align the right edges.)
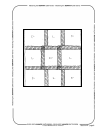
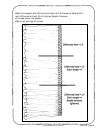
•Open the layers (1 muslin, 1 quilt top, 1 batting) to the right and left of the
serged seam and press flat.
•To serge the third section into place, layer the remaining 4” fabrics as follows:
muslin to muslin, right sides together; print to print, right sides together;
batting on top.
•Serge through all 6 layers.
•Open the last 3 layers to the right side and press.
•Add the last section to the top edge of the 3 paneled quilt. Layer the 5½”
fabrics as follows: muslin to muslin, right sides together; print to print, right
sides together; batting on top.
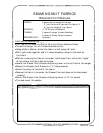
FABRIC: 4 pieces of contrasting print cotton fabric
cut 3 pieces 2” X 4” ; cut 1 piece 2” X 5 ½”
4 pieces of muslin
3 cut 2” X 4” ; 1 cut 2” X 5 ½”
4 pieces of cotton batting
3 cut 2” X 4”; 1 cut 2” X 5 ½”
NEEDLES: 80/12 Universal, Sharp, or Microtex
THREAD: 4 cones of serger thread
PRESSER FOOT: Standard