


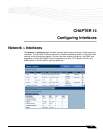

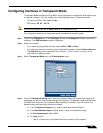
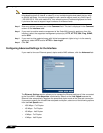

Configuring Interfaces
144
SonicOS Enhanced 4.0 Administrator Guide
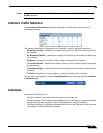
• Range to specify a range of IP addresses by entering beginning and ending value
of the range.
• Network to specify a subnet by entering the beginning value and the subnet mask.
The subnet must be within the WAN address range and cannot include the WAN
interface IP address.
c. Enter the IP address of the host, the beginning and ending address of the range, or the
IP address and subnet mask of the network.
d. Click OK to create the address object and return to the Edit Interface window.
See “Network > Address Objects” section on page 203 for more information.
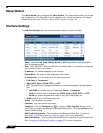
Step 5 Enter any optional comment text in the Comment field. This text is displayed in the Comment
column of the Interface table.
Step 6 If you want to enable remote management of the SonicWALL security appliance from this
interface, select the supported management protocol(s): HTTP, HTTPS, SSH, Ping, SNMP,
and/or SSH.
Step 7 If you want to allow selected users with limited management rights to log directly into the
security appliance through this interface, select HTTP and/or HTTPS in User Login.
Step 8 Click OK.
Note The administrator password is required to regenerate encryption keys after changing the
SonicWALL security appliance’s address.
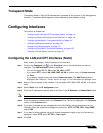
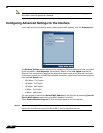
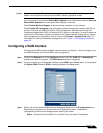
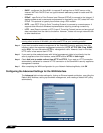
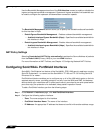
Configuring Advanced Settings for the Interface
If you need to force an Ethernet speed, duplex and/or MAC address, click the Advanced tab.
The Ethernet Settings section allows you to manage the Ethernet settings of links connected
to the SonicWALL. Auto Negotiate is selected by default as the Link Speed because the
Ethernet links automatically negotiate the speed and duplex mode of the Ethernet connection.
If you want to specify the forced Ethernet speed and duplex, select one of the following options
from the Link Speed menu:
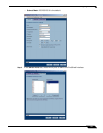
• 1000 Mbps - Full Duplex ()
• 100 Mbps - Full Duplex
• 100 Mbps - Half Duplex
• 10 Mbps - Full Duplex
• 10 Mbps - Half Duplex
You can choose to override the Default MAC Address for the Interface by selecting Override
Default MAC Address and entering the MAC Address in the field.
Check Enable Multicast Support to allow multicast reception on this interface.
Caution If you select a specific Ethernet speed and duplex, you must force the connection speed and
duplex from the Ethernet card to the SonicWALL security appliance as well.