2-5
Installation Guide for the Cisco Secure PIX Firewall Version 5.2
78-11180-01
Chapter 2 Installing a PIX Firewall
Installing a PIX 506
Step 2 The inside or outside network connections can be made to either interface port on the PIX 506. Connect
the inside network cable to the interface connector marked ETHERNET 0 or ETHERNET 1. Connect
the outside network cable to the remaining Ethernet port. Refer to the “Configuring the PIX 506”
section for information on how to configure the ports.
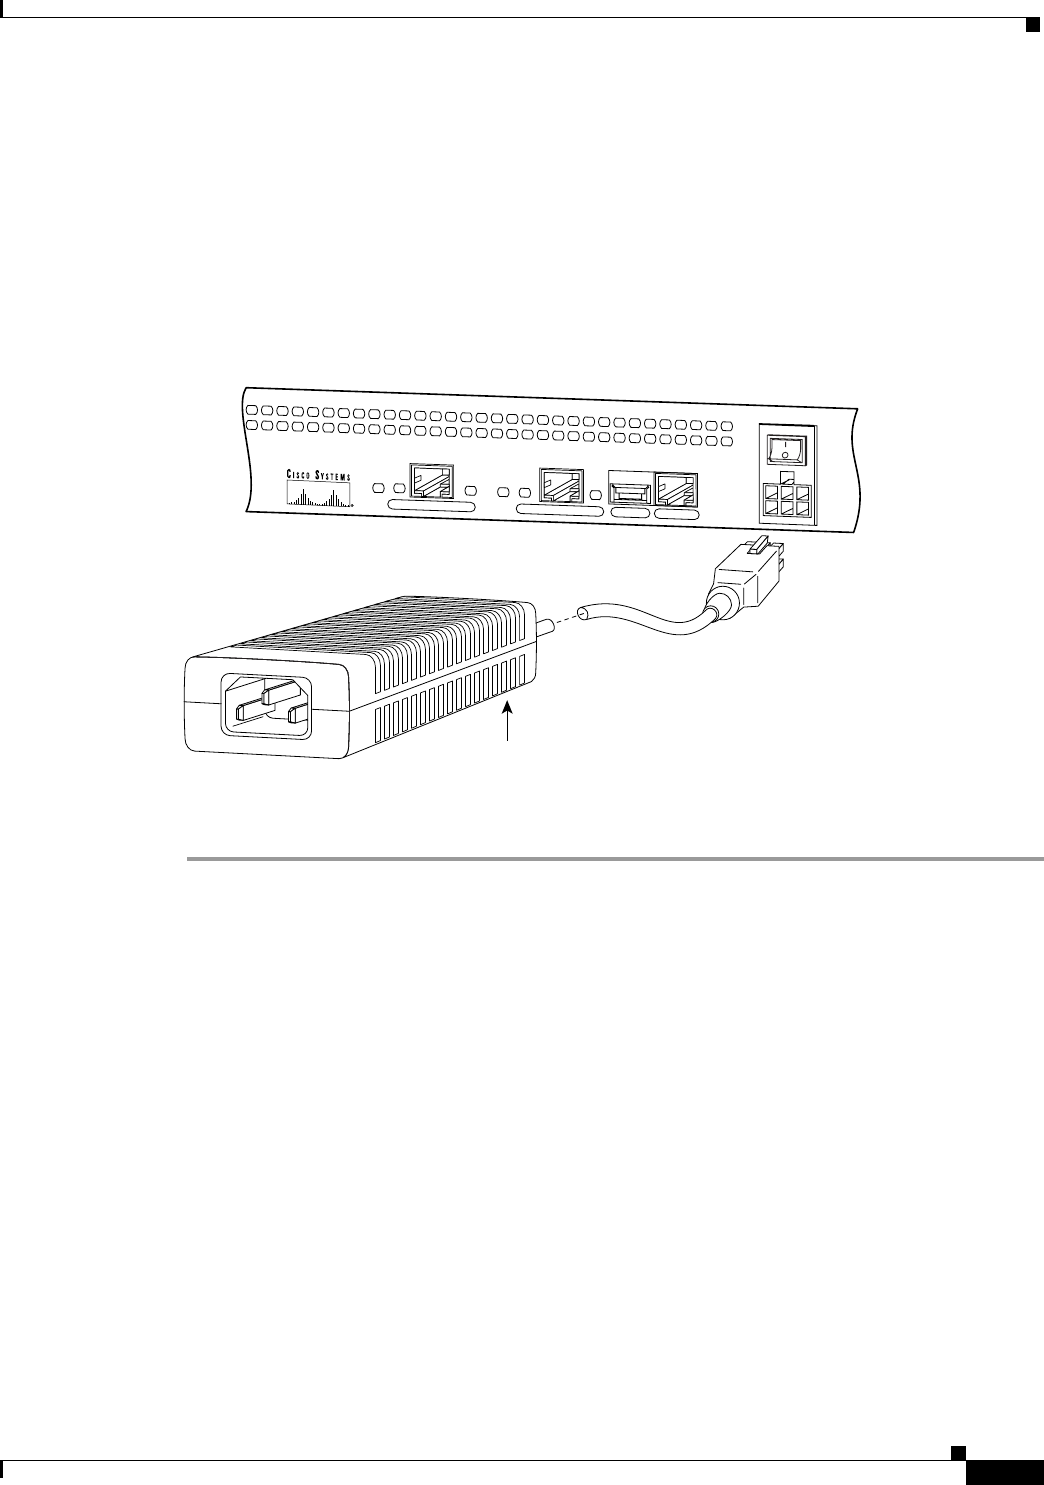
Step 3 The PIX 506 uses an external AC to DC power supply. Power is supplied to the PIX 506 by connecting
the power supply to the back of the PIX 506 and connecting a separate AC power cord to the power
supply. Figure 2-4 displays the cable connection from the power supply to the PIX 506, and displays
the AC power cord connector (at the opposite end of the power supply).
Figure 2-4 Connecting the Power Supply Module to the PIX 506
Step 4
When you are ready to start the PIX 506, power on the unit from the switch at the rear of the unit.
Configuring the PIX 506
If needed, you can use the PFSS (PIX Firewall Syslog Server) with the PIX 506. Refer to Chapter 4,
“Installing the PIX Firewall Syslog Server (PFSS),” for more information on the installation and use of
PFSS.
The PIX Firewall Setup Wizard provides an easy-to-use interface for building the initial PIX Firewall
configuration. For more information on the PIX Firewall Setup Wizard, see Chapter 9, “Installing the
PIX Firewall Setup Wizard.”
For more configuration information, refer to the Cisco PIX Firewall Configuration Guide, Version 5.2,
which is available in your accessory kit or online at the following site:
http://www.cisco.com/en/US/products/sw/secursw/ps2120/products_configuration_guide_book09186
a00801027d5.html
Always check the release notes first before configuring the PIX Firewall for the latest release details.
This document is also in your accessory kit or you can view it online at the following site:
http://www.cisco.com/en/US/products/sw/secursw/ps2120/prod_release_notes_list.html
CONSOLE
ETHERNET 0
ACT
LINK
LINK
DC
POWER
INPUT
ACT
USB
ETHERNET 1
38854
Power supply
