2-14
Installation Guide for the Cisco Secure PIX Firewall Version 5.2
78-11180-01
Chapter 2 Installing a PIX Firewall
Installing a PIX 525
• LINK—Shows that data is passing through that interface.
The following are fixed connectors on the back of the PIX 525:
• RJ-45—Network and console connectors.
• DB-15—Failover cable connector.
• USB—Not used at the present time.
PIX 525 Installation Steps
Use the following steps to install a PIX 525:
Step 1 The PIX 525 provides one set of brackets for installing the unit in an equipment rack. Use the following
steps if the unit is going to be installed into an equipment rack:
a. Attach the brackets to the holes near the front of the unit on each side of the PIX 525 using the
supplied screws.
b. Attach the unit to the equipment rack.
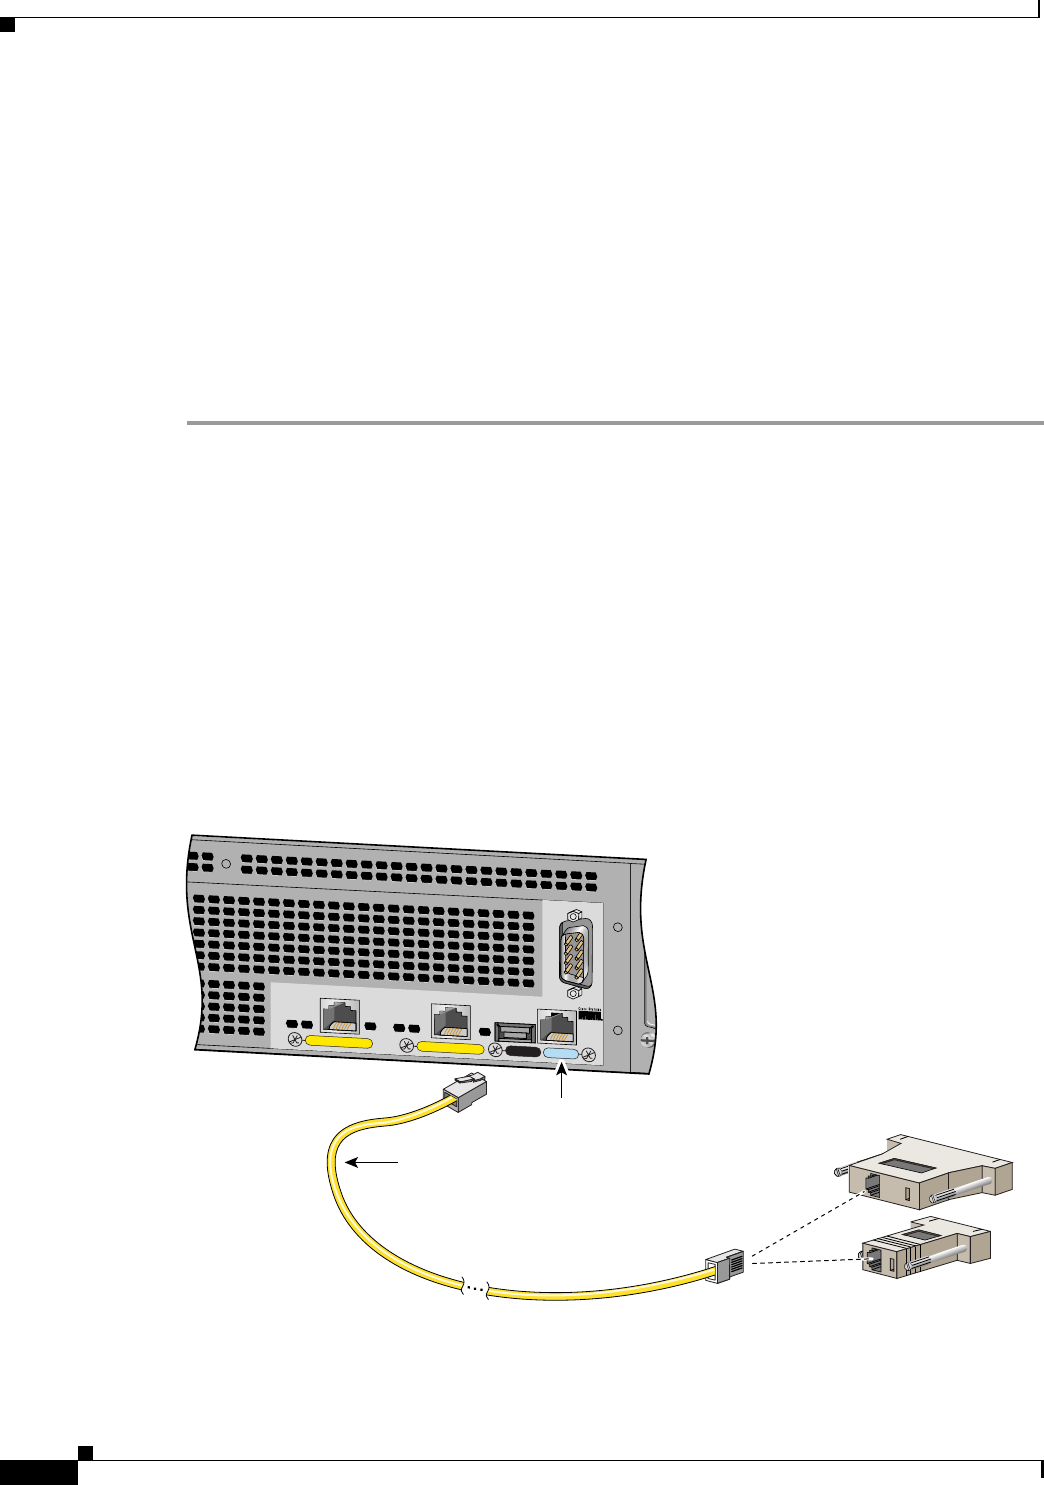
Step 2 Use the Console port to connect a computer to enter configuration commands. Locate the serial cable
from the accessory kit. The serial cable assembly consists of a null modem cable with RJ-45 connectors,
and one DB-9 connector and a DB-25 connector. Connect the cable so that you have either a DB-9 or
DB-25 connector on one end as required by the serial port for your computer, and the other end is the
RJ-45 connector as shown in Figure 2-16.
Connect the RJ-45 serial cable connector to the PIX 525 console connector and connect the other end
to the serial port connector on your computer.
Figure 2-16 PIX 525 Rear Panel
F
A
I
L
O
V
E
R
100M
bps AC
T
100M
bps A
C
T
LIN
K
LIN
K
P
IX
-525
10/100 ETHERNET 1
10/100 ETHERNET 0
USB
CONSOLE
44634
Console
port (RJ-45)
RJ-45 to
DB-9 or DB-25
serial cable
(null-modem)
Computer serial port
DB-9 or DB-25
