10
VFR-400 • 5403548 • REV D • 10/07
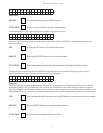
Low Air Alarm
1) Operation of supervisory relay contacts and local buzzer.
2) Activation of the notifi cation appliance circuit(s) or releasing circuit(s) which are mapped to the initiating device circuit(s).
Providing all zone(s) necessary for the activation of those circuits is in alarm
3) LOW AIR ALARM and <CIRCUIT #> displayed on LCD.
4) Activation of the amber supervisory LED in a fl ashing mode. NOTE: The supervisory LED will continue to fl ash until all
events in the SUPERVISORY queue are viewed. This is accomplished by scrolling through all of the events by use of the
scroll up and scroll down buttons. The LED will go steady after all alarm events have been viewed.
Supervisory
An increase of current to approximately 8 mA or greater on the supervisory initiating device circuit(s) or disabling an output
programmed as releasing will result in the following:
A problem in an audible or visual device may not be apparent when the panel is in a normal condition. If the circuit indicates a
trouble condition when the panel is in an alarm condition the problem must be located and corrected.
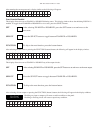
1) Operation of supervisory relay contacts and local buzzer.
2) Operation of any output circuits that have been described as SUPERVISORY BELL.
3) “SUPERVISORY”, “TAMPER”, “LOW AIR”, or “HIGH AIR” and <CIRCUIT> displayed on LCD.
4) Activation of the amber SUPERVISORY LED in a fl ashing modes well as the corresponding zone LED. NOTE: The
SUPERVISORY LED will continue to fl ash until all events in the SUPERVISORY queue are viewed. This is accomplished by
scrolling through all of the events by use of the scroll up and scroll down buttons. The LED will go steady after all supervisory
events have been viewed.
Trouble Conditions
Initiating Device Circuits
A decrease of current to approximately 3.3 mA or programming the zone as disabled on any initiating device circuit will result in
the following:
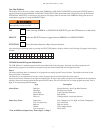
1) Activation of trouble relay contacts and local buzzer.
2) Operation of any output circuits which have been described as TROUBLE BELL.
3) “TROUBLE” and <CIRCUIT> displayed on LCD.
4) Activation of the amber TROUBLE LED in a fl ashing mode as well as corresponding zone. NOTE: The TROUBLE LED
will continue to fl ash until all events in the TROUBLE queue are viewed. This is accomplished by scrolling through all of the
events by use of the scroll up and scroll down buttons. The LED will go steady after all trouble events have been viewed.
Note: When the circuits are operated in the Class A mode any trouble condition will require manual operation of the reset switch
to restore the panel to normal after the fault has been removed.
A complete loss of power will result in the transfer of the common system trouble relay contacts.
If Zone 1 is programmed as Firecycle, an increase in current to 10 mA or greater will result in the above.
Notifi cation Appliance/Releasing Circuits
An increase of current to approximately 0.63 mA or a decrease in current to approximately 0.11 mA on any output circuit or
connecting an indicating appliance backwards, or disabling an output will result in the following:
1) Activation of trouble relay contacts and local buzzer.
2) Operation of any output circuits which have been programmed as TROUBLE BELL. If this output is in trouble, a
TROUBLE BELL on this output may not function correctly, depending on the type of trouble.
3) “TROUBLE” and “OUTPUT #” <CIRCUIT NO.> displayed on LCD.
Note: A current in excess of 2.5 Amps, when the panel is in the alarm condition, will result in an output trouble as described above.
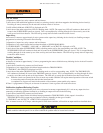
Do not silence signals until all occupants are
evacuated to a safe area.


