


Pro SweepPage 5 -- 16Chassis
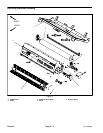
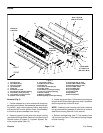
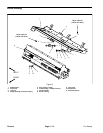
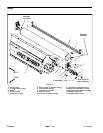
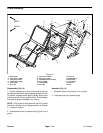
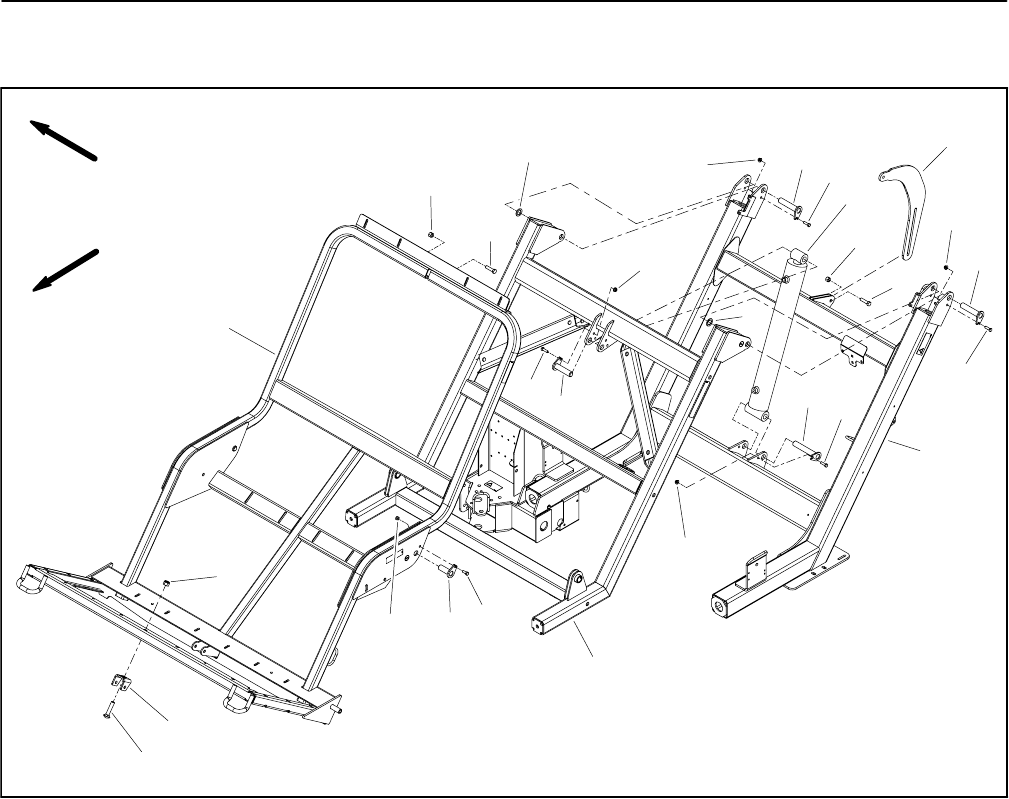
Frame Assembly
1. Main frame
2. Cap screw (4 used)
3. Pivot pin (2 used)
4. Flange nut (6 used)
5. Pitch frame
6. Pivot pin
7. Cap screw (2 used)
8. Pivot pin (2 used)
9. Hardened spacer (2 used)
10. Pivot saddle
11. Carriage bolt
12. Pivot pin
13. Lock nut
14. Saddle frame
15. Cap screw
16. Lift cylinder
17. Lock nut
18. Link
Figure 12
FRONT
RIGHT
2
3
6
8
9
10
11
13
1
5
7
12
14
15
16
17
18
9
4
4
4
4
4
2
2
2
3
15
17
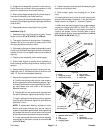
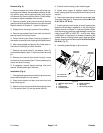
Disassembly (Fig. 12)
1. Position sweeper on a level surface with dump hop-
per empty and lowered. Have sweeper attached to tow-
ing vehicle, engage vehicle parking brake, stop engine
and remove key from the ignition switch. Chock sweep-
er wheels to prevent sweeper from moving.
NOTE: If lift cylinder is to be removed, see Lift Cylinder
Removal in the Service and Repairs section of Chapter
3 -- Hydraulic System.
2. Disassemble frame as needed using Figure 12 as a
guide.
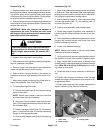
Assembly (Fig. 12)
1. Assemble frame using Figure 12 as a guide.
2. Lubricate pivot point grease fittings.