


Pro SweepHydraulic System Page 3 -- 34
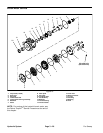
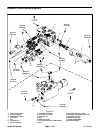
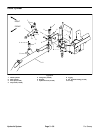
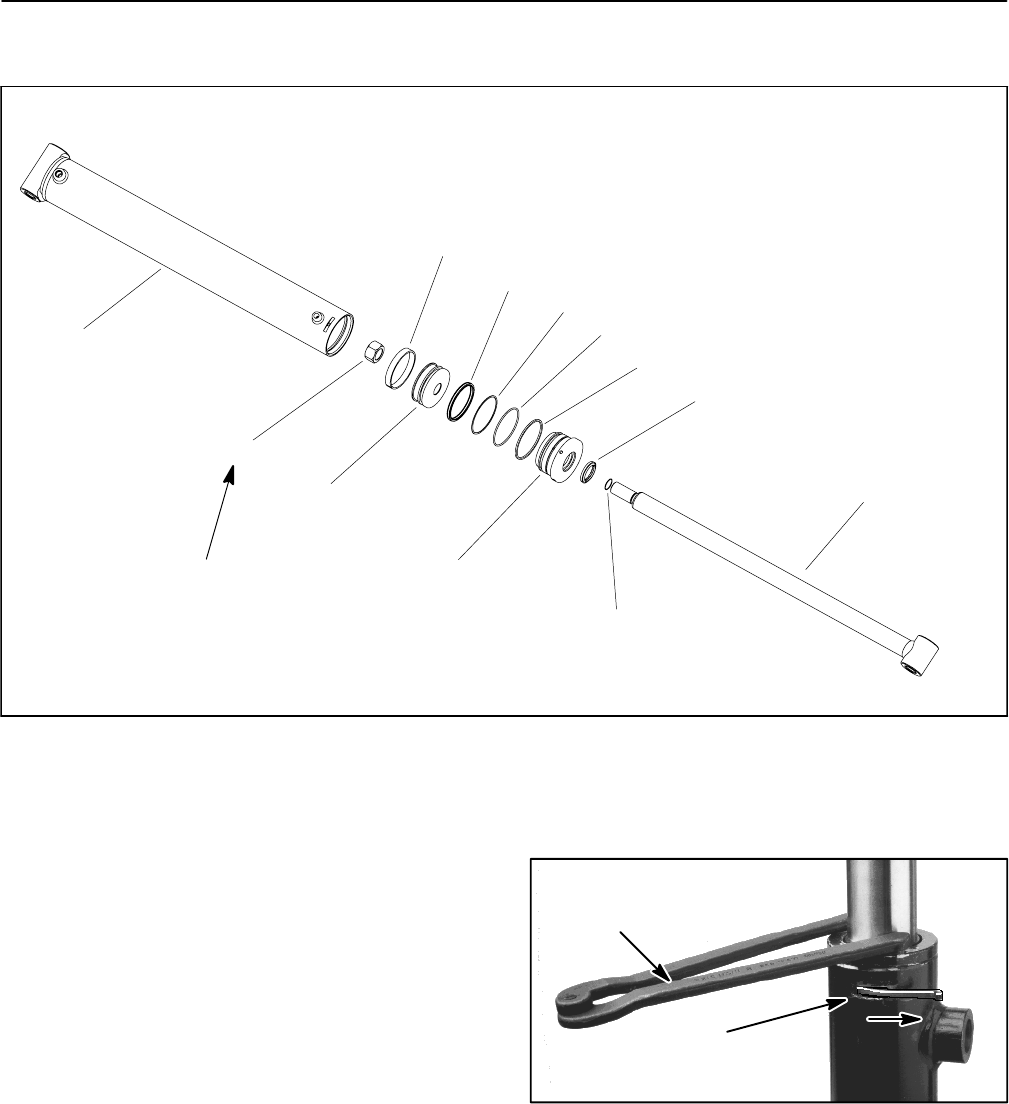
Lift Cylinder Service
1. Wear ring
2. Seal
3. O--ring
4. Tube
5. Rod
6. O--ring
7. Backup ring
8. Retaining ring
9. Head
10. Wiper
11. Lock nut
12. Piston
Figure 22
5
7
8
9
6
1
3
2
12
10
11
250 to 300 ft--lb
(339 to 407 N--m)
4
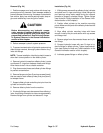
Disassembly (Fig. 22)
1. Remove oil from the lift cylinder into a drain pan by
slowly pumping the cylinder rod. Plug ports and clean
the outside of the lift cylinder.
IMPORTANT: Prevent damage when clamping the
lift cylinder into a vise; clamp on the clevis only.
2. Mount lift cylinder in a vise so that the shaft end tilts
up slightly.
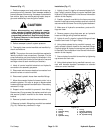
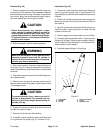
3. Using a spanner wrench, rotate head (item 9) clock-
wise until the edge of the retaining ring appears in the
tube opening. Insert a screwdriver under the beveled
edge of the retaining ring to start the retaining ring
through the tube opening. Rotate the head counter--
clockwise to remove retaining ring (item 8) as shown in
Figure 23.
4. Grasp end of rod; extract rod assembly by carefully
twisting and pulling on the rod.
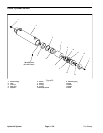
Figure 23
Spanner
wrench
Retaining
ring
IMPORTANT: Do not clamp vise jaws against rod
surface.
5. Mount rod securely in a vise by clamping vise on the
clevis of the shaft. Remove lock nut (item 11) and care-
fully slide piston and head from the rod.