


- 13 -
Removing Bobbin Case And Bobbin / Retirar El Casquillo De La Bobina Y La Bobina
Sortir Le Boîtier De La Canette Et La Canette
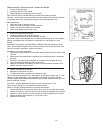
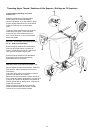
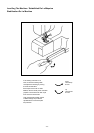
1. Raise the needle to its highest position and open shuttle race cover. (Fig. 1)
1. Coloque la aguja en la posición más alta y abra la cubierta del ajuste. (Fig. 1)
1. Mettez l´aiguille en position la plus haute et ouvrez le couvercle. (Fig. 1)
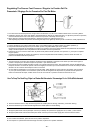
3. Release the latch and the bobbin will fall out easily. (Fig. 3)
3. Si usted deja la palanca, la bobina caerá automáticamente del casquillo. (Fig. 3)
3. Si vous lachez le loquet, la canette tombera automatiquement hors du boîtier. (Fig. 3)
Inserting Bobbin Into Bobbin Case / Colocar La Bobina En El Casquillo De La Bobina
Mettre La Canette Dans Le Boîtier
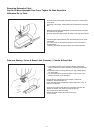
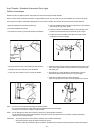
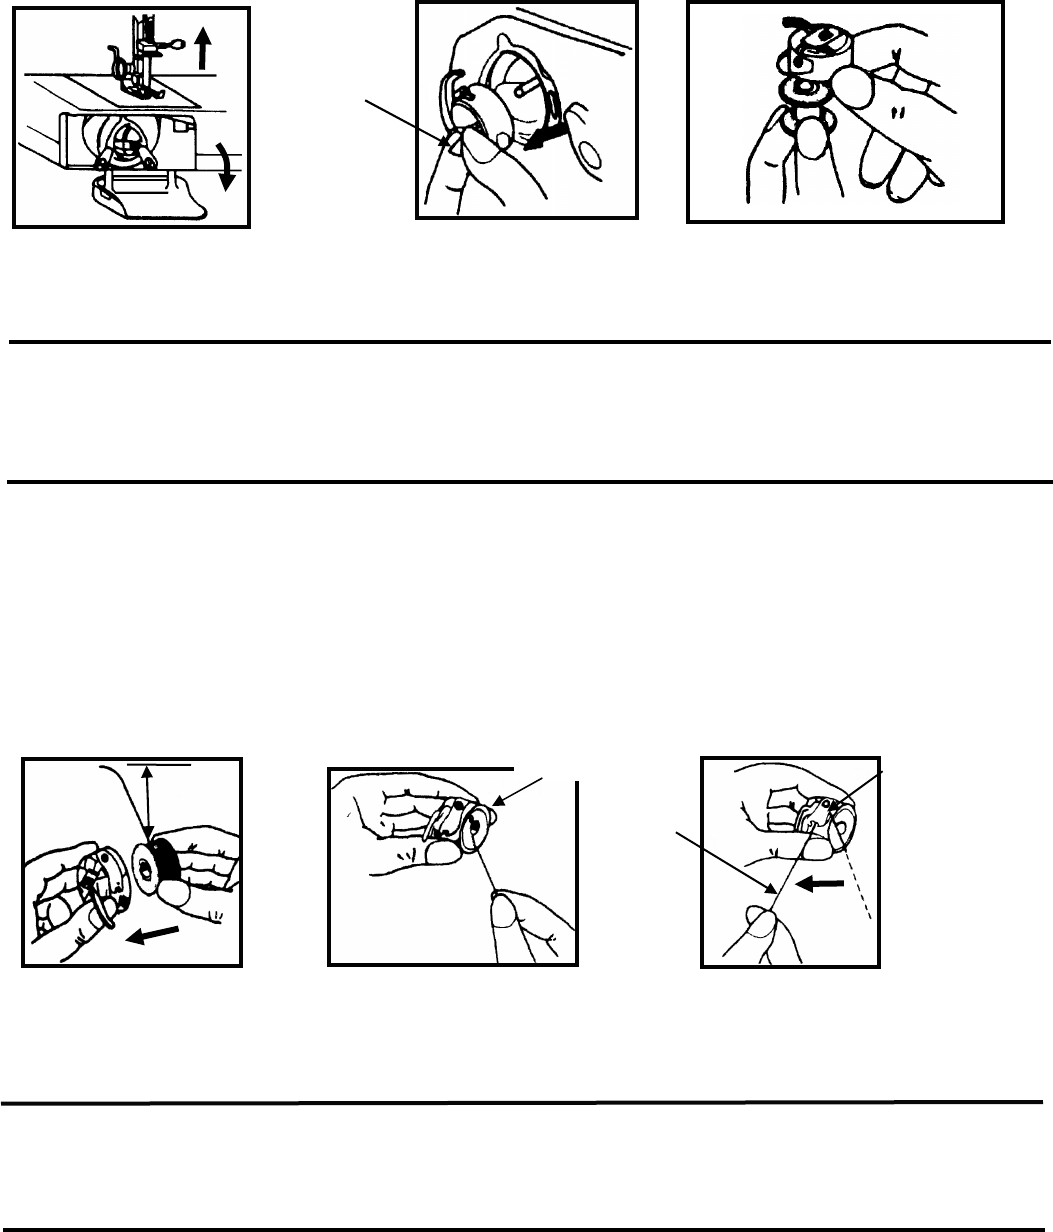
1. Pull 5 cm of thread from bobbin and insert it into bobbin case as shown. (Fig. 1)
1. Cuando coloque la bobina en el casquillo, deje 5 centímetros de hilo de rosca de más. ( Véase ilustración) (Fig. 1)
1. Laissez dépasser 5cm de fil, si vous remettez la canette dans le boîtier. (voir image) (Fig. 1)
3
. Pull the thread through the slot and under the tension spring and draw out about 10 cm of thread. (Fig. 3)
3. Tire del hilo de rosca por la ranura y por debajo del muelle de tensión y tire aproximadamente 10 centímetros de hilo. (Fig. 3)
3. Tirez le fil par l´intertice et sous le ressort de tension et sortez 10cm du fil. (Fig. 3)
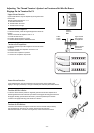
2. Open the hinged latch of the bobbin case and pull the bobbin case out of the machine. (Fig. 2)
2. Abra la palanca del casquillo de la bobina y retírelo de la máquina. (Fig. 2)
2. Ouvrez le loquet du boîtier de la canette et sortez-le de la machine. (Fig. 2)
2. Guide the end of thread into the slot. (Fig. 2)
2. Conduzca el extremo del hilo de rosca por la ranura. (Fig. 2)
2. Insérez le fil dans l´intertice. (Fig. 2)
10 cm
5 cm
Hinged latch
Pala
nca
Levier b
asculable
Slot
Ranura
Inter
tice
Tension spring
Resorte d
e tensión
Ressort
de tension
Fig. 1
Fig. 2 Fig. 3
Fig. 1
Fig. 2
Fig. 3