


Revision 0.07
17
3.1.3 Normal Status Display
MO
N
1
0
:
2
3
R
1
O
F
F
S
0
1
C
O
5
P
P
M
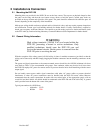
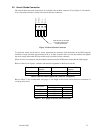
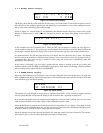
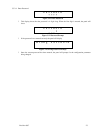
Figure 3-4 Normal System Display
The display shows the day of the week and the time of day, in 24-hour format. It also shows the status of one of
the relays, R1 in this example, and the type and indicated gas concentration of one of the configured sensors,
S01 is a CO sensor indicating 5 ppm in this example.
Notice in Figure 3-4 that the digits 01 are underlined, this indicates that the digit keys can be used to jump
directly to another sensor’s status. When the first digit is pressed, the display will prompt for the sensor to
display.
S
h
o
w
S
e
n
s
o
r
_
1
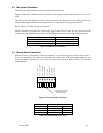
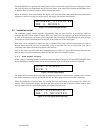
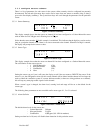
Figure 3-5 Sensor prompt
In this example, the first digit entered was 1. Since the DVP-120 can handle 12 sensors, the first digit for a
sensor number is either 0 or 1. The leading zero must be entered when selecting a sensor less than ten. When the
second digit is entered, the normal display will be restored; showing the type and value for the selected sensor.
As mentioned above, the left and right scroll keys will display the next (previous) relay’s status. The display
will also change the underline to indicate that the digit keys (zero, one and two) can be used to jump directly to
a particular relay. Since only one digit is needed to select a relay, the system does it immediately rather than
prompting to show the relay.
If the sensor is indicating a gas level that is greater than the alarm or warning levels the gas reading will
alternate with the words ALARM or WARNING as appropriate. If the sensor is indicating a trouble condition
the gas reading will be replaced by the word TROUBLE.
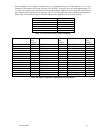
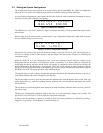
3.1.4 ALARM Status Display
When any sensor indicates a gas level that is at or above the configured alarm level for the sensor, the panel will
enter ALARM mode, during which the internal buzzer will sound, the alarm lamp will be red and the LCD will
show the sensor type and channel number.
A
L
A
R
M
C
O
S
E
N
S
O
R
0
2
Figure 3-6 Alarm display
The display will cycle through all sensors that are signaling alarm levels, at five seconds per display. Pressing
any key (except HUSH) will advance the display to the next sensor that is signaling an alarm level.
If an external horn and/or strobe are connected and configured to signal an alarm condition, they will also sound
when an alarm condition occurs, after a delay if that configuration option is used.
When the HUSH key is pressed, the internal buzzer will be silenced for five (5) minutes. If the horn or strobe
turn on delays have not finished then they will also be silenced. If the delays have finished the HUSH key must
be held for three (3) seconds in order to silence the horn and strobe.
When all indicators have been silenced, the display will show that alarms have been silenced for five minutes.
After any key press (or five seconds), the display will return to normal mode.