


Heat & Glo • 6000CL-IPI-S, 6000CL-IPI-T, 8000CL-IPI-S 8000CL-IPI-T • 2165-900 Rev. S • 9/12
60
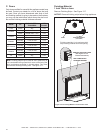
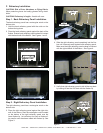
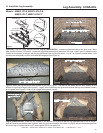
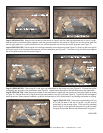
G.EmberPlacement
WARNING! Risk of Explosion! Follow ember placement
instructions in manual. DO NOT completely block burner
ports with ember material. Replace ember material annu-
ally. Improperly placed embers interfere with proper burner
operation.
Ember material is shipped with this gas appliance. To place
the ember material:
• Embers CANNOT completely block burner ports. Care
should be taken not to block the lighting trail of ports.
• Embers may only be placed in areas as shown in Figure
14.2.
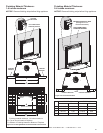
• LPOnly: Using dime-size pieces of Glowing Embers®,
overlap the burner ports (see Figure 14.3). The
impingement created by the embers will help blend the
re.
• Save the remaining ember materials for use during
appliance servicing. The embers provided should be
enough for 3 to 5 applications.
Figure14.2PlacementofEmbers
NO EMBERS IN SHADED AREA
EMBERS
Figure14.3EmbersOverlappingBurnerPortHoles(LPonly).
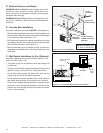
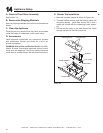
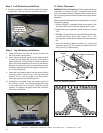
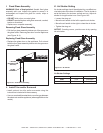
Step3.LeftRefractoryInstallation
6. Steps for installation of left refractory side are the same
as right side. Repeat the same procedure as Step 2.
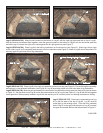
Step4.TopRefractoryInstallation
7. Using both hands, hold the top refractory panel with
the brick pattern facing down.
8. Insert the top refractory panel into the rebox and lift
it toward the top. Keep top refractory panel close to
upper rebox lip. This will allow for easier installation
due to the wider dimension of the front of the rebox.
Slide the top refractory panel in toward the back wall
of rebox, maintaining the same angle as the top sec-
tion of the side panels.
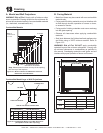
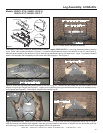
9. Lower the top refractory panel onto the side and back
refractory panels. There is a lip on the top panel that
allows it to sit on the top edge of the side panels.
Push tight against back refractory panel.
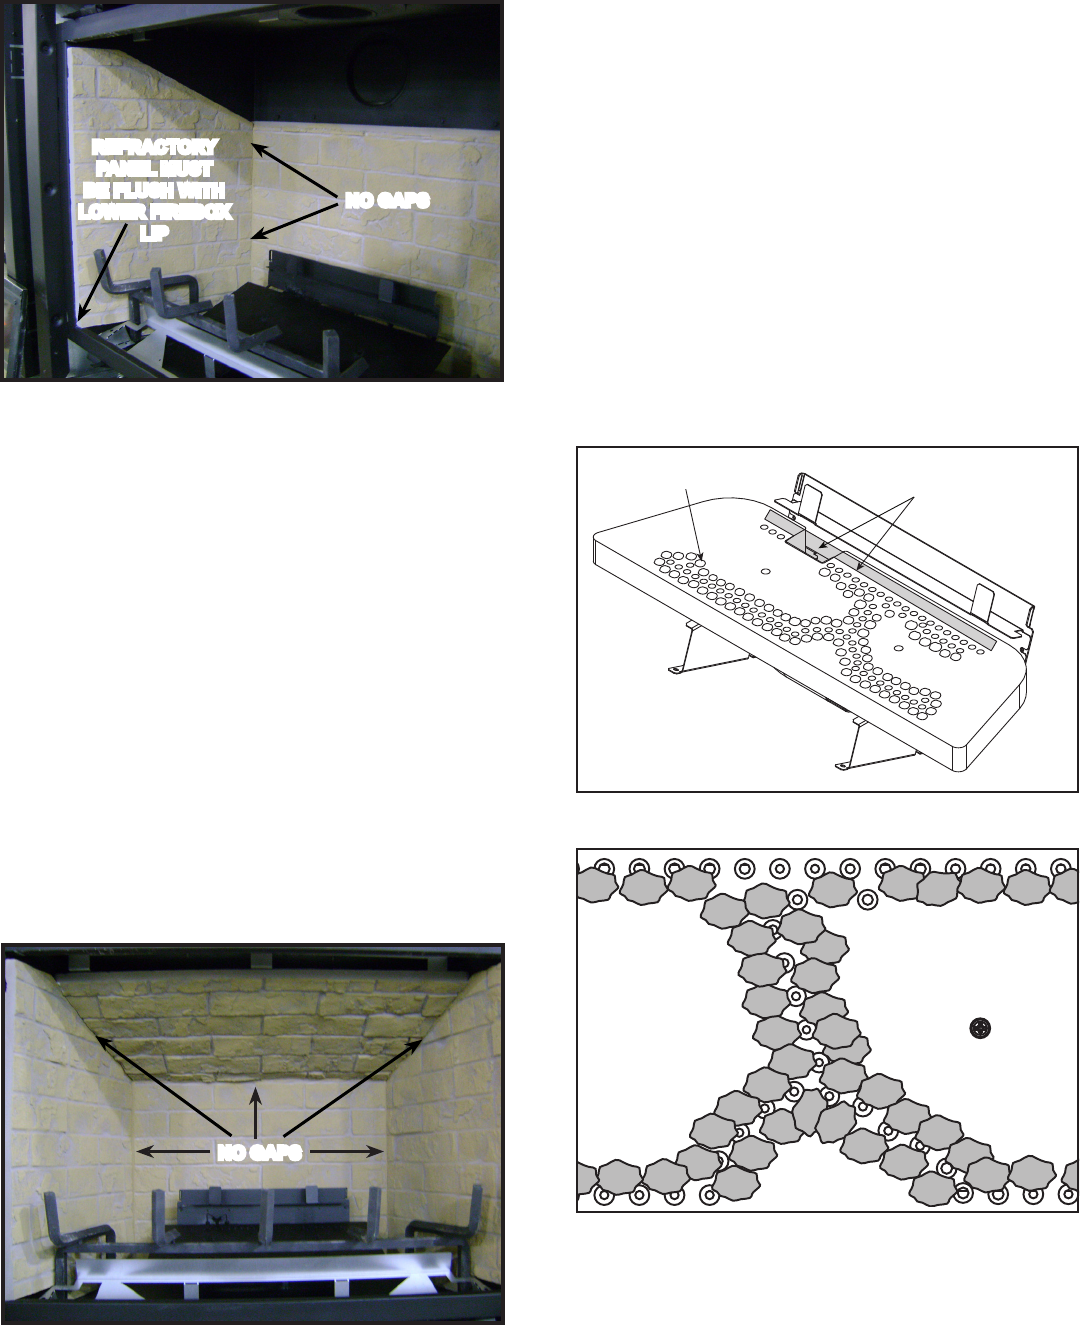
10. Installation is complete when top refractory panel is
set securely in place. Top refractory panel may need
to be pulled down to t correctly. Chamfers should
properly t together and gaps should be minimized
with correct installation.
Figure6
Figure7
NOGAPS
REFRACTORY
PANELMUST
BEFLUSHWITH
LOWERFIREBOX
LIP
NOGAPS