


35
Heat & Glo • SL-550 / 750 / 950TR-D • InD • 2044-985 Rev. M • 10/06
D. Installing Roof Flashing and
Vertical Termination Cap
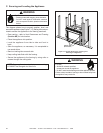
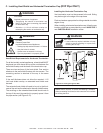
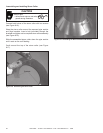
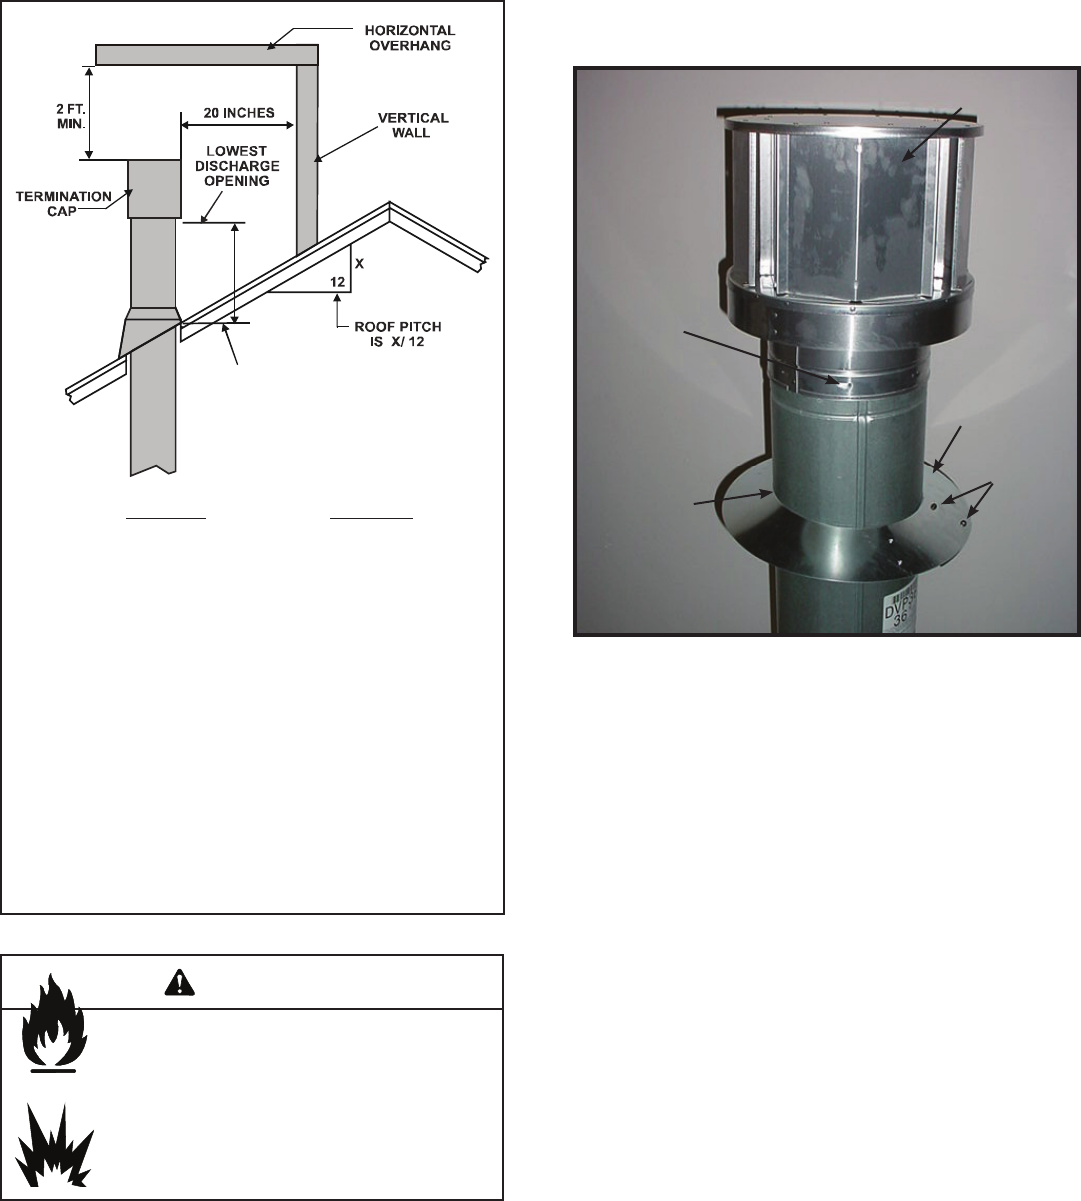
To install roof fl ashing see Figure 8.16.
For installation of vertical termination cap see minimum vent
heights for various pitched roofs (see Figure 8.16) .
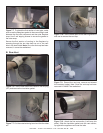
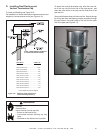
To attach the vertical termination cap, slide the inner col-
lar of the cap into the inner fl ue of the pipe section and
place the outer collar of the cap over the outer fl ue of the
pipe section.
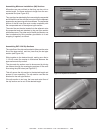
Secure with three screws into the outer fl ue. Secure the cap
by driving the three self-tapping screws (supplied) through
the pilot holes in the outer collar of the cap into the outer
fl ue of the pipe (see Figure 8.17).
Roof Pitch H (Min.) Ft.
Flat to 6/12.......................................1.0*
Over 6/12 to 7/12 ...........................1.25*
Over 7/12 to 8/12 .............................1.5*
Over 8/12 to 9/12 .............................2.0*
Over 9/12 to 10/12 ............................ 2.5
Over 10/12 to 11/12 ........................ 3.25
Over 11/12 to 12/12 .......................... 4.0
Over 12/12 to 14/12 .......................... 5.0
Over 14/12 to 16/12 .......................... 6.0
Over 16/12 to 18/12 .......................... 7.0
Over 18/12 to 20/12 .......................... 7.5
Over 20/12 to 21/12 .......................... 8.0
Figure 8.16 Minimum Height from Roof to
Lowest Discharge Opening
* 3 foot minimum in snow regions
H (MIN.) - MINIMUM HEIGHT FROM ROOF
TO LOWEST DISCHARGE OPENING
Figure 8.17
SCREWS
CAULK
STORM
COLLAR
(1 of 3)
TERMINATION CAP
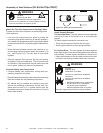
Fire Risk.
Explosion Risk.
Inspect external vent cap regularly.
• Ensure no debris blocks cap.
• Combustible materials blocking cap may
ignite.
• Restricted air fl ow affects burner operation.
WARNING