


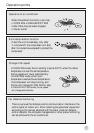
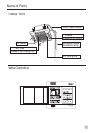
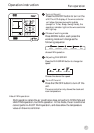
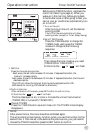
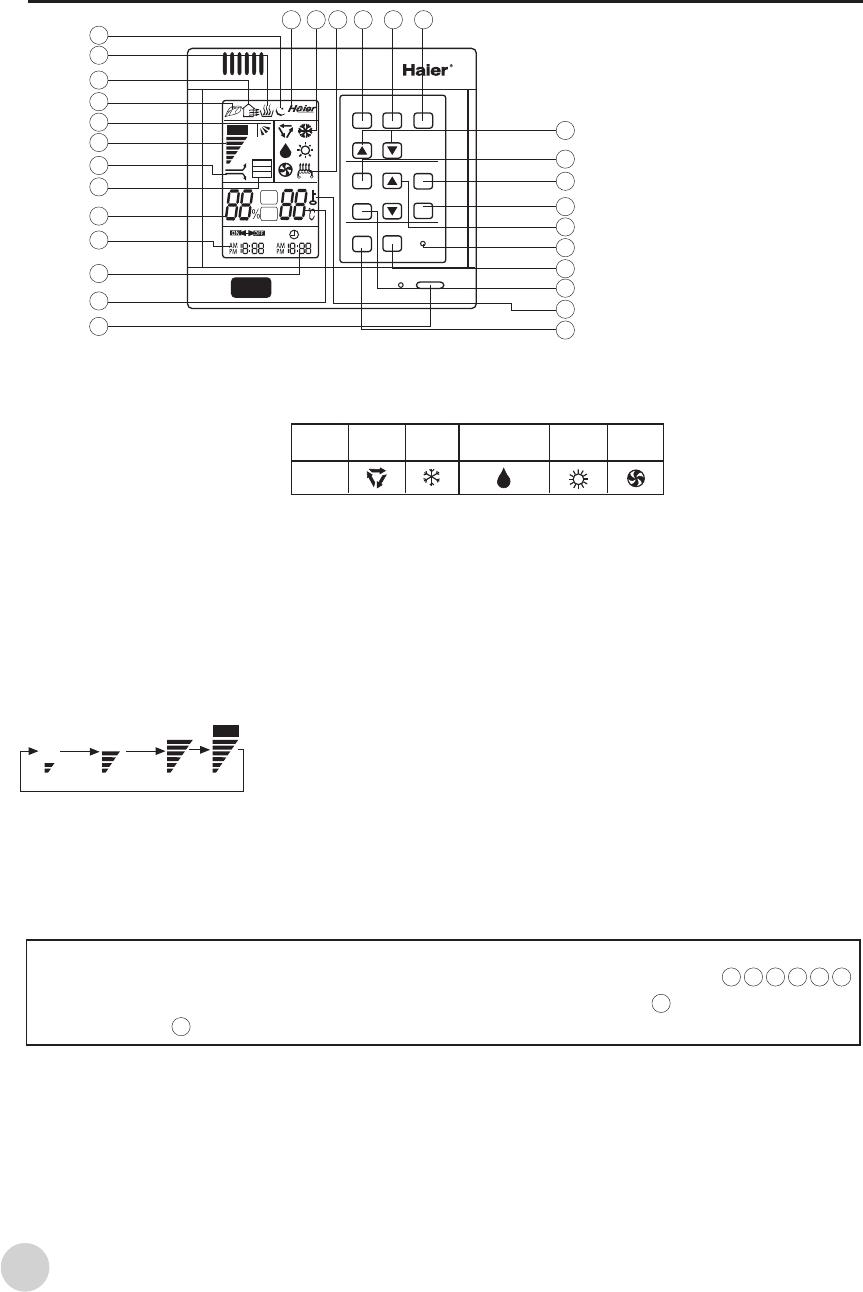
Name of Parts
Wire Controller
14.Network control display
Used to adjust the
time of timer and
clock
When the wire
controller appears
abnormal condition,
use a sharp-pointed
article to press this
button to make the
wire controller
resume normal
After cleaning the
air inlet, press this
button, the unit
can start to operate
12.Humidifying state display
Used to turn on/off unit
1.ON/OFF button
6.Air filter cleaning display
*
7.Super/Soft operation display
13.Sleep state display
2.Temperature display
24.Time Adjusting
button
23.Sleep button
Used to set Sleep
state or Power
Failure Resume
Function
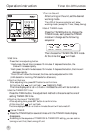
When there is too much dust
collected on the air inlet, the
wire controller will show
this display to remind the
user to clean the air inlet.
After cleaning and installation,
just press the air filter reset button.
8.Fan speed display
9.Auto Swing display
11.Fresh air state display
25.Reset button
26.Air Filter Reset
button
27.Timer button
Used to set the
mode of timer
28.Lock state display
29.Electric heating button
4.Timer ON/OFF display
3.Clock display
17.Operation mode button
5.Humidity display
22.Setting button
Used to confirm
the time of timer
and clock
15.Working mode display
21.Clock button
Used to calibrate the time of
timer and clock
16.Electric heating display
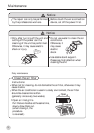
Used to set working mode:
Auto, Cooling, Dehumidifying,
Heating, Fan
18.Fan speed button
Used to set fan speed: Low
Fan, Med Fan, High Fan, Auto
20.Temperature Setting button
29
** ** **
**
**
**
**
**
**
****
**
**
**
**/**
1
2
3
4
5
6
7
8
9
11
12
13
14 15 16 17 18
20
21
22
23
24
25
26
27
28
AUTO
10.Health state display
Used to set temperature,
temperature range: 16*~30*
10
19
19.Swing button
Used to set Auto Swing or
Fixed air sending direction
4
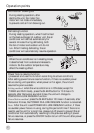
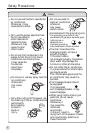
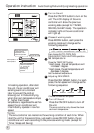
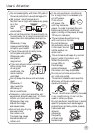
Calibration of clock
When turning on the unit for the first time, the clock should be calibrated. The
method of calibration is:
1.Press “Clock” button, the Clock display “AM” “PM” will flash.
2.Press * or * to adjust time. For each press, the time will increase or*decrease 1
*minute. If depressing the button, the time will increase or decrease*rapidly.
3.After confirming the time, press “Set” button, “AM” or “PM” will stop flashing,
*the clock will begin to work.
Note:
1.This model does not have the following related display and function
2.Non-electric heating type, there is no electric heating button and electric heating
display
* * 10 11 12 28
16
29
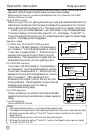
Auto
Low Fan Med Fan High Fan Auto
Working
mode
Auto
operation
Cooling
operation
Dehumidifying
operation
Heating
operation
Fan
operation
Wire
controller