


Page 20 R-5627
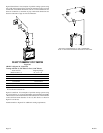
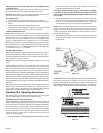
Figure 37
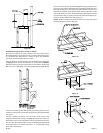
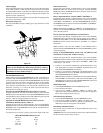
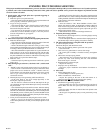
Initial Set-Up and Operation
Before you begin: This unit is supplied with a set of four ceramic fiber
logs. Do not handle these logs with your bare hands! Always wear gloves
to prevent skin irritation from ceramic fibers. After handling logs, wash
your hands gently with soap and water to remove any traces of fibers.
Every burner is shipped with a protective cover. This cover must be re-
moved before log placement.
The positioning of the logs is critical to the safe and clean operation of
this heater. Sooting and other problems may result if the logs are not
properly and firmly positioned in the appliance.
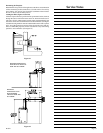
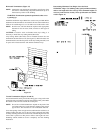
Glass Removal
1. Push up and outward to remove top louver.
2. Lower door assembly.
3. Release two door latches at bottom of firebox.
4. Grasp bottom of glass frame, lift glass frame upward in order to
release glass frame from lip on top of firebox.
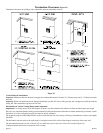
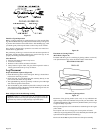
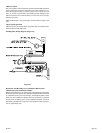
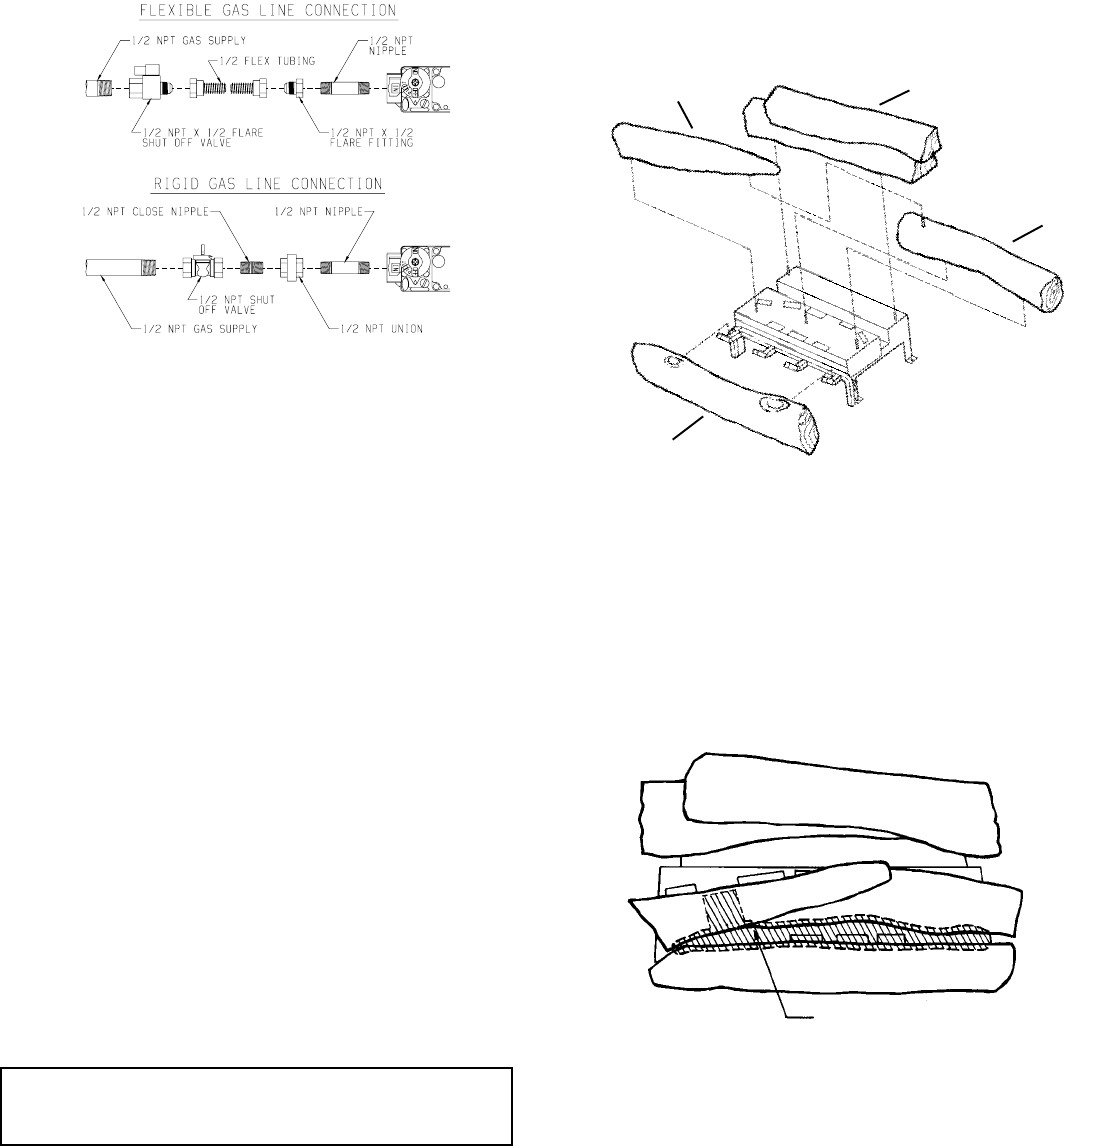
Log Placement
Proper Installation Sequence (Figure 38)
1. Install the front log (#1) in front of the grate. The log is located into a
notch area in the front grate area.
2. Install the back log (#4) behind the pilot assembly directly on the
pins on each side of the rear log shield.
3. The right middle log (#3) will go directly on the two pins on the right
side of the flat portion of the burner.
4. The left middle log (#2) should be placed flat on the pin on the left
side of the flat portion of the burner. The left middle log will rest on a
pin located on the right middle log.
Refer to Figure 38 for the following warning.
Warning: Failure to position the parts in accordance with this
diagram or failure to use only parts specifically approved with this
appliance may result in property damage or personal injury.
Figure 38
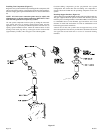
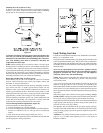
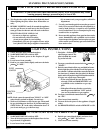
Placement of Glowing Embers
(Rock Wool) (Figure 39)
Provided with the log set is a small bag of glowing embers (rock wool)
to be placed between logs on the flat metal surface of the burner.
TOP VIEW OF LOG SET
REAR LOG
Placement of glowing embers.
Figure 39
Placement of the glowing embers (rock wool) is very individual and
light coverage of the areas indicated will provide your best effects. We
recommend separation of the rock wool by hand and make your coverage
as light and fluffy as possible.
Place just enough rock wool on the burner to obtain the glow and a gold
yellow flame.
Do not place rock wool over large ports in rear portion of burner.
A thin layer of glowing embers (rock wool) should be placed under open
space between the right and left middle logs.
Rock wool should not be placed in the area of the pilot assembly.
3
4
2
1