


PRINT AND STITCH (COMBINING EMBROIDERY PATTERNS AND PRINTED DESIGNS)
Embroidery Edit
311
6
b
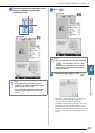
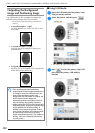
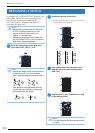
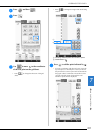
Cut the paper printed with the center
positioning image so it can easily be
positioned aligned with the background
image on the fabric.
* Lines or color changes in the image can help you
find the correct alignment position.
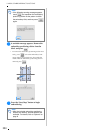
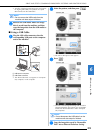
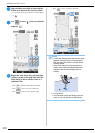
c
Place the paper printed with the positioning
image on top of the fabric so that the
pattern is aligned, and then affix the paper
to the fabric with cellophane tape to
prevent the paper from moving.
a Cellophane tape
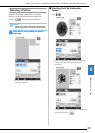
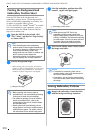
d
After checking that a pattern is selected,
press .
→ The sewing screen appears.
e
Align the embroidering position according
to steps
b through f of “Using the Built-
In Camera to Align the Embroidering
Position” on page 302.
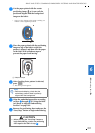
f
Remove the positioning sheet and press the
“Start/Stop” button to begin embroidering.
Note
• Before embroidering, check that the
embroidery position sheet is perfectly
aligned with the background.
CAUTION
• Before pressing the “Start/Stop” button to
begin embroidering, remove the positioning
sheet taped to the fabric in step
c.