


BEFORE EMBROIDERING
Embroidery
183
5
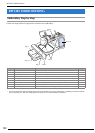
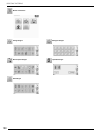
Attaching Embroidery Foot “W”
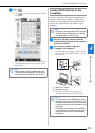
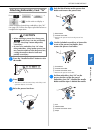
Press o o o
o in this order to display a
video example of attaching embroidery foot “W”
(see page 34). Follow the steps explained below to
complete the operation.
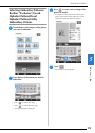
a
Press the “Needle Position” button to raise
the needle.
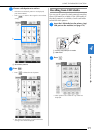
b
Press .
o The entire screen becomes white, and all keys and
operation buttons are locked.
c
Raise the presser foot lever.
d
Push the black button on the presser foot
holder and remove the presser foot.
a Black button
b Presser foot holder
o Remove the presser foot from the presser foot
holder.
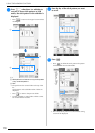
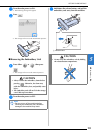
e
Use the included screwdriver to loosen the
screw of the presser foot holder, then
remove the presser foot holder.
a Screwdriver
b Presser foot holder
c Presser foot holder screw
o Remove the presser foot holder.
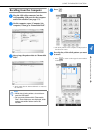
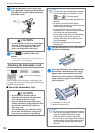
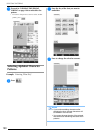
f
Position embroidery foot “W” on the
presser foot bar so that the arm of
embroidery foot “W” is behind the needle
holder and the wiper is behind the needle.
a Arm
b Needle holder
c Presser foot holder screw
d Wiper
CAUTION
• When attaching a presser foot, always press
on the screen. You may accidentally
press the “Start/Stop” button and possibly
cause injury.
• Be sure to use embroidery foot “W” when
doing embroidery. Using another presser foot
may cause the needle to strike the presser foot,
causing the needle to bend or break and
possibly cause injury.