


SEWING THE STITCHES
Utility Stitches
143
3
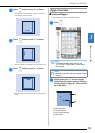
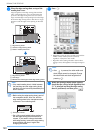
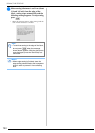
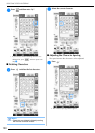
Example: When a straight stitch is selected
(example: )
a Middle needle position
b Stitching
c Edge of fabric
d Width of edge sewing
k
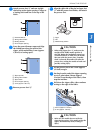
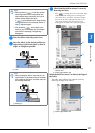
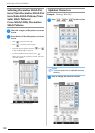
Lower the presser foot.
o The distance from the edge of the fabric to the seam
is set.
l
Press the “Start/Stop” button to start edge
sewing.
o Sewing starts with the set distance to the edge of the
fabric maintained.
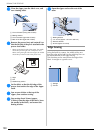
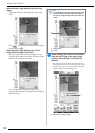
* While sewing, use the red scale marks on the
vertical stitch alignment foot “V” as a guide to keep
a fixed distance from the edge of the fabric.
a Red scale marks
* When sewing starts, a still image from the built-in
camera is displayed.
Note
• Distances between 1.5 mm (about 1/16
inch) and 38.5 mm (about 1-1/2 inches) can
be measured. The distance is displayed in
the screen in 0.5 mm (about 1/64 inch)
increments.
• The distance is displayed in millimeters.
However, depending on the measurement
setting, it can also be displayed in inches.
• If “-_- mm” appears as the distance and no
inch measurement is displayed, the built-in
camera is not able to detect the edge of the
fabric.
• When a straight stitch is selected, use the
scale on the edge sewing sheet as a guide
for positioning the fabric for edge sewing.
a Scale on the edge sewing sheet
Memo
• If the knee lifter is used to lower the presser
foot, the fabric can be held in place with both
hands so the fabric does not move when the
presser foot is lowered.
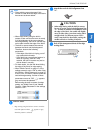
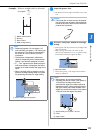
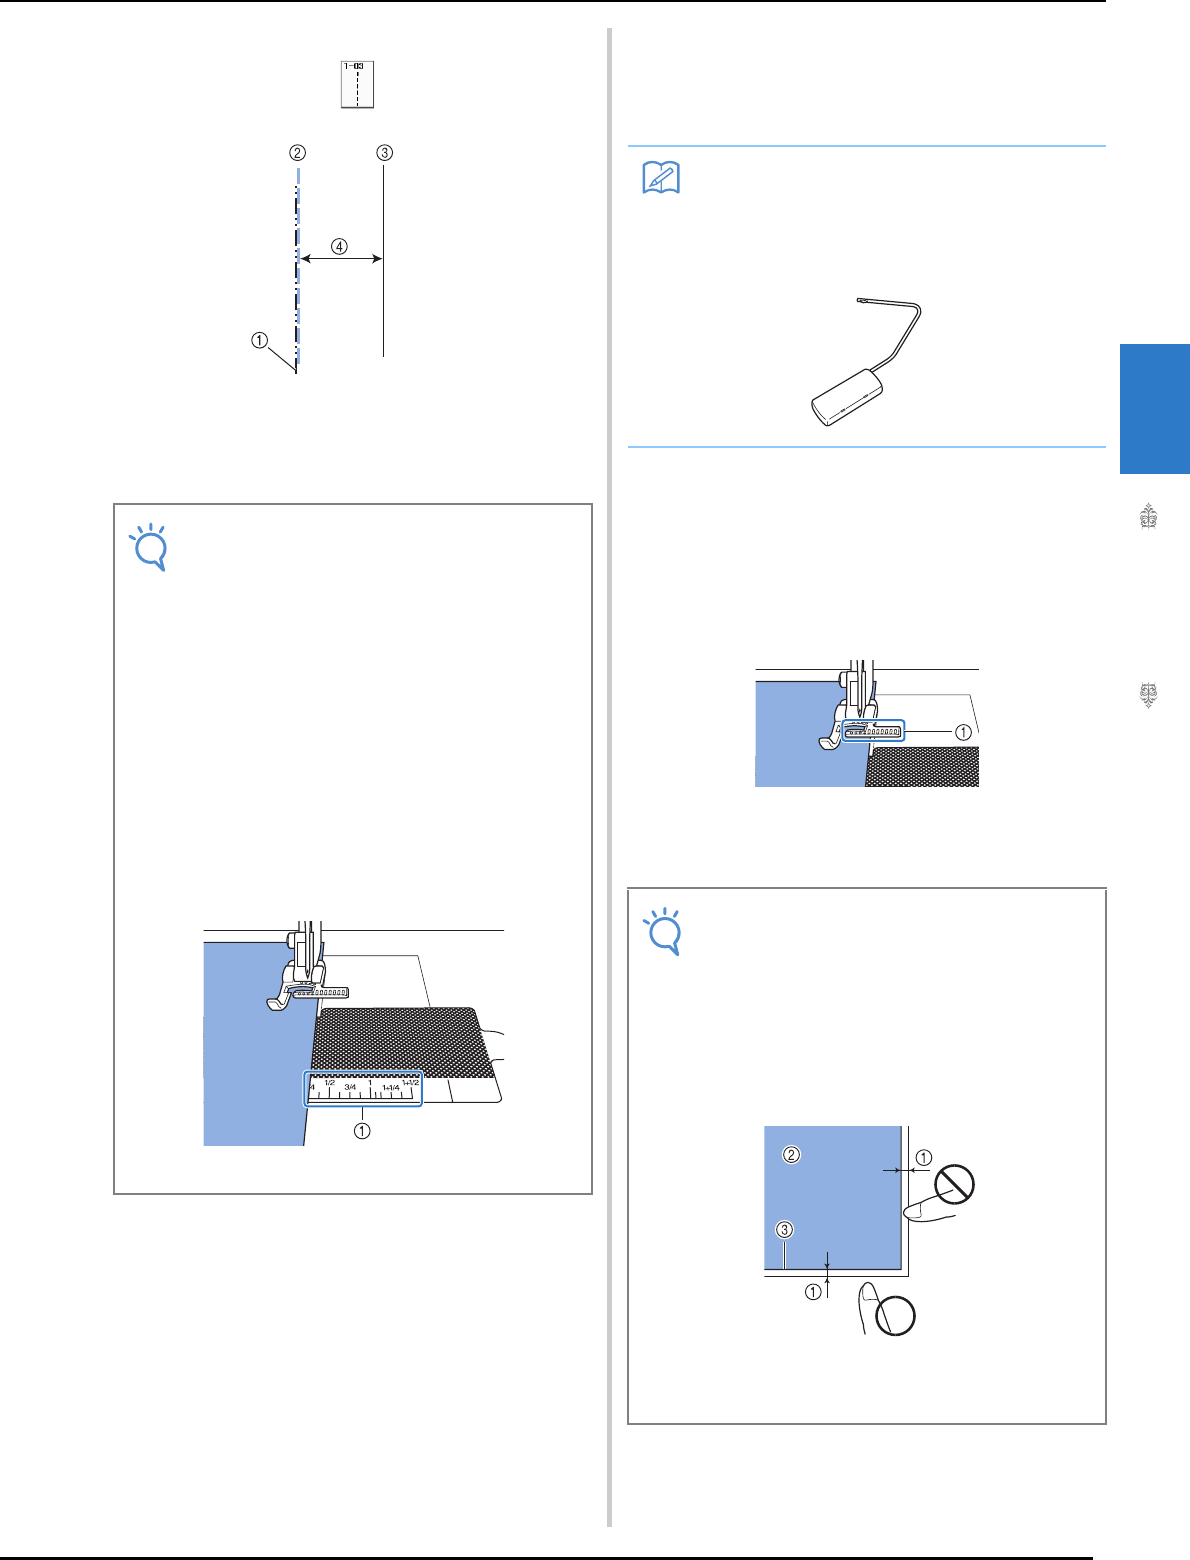
Note
• While sewing, do not place anything,
including your hands, within 2 mm (about 1/
16 inch) from the edge of the fabric,
otherwise the edge of the fabric cannot be
detected correctly. When guiding the fabric
with your hands, place them outside of the
object-free area and more than 2 mm (about
1/16 inch) from the edge of the fabric.
a Approximately 2 mm (about 1/16 inch)
b Fabric
c Edge of fabric