


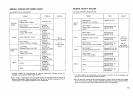
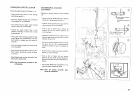


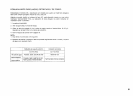
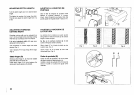

SETTINGCHART
Number of threads
Overedge cutting width dial
Needle to use
Stitch finger required
Tension ^^-"^J
Left needle thread
Right needle thread
Upper looper thread
i
I Lower looper thread
Stitch length control
Ref. No.
Reference page
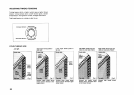
4
-6-
Left an_Right
Yes
-4-
- 4-
- 4-
I -- r
-4-
2.5 - 3.5
6
Left Right
Yes Yes
-4-
-4-
4o "
-4- -4-
2.5 - 3.5
® ®
i!'
_:'___.
.
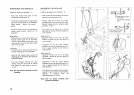
Left
Yes
O-
3
-5-
Right
Yes
O _
-4 -4
7- } 7-
2.5 - 3.5
®
_'%,i!
_iiii_i!
_2_i!i iiii!iii
.......... !i!ili!_i_!!!
TZ{X_I
]ii]]]l
E}SS_
iii!:_i!i_i!_ iiiiiiiiiiiii
_i!i!:!i!(:!t
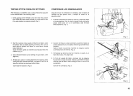
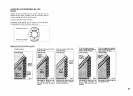
Fiat seam
®
iiiiiiiiii!_ i_iiii;;i i
i]iiiiiiiii_ iiii_i!i;if_ii_ ......iq..........
:i:i:i:;:::i=_ i:i:i:i!ii_ iiiiiiiii_s_ii_
-4-
-4-
0-
1.5 -2
®
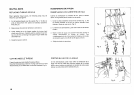
Narrow hem
4-6
Right
No
-4- -4-
4-.
7- 7-
1 -2 2-3
® ®
i !ii_iii!_i@!
Rolled hem Picot stitch
22 29 20
Note: The above settings of tension and overedge cutting width dial are for general guidance. A
little fine-tuning wili improve your stitching in many cases. Following are some tips which
may help you.
1. Adjust overedge cutting width dial when fabric "curls" or loops hang over the edge of
fabric. (See page 24)
2. Stitch finger (8) may have to be used when loops hang over the edge when sewing
lightweight fabric using 3 threads (right needle only). (See page 24)
3. Adjust needle thread tension controls when sewing thick or thin fabric.
4. Reduce the tension when using thick thread.
5. Incorrect tension settings may cause skipped stitches. Readjust the tension
settings.
Try test sewing with a piece of fabric you are going to use and find the best settings.
17