


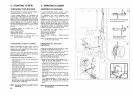

2. STARTING TO SEW 2. EMPEZAR A COSER
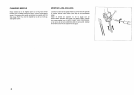
THREADING YOUR MACHINE
Wrong threading may cause skipped stitches,
breaking threads, or other problems.
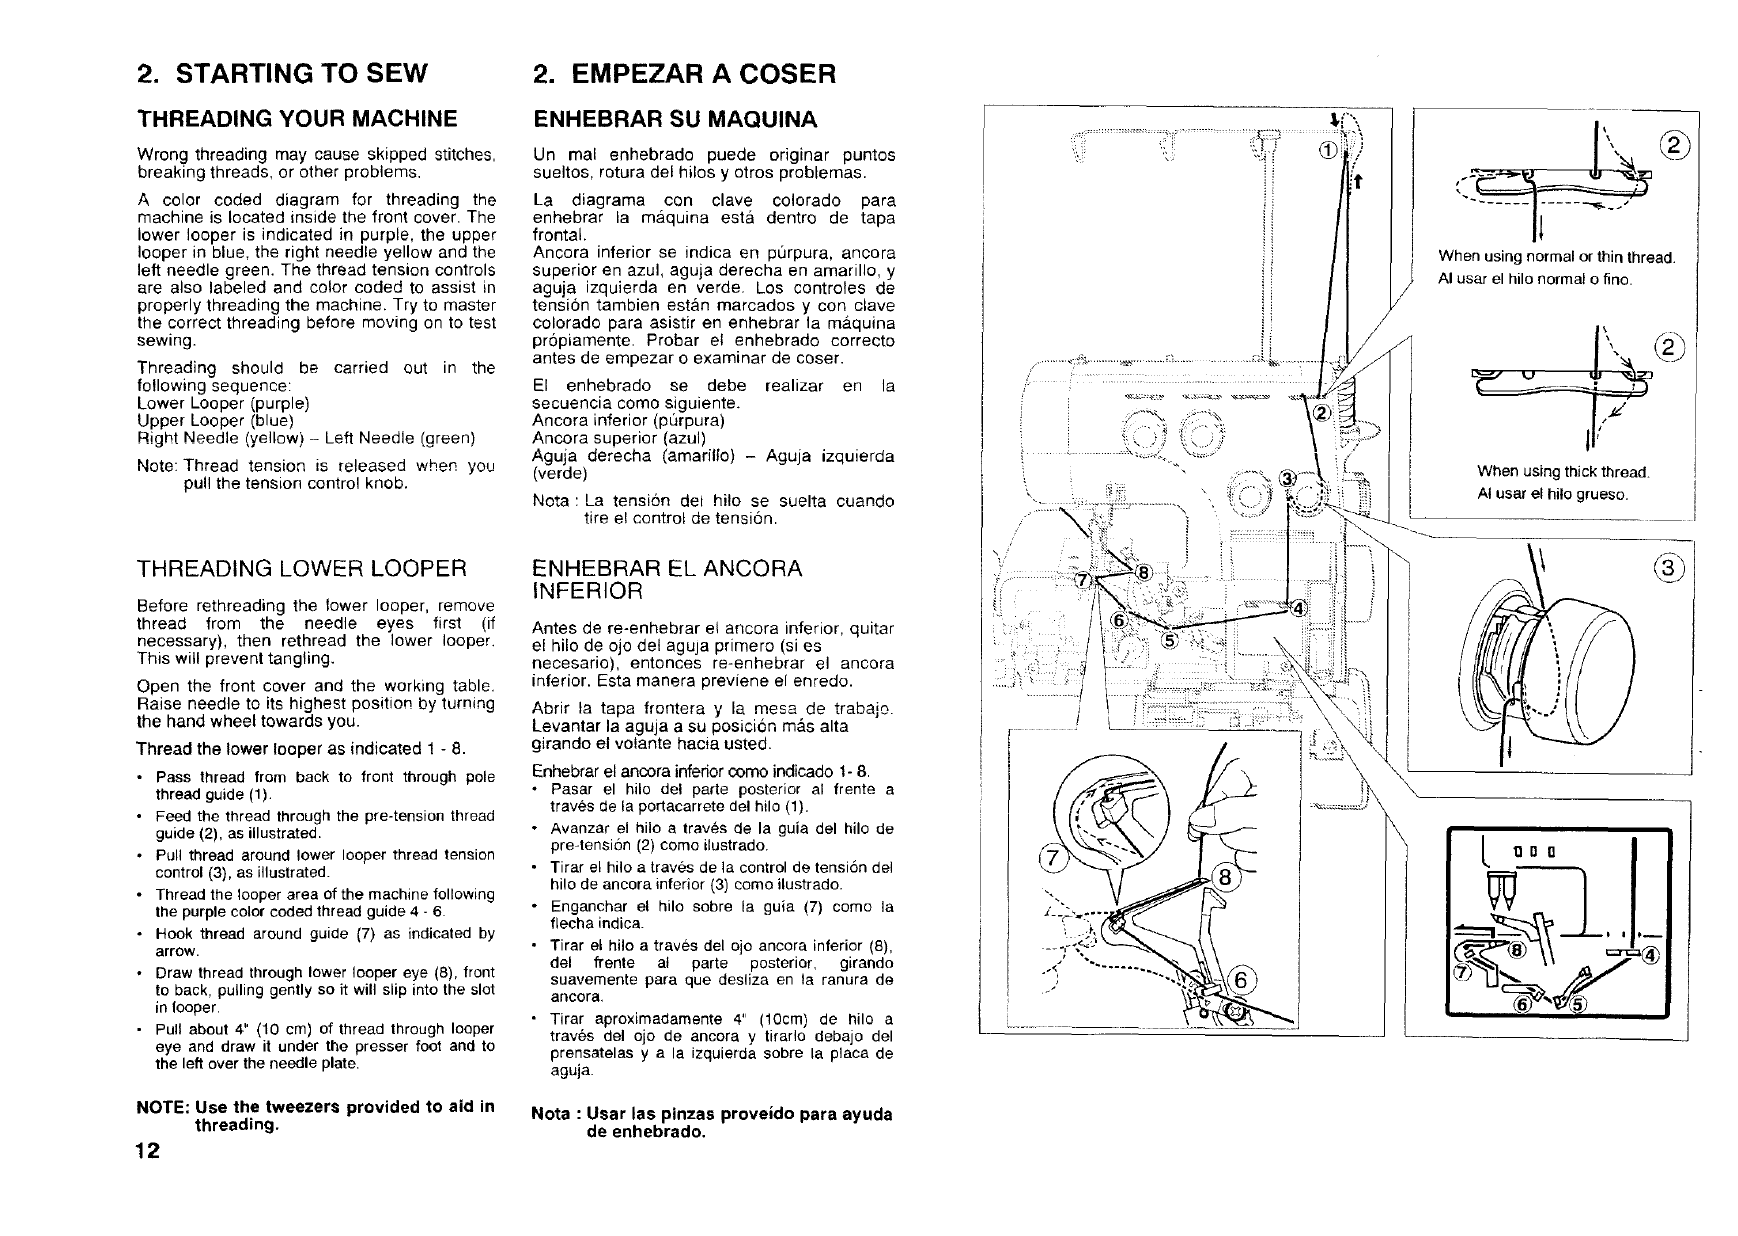
A color coded diagram for threading the
machine is located inside the front cover. The
lower looper is indicated in purple, the upper
looper in blue, the right needle yellow and the
left needle green. The thread tension controls
are also labeled and color coded to assist in
properly threading the machine. Try to master
the correct threading before moving on to test
sewing.
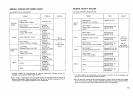
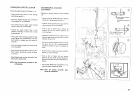
Threading should be carried out in the
following sequence:
Lower Looper (purple)
Upper Looper (blue)
Right Needle (yellow) - Left Needle (green)
Note: Thread tension is released when you
pull the tension control knob.
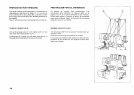
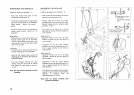
THREADING LOWER LOOPER
Before rethreading the lower looper, remove
thread from the needle eyes first (if
necessary), then rethread the lower looper.
This will prevent tangling.
Open the front cover and the working table.
Raise needle to its highest position by turning
the hand wheel towards you.
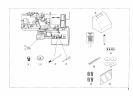
Thread the lower looper as indicated 1 - 8.
Pass thread from back to front through pole
thread guide (1).
Feed the thread through the pre-tension thread
guide (2), as illustrated.
Pull thread around lower looper thread tension
control (3), as illustrated.
Thread the looper area of the machine following
the purple color coded thread guide 4 - 6.
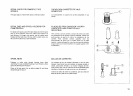
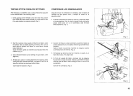
Hook thread around guide (7) as indicated by
arrow.
Draw thread through lower looper eye (8), front
to back, pulling gently so it will slip into the slot
in looper.
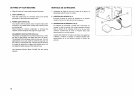
• Pull about 4" (10 cm) of thread through looper
eye and draw it under the presser foot and to
the left over the needle plate.
NOTE: Use the tweezers provided to aid in
threading,
12
ENHEBRAR SU MAQUINA
Un mal enhebrado puede originar puntos
sueltos, rotura del hilos y otros preblemas.
La diagrama con clave colorado para
enhebrar la maquina est& dentro de tapa
frontal.
Ancora inferior se indica en pL_rpura, ancora
superior en azul, aguja derecha en amarillo, y
aguja izquierda en verde. Los controles de
tensi6n tarnbien est&n marcados y con clave
colorado para asistir en enhebrar la m&quina
pr6piamente. Probar et enhebrado correcto
antes de empezar o examinar de coser.
El enhebrado se debe realizar en la
secuencia come siguiente.
Ancora inferior (pQrpura)
Ancora superior (azul)
Aguja derecha (amarillo) - Aguja izquierda
(verde)
Nota : La tensi6n dei hito se suelta cuando
tire el control de tensi6n.
ENHEBRAR EL ANCORA
INFERIOR
Antes de re-enhebrar el ancora inferior, quitar
el bile de ejo det aguja primero (si es
necesario), entonces re-enhebrar el ancora
inferior. Esta manera previene el enredo.
Abrir la tapa frontera y la mesa de trabajo.
Levantar la aguja a su posici6n m&s alta
girando el votante hacia usted.
Enhebrar el ancora inferior come indicade 1- 8.
• Pasar el hilo del parle posterior al frente a
trav@s de la portacarrete del hilo (1).
• Avanzar el hilo a trav@s de la guia del hilo de
pre4ension (2) come ilustrado.
• Tirar el hilo a trav@s de la control de tensi6n del
hilo de ancora interior (3) come ilustrado.
• Enganchar el bile sobre la guia (7) come la
flecha indica.
• Tirar el bile a trav@s del ojo ancora inferior (8),
del frente at parte posterior, giraedo
suavemente para que desliza en la ranura de
ancora.
• Tirar aproximadamente 4" (10cm) de bile a
trav@s del ojo de ancora y tirarlo debajo del
prensatelas y a la izquierda sobre la placa de
aguja.
Nota : Usar las pinzas proveido para ayuda
de enhebrado.
!
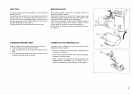
When using normal or thin thread
AI usar el hilo normal o fine.
/
®
When using thick thread.
At usar el hilo grueso.