


UGH016/0500 Series 1 Portable Chillers, TIC Control
INSTALLATION 3-5
M
AKING
PROCESS
PLUMBING
CONNECTIONS
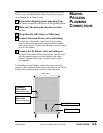
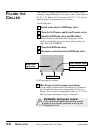
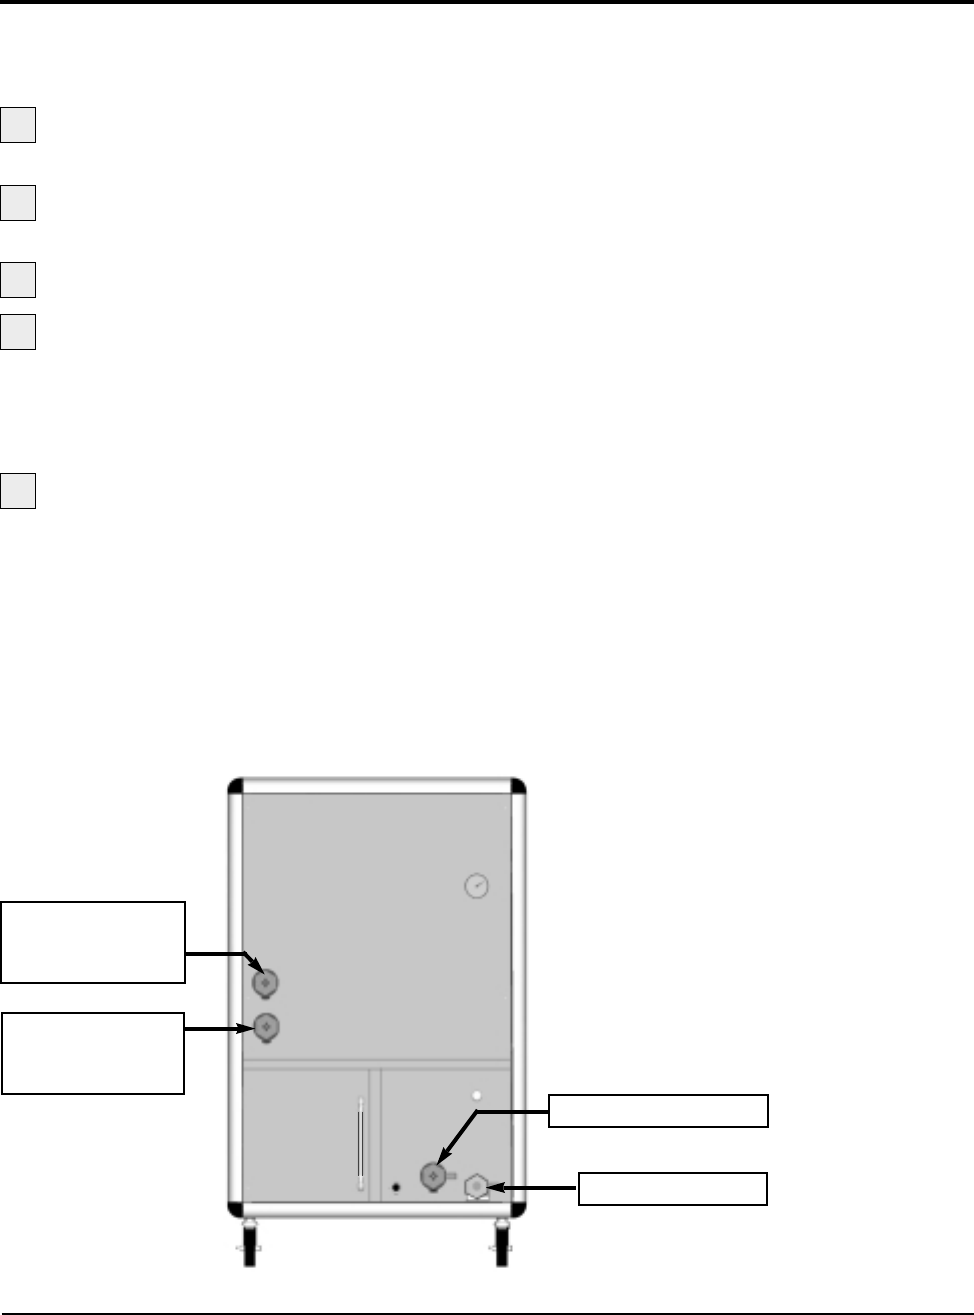
Warm fluid from your process enters the chiller at the From
Process valve and chilled fluid returns to the process equip-
ment through the To Process valve.
Remove the shipping plastic pipe plug from
the female connections on the back of the portable chiller.
Make sure the male pipe threads are clean
and new.
Wrap threads with Mylar or Teflon tape.
Connect the From Process valve and tubing
on the back of the chiller to the From Process tubing.
Start by hand until the threads engage and then tighten
with a pipe wrench. Tighten only enough to prevent leaks;
do not over-tighten!
Connect the To Process valve and tubing on
the back of the chiller to the return tubing. Start by hand
until the threads engage and then tighten with a pipe
wrench. Tighten only enough to prevent leaks; do not
over-tighten!
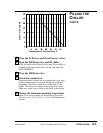
For the Water-cooled Chillers connect the water source for
cooling to the Condenser Water inlet on the back of the chiller.
Connect the Condenser Water outlet for returning water.
To Process valve
back view
From Process valve
1
2
3
4
5
Condenser
Water Outlet
(water-cooled only)
Condenser
Water Inlet
(water-cooled only)