


– 181 –
14. DETACHMENTS
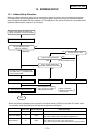
14-1. Indoor Unit
14-1-1. 4-Way Air Discharge Cassette Type
RAV-SM564UT-E, RAV-SM804UT-E, RAV-SM1104UT-E, RAV-SM1404UT-E, RAV-SM1604UT-E
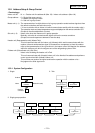
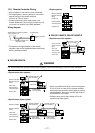
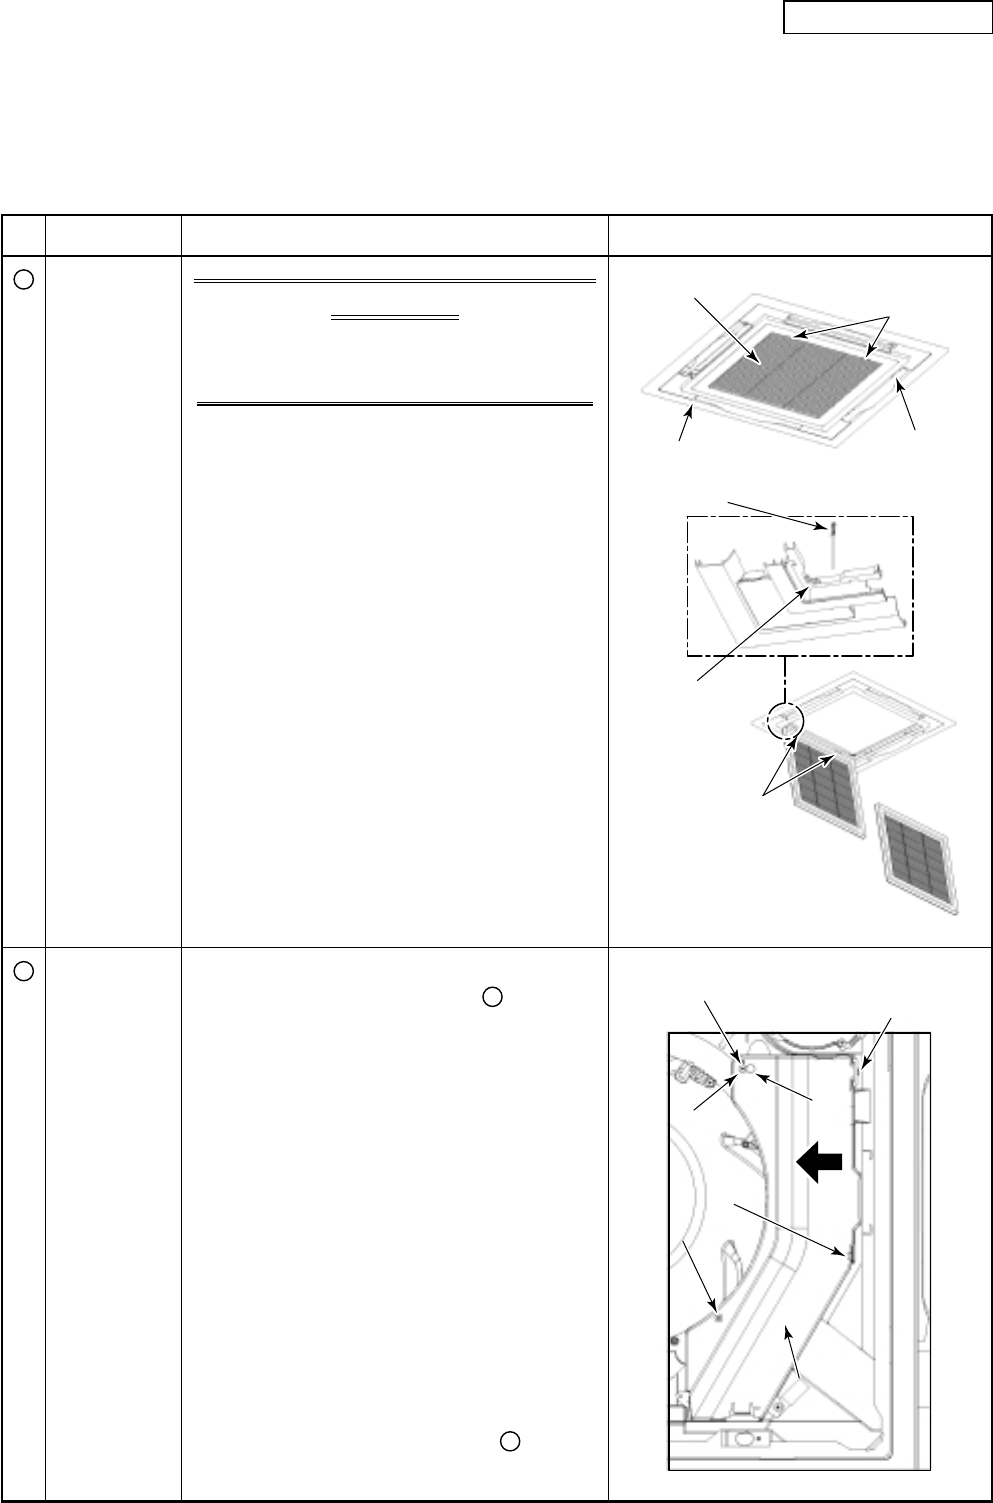
Suction grille Knobs of the
suction grille hook
Ceiling panel
Adjust
corner cap
Hook for
falling-preventive strap
Hole for
ceiling panel hook
Hinge
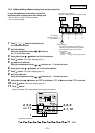
Bell mouth pin Claw of
electric parts box
Sliding direction
Sliding direction
Fixing scre
Fixing scre
w B
w B
Fixing scre
Fixing scre
w B
w B
Potbelly hole
otbelly hole
(Dhar
(Dhar
ma doll hole)
ma doll hole)
Electr
Electr
ic par
ic par
ts bo
ts bo
x co
x co
ver
er
Sliding direction
Fixing screw B
Fixing screw A
Potbelly hole
(Dharma doll hole)
Cla
Cla
w of electr
w of electr
ic
ic
par
par
ts bo
ts bo
x co
x co
ver
er
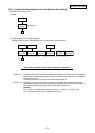
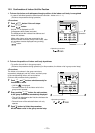
Electric parts box cover
Claw of electric
parts box cover
No.
1
2
Part name
Suction grille
Electric parts
cover
Procedure
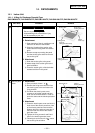
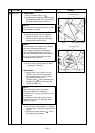
XCAUTIONX
Be sure to put on the gloves at
disassembling work; otherwise an injury
will be caused by a part, etc.
1. Detachment
1) Stop operation of the air conditioner and
then turn off switch of the breaker.
2) Slide the 2 knobs of the suction grille
inward and then hang down the suction
grille.
3) Remove a strap connecting the panel
and the suction grille and then remove
the suction grille.
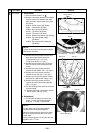
2. Attachment
1) Hook the suction grille to the panel.
2) Attach strap of the suction grille to the
panel as before.
3) Close the suction grille, slide the knobs
outward and then fix the panel.
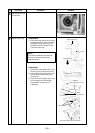
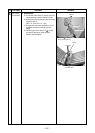
1. Detachment
1) Carry out work of item 1. of
1
.
2) Remove the fixing screw A which fixes
the electric parts cover and loosen the
fixing screw B.
3) Pull down the electric parts cover,
remove pin of the bell mouth and then
slide it to the arrow direction in order to
open the claws and the electric parts box
cover.
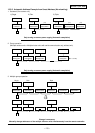
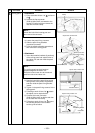
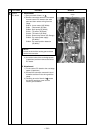
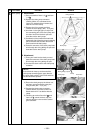
2. Attachment
1) Close the electric parts cover and slide it,
hook claw of the electric parts box, claw
of the electric parts box cover and the
Dharma doll hole, and then insert pin of
the bell mouth into hole of the electric
parts box cover.
2) Tighten the fixing screws A and B and
then fix the electric parts box cover.
3) Following to work of item 2 of
1
, mount
the suction grille as before.
Remarks
Revised 2: Jun., 2008