


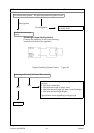

Convector 460/560PTR - 45 - ©Rinnai
*DV&RQYHUVLRQ
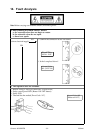
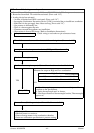
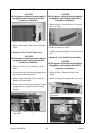
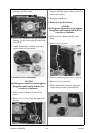
1. Remove the front panel (see “Removal of the Front Panel Assembly” on page 48).
2. Remove the filter (see “Removal of the Purifier Filter” on page 48).
3. Replace small gas label on gas inlet, and large gas label on back of appliance.
4. Place new very small gas label on Data Plate.
5. Complete details on conversion sticker, place sticker inside front panel.
6. Remove convection fan and combustion chamber assemblies (see “Removal of the Convection
Fan Assy on page 52) to gain access to the burner.
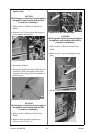
7. Remove the burner assembly (see “Removal of the Spark Electrode” on page 53) and replace.
8. Remove the overheat switch from the burner and replace (2 screws).
9. Remove the secondary aeration cover (6 screws).
10. Remove the electrode (2 screws) and burner blanking plate
and fit to the new burner.
11. Fit restrictor to new burner assembly.
12. Refit the new burner to the combustion chamber.
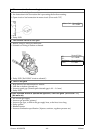
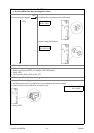
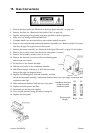
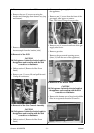
13. Refit Thermocouple with spacer (A & B) fold on bracket
facing to the right (see diagram below).
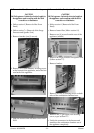
14. Replace the blanking plate, electrode assembly, overheat
switch, thermocouple assembly, combustion chamber hood cover, gas supply connection, and
connection tube clips.
15. Slide combustion chamber back and screw into place.
16. Replace and refit injector and filter.
17. Reconnect gas and electrical supplies.
18. Carry out gas pressure setting procedure on page 46.
19. Replace the front panel.
NG
LP
Installation direction
of thermocouple
installation panel
Thermocouple
Height
High
Low