


19
ENGLISH
10.5. Distributor (gas) connection
method
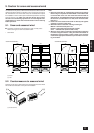
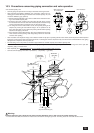
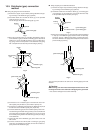
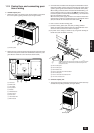
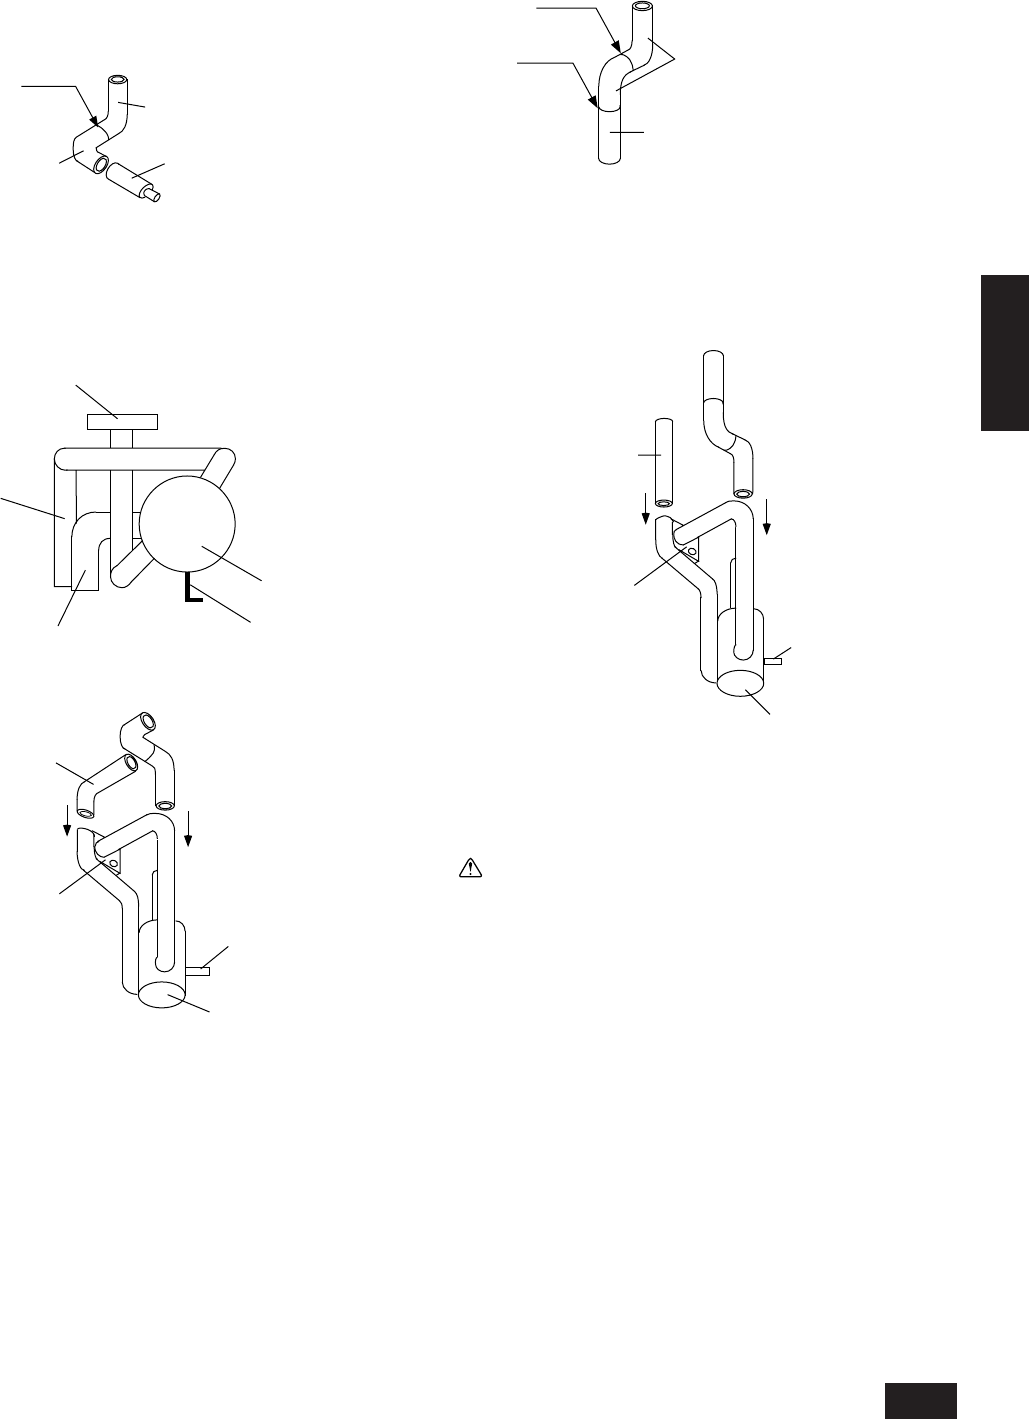
■ Taking out piping from the front direction
(1) Remove the copper cap and rubber packing attached to the pip-
ing and flange of the distributor (gas) (optional).
(2) Assemble outside the unit with the elbow (8) in the specified
shape and braze. (see Fig. 1.)
For the 600 type, braze the connecting pipe (7) also.
Brazing
7Connecting pipe
8Elbow
8Elbow
Fig. 1
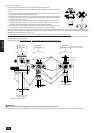
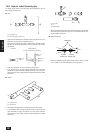
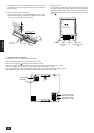
(3) Braze the connecting pipe (4) and piping assembled in step (2)
to the distributor (gas) so that the connecting pipe is attached as
shown in Fig. 2. For assembly procedure, see Fig. 3. When braz-
ing piping, cool the brazed portion of the distributor side piping
with a dampened waste cloth to prevent heating by brazing.
Distributor (gas)
Flange
Elbow assembly
Fastening plate
4Connecting
pipe
Fig. 2
Distributor (gas)
Flange
Fastening plate
4Connecting pipe
Fig. 3
(4) Connect the ø12.7 oil balance pipe to the ball valve of the vari-
able capacity unit (oil balance) and constant capacity unit.
(5) Connect the ø15.88 piping branched by the distributor (liquid) to
the ball valve of the variable capacity unit (liquid side).
(6) Insert the distributor (gas) into the variable capacity unit and con-
nect to the flange of the ball valve (gas side). (Use a socket wrench
and socket wrench extension.) When doing so, be sure to mount
the included packing between the ball valve (gas side) and flange
of the distributor.
(7) Fasten the plate of the distributor (gas) to the frame of the unit
with screws.
(8) Connect and braze the ø44.45 (ø38.1 for 600 type) gas piping
(main pipe) and ø28.58 gas pipe that connects the constant ca-
pacity unit with the distributor (gas).
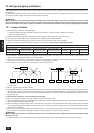
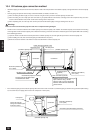
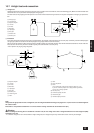
■ Taking out piping in the downward direction
(1) Remove the copper cap and rubber packing attached to the pip-
ing and flange of the distributor (gas) (optional).
(2) Assemble outside the unit with the elbow (8), connecting pipe
(7 for 600 type), or connecting pipe (6 for types other than 600)
in the specified shape and braze. (see Fig. 4.)
Brazing
Brazing
For 600
For other than 600
7Connecting pipe
6Connecting pipe
8Elbow
:
:
Fig. 4
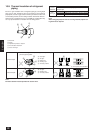
(3) Braze the connecting pipe (5) and connecting piping assembled
in step (2) to the distributor (gas) outside the unit. For assembly
procedure, see Fig. 5. When brazing piping, cool the brazed por-
tion of the distributor side piping with a dampened waste cloth to
prevent heating by brazing.
Distributor (gas)
Fastening plate
Flange
5Connecting pile
Fig. 5
The rest of the procedure is the same as for “Running piping from front
direction”.
Caution:
When brazing, cool with a waste cloth dampened with water so that
the flange and ends of the distributor side piping don’t get heated.
- Part could be damaged if not cooled sufficiently.