


INSTALLATION
mini HE --- Installation & Servicing
29
34 INITIAL LIGHTING
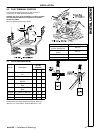
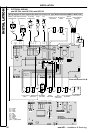
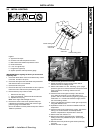
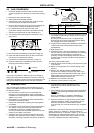
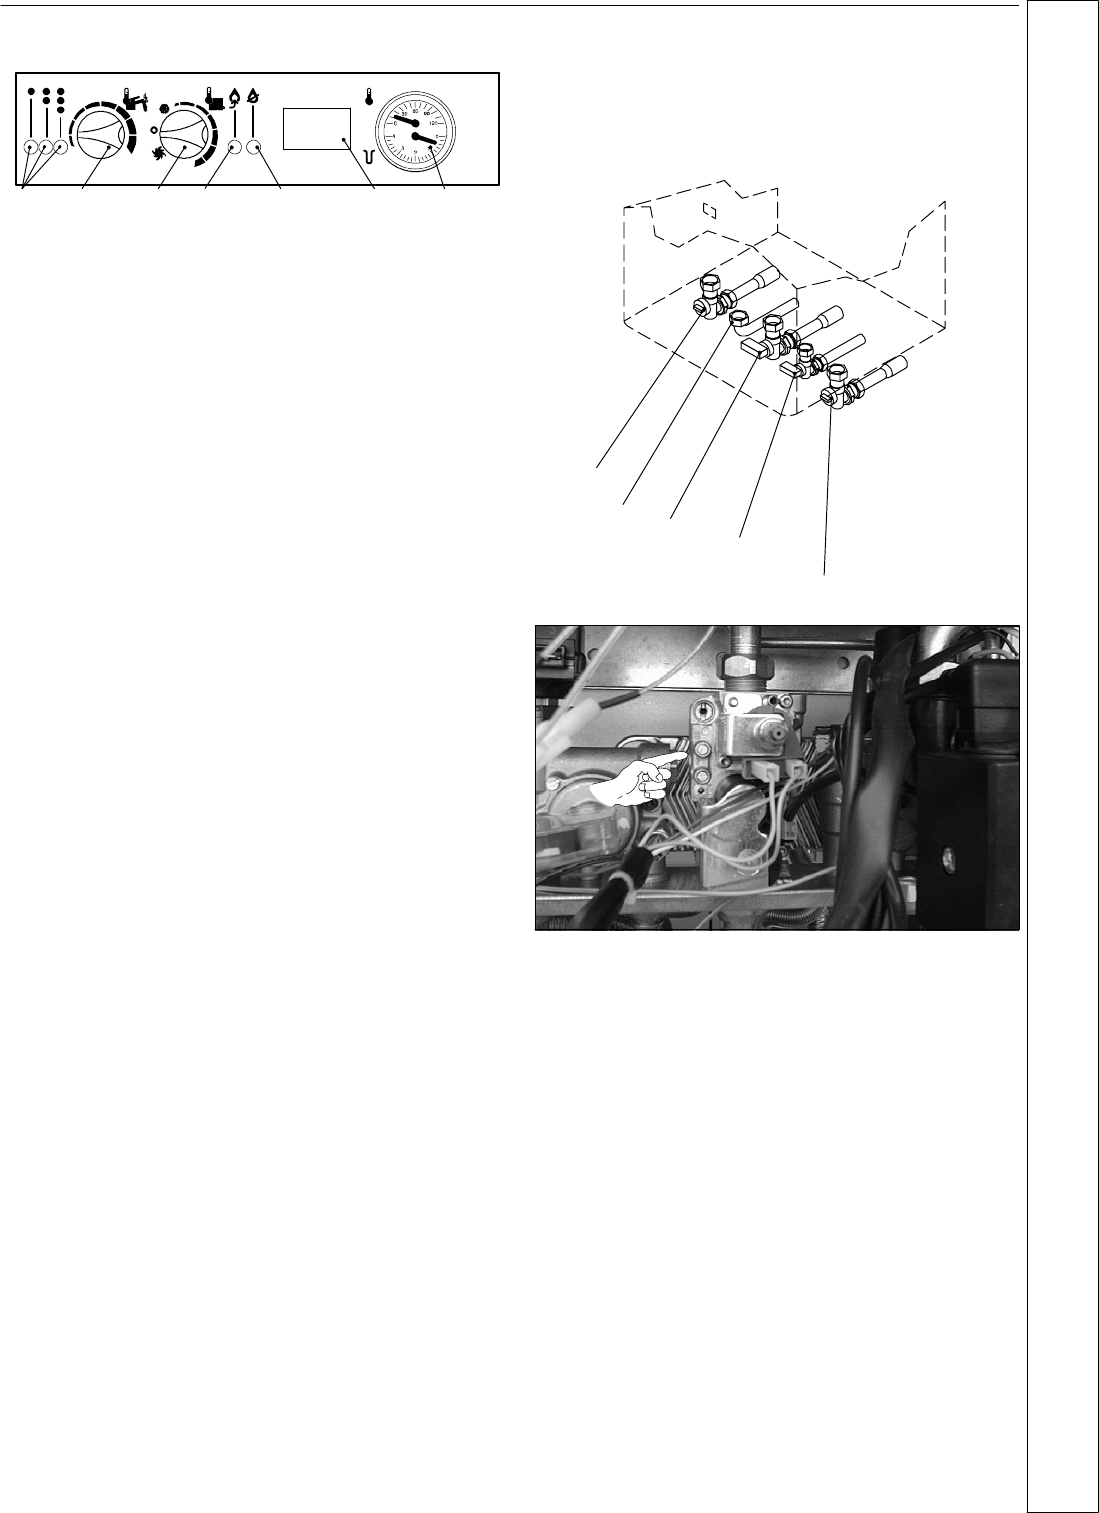
AB CD E F
Central Heating flow
Domestic hot
water outlet
Gas inlet
Domestic cold
water inlet
Central Heating return
G
Legend
A Appiance On lamps
B Domestic hot water temperature control
C Main switch and radiator temperature control
D Boiler reset button
E Lock---out signal lamp
F Programmer (optional)
G System pressure and temperature gauge
IMPORTANT Before lighting the boiler you should note
especially that:
1 Check that all the drain cocks are closed and any valves
in the flow and return are open.
2 Check that the system has been filled and pressurised
and that the boiler is not air locked.
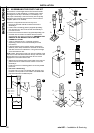
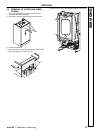
3 Remove boiler front panel.
4 Ensure the dust cap on the automatic air vent is open at
least one full turn and leave this permanently open
5 Ensure that the pump is free to rotate
i Remove the vent plug
ii Using a screwdriver, rotate the shaft several times
iii Replace the vent plug
Note. Some slight water leakage will occur
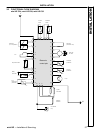
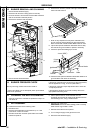
6 R emove the screw in the burner pressure test point
indicated on the foll owing picture and connect a gas
pressure gauge via a flexible tube.
Be sure to select the correct pressure test point. Refer to
Tables for pressures.
7 Check that the gas service cock is ON.
8 Switch the el ectricit y suppl y ON and check that all
external co ntrols are calling for heat.
9 Set the main switch C to ’ON’. Following a pre---purge
period the gas control solenoid valve should open and the
spark commence, c ontinuing until the burner is
established.
10 Check that the burner li ghts smoothly. If this does not
occur within 2 0 seconds, turn the main switch to ’ O’
position, wait for 5 seconds then try again by pressing the
reset button ’D’. If the burner still does not light, refer to
the ’Fault Finding’ section.
11 Test for gas tightness around ALL boiler gas components,
using leak detection fluid.
12 Operate the boiler for 10 minutes to stabilise the burner
temperature.
13 Check that the burner pressures are correct. The boiler is
factory pre---set and should not need adjustment.
However if adjustment is required refer to frame 35.
14 Set the boiler main switch to ’O’.
15 Remove the pressure gauge and tube. Replace the
sealing screw in the pressure test point. Ensure a gas
tight seal is made.
16 Refit the boiler front panel using the screws previously
removed.
17 Switch the boiler on again.
INSTALLATION