


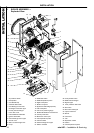
INSTALLATION
mini HE --- Installation & Servicing
18
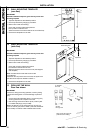
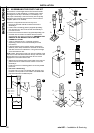
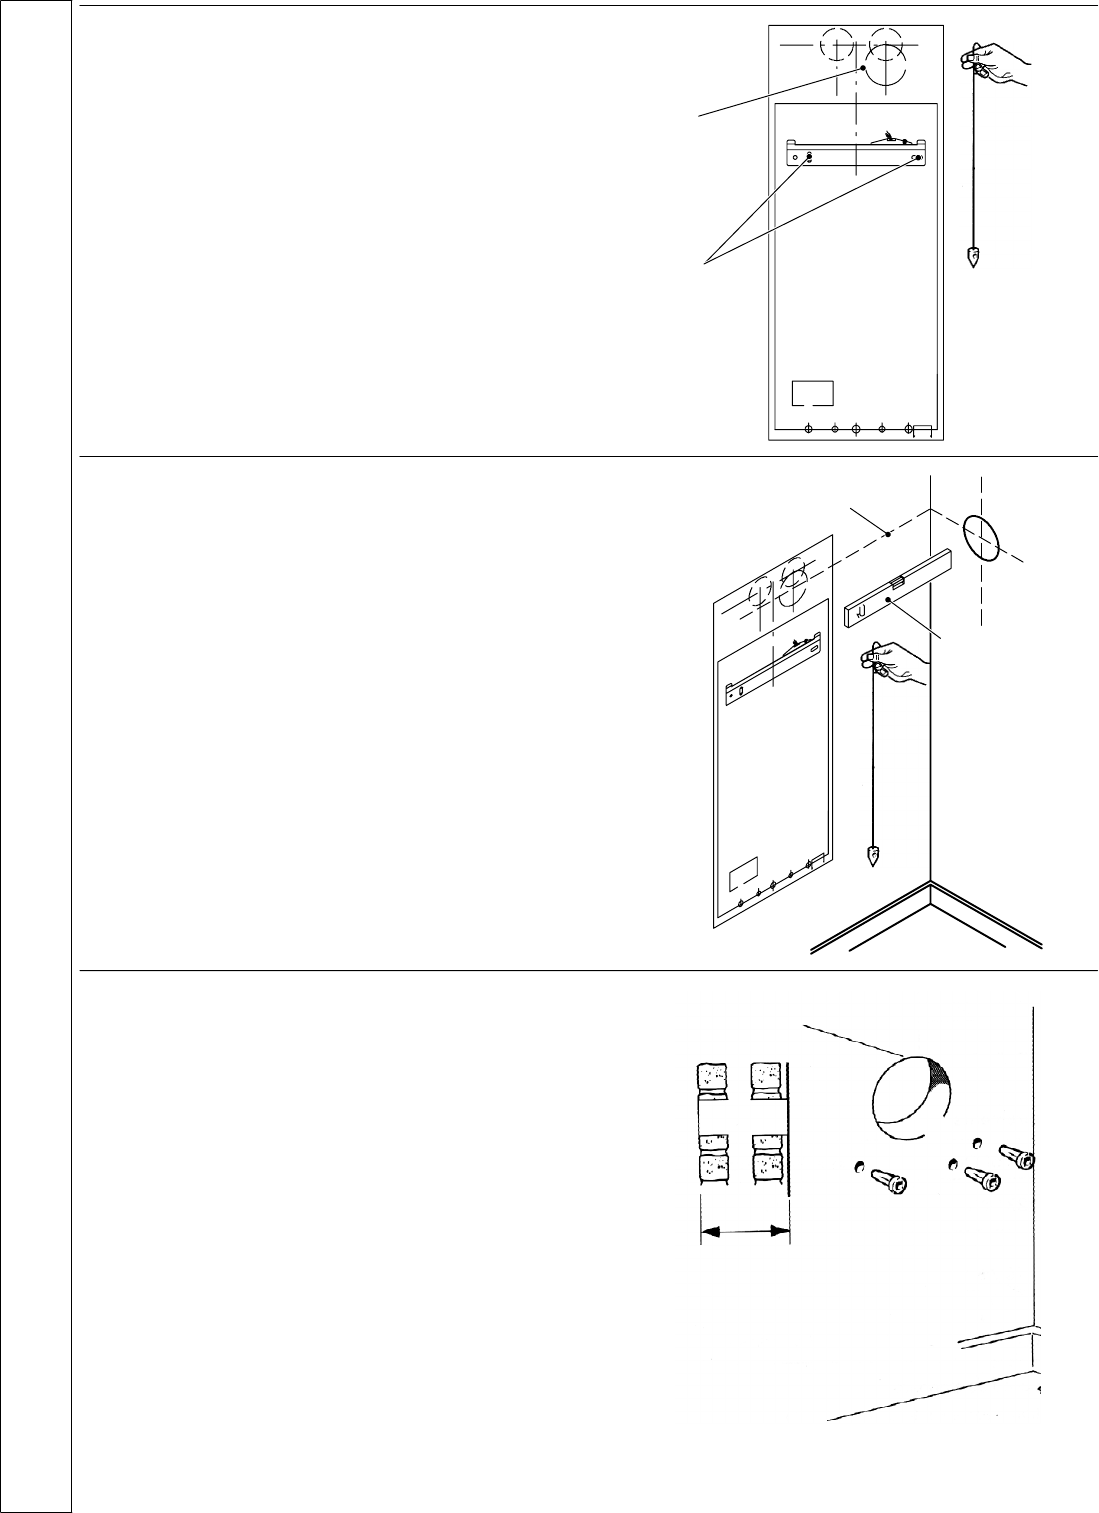
13 WALL MOUNTING TEMPLATE
(rear flue)
IMPORTANT
Detailed installation steps are given directly on the wall
mounting template
1 Tape the template into the selected position.
2 Ensure squarenes s by hanging a plumbline.
3 Mark onto the wall the following:
a. the wall mounting plate screw positions
b. the position of the flue duct.
(Mark the centre of the hole as well as the ci rcumference)
4 R emove the template from the wall
a
b
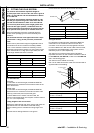
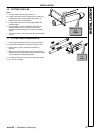
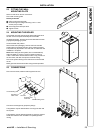
14 WALL MOUNTING TEMPLATE
(side flue)
IMPORTANT
Detailed installation steps are given directly on the wall
mounting template
1 Tape the template into the selected position.
2 Ensure squarenes s by hanging a plumbline.
3 Mark onto the wall the following:
a. the wall mounting plate screw position
b. Extend the centre line as shown.
Mark the flue duct centre from the corner (see diagram
and template)
Note. mark the centre of the hole as well as the
circumference.
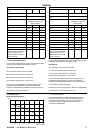
If extension duct kit pack D has to be used, the pipes must
have the correct slope as detailed in frame 11.
4 R emove the template from the wall
Extended centre
Spirit level
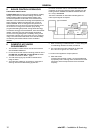
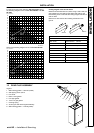
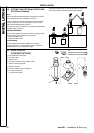
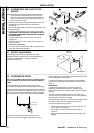
15 DRILLING THE WALL
Rear flue shown
IMPORTANT
Ensure that, during the cutting operation, masonry falling
outside the building does not cause damage or personal
injury.
1 Cut the flue hole (preferably with a 5” core boring tool),
ensuringthattheholeissquaretothewall.
2 Drill the fixing holes with an 8mm (5/16”) masonry drill.
Fit suitable wall plugs (not provided).
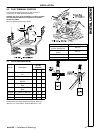
Note. If the teminal is to be sited within 25---40 mm of a
corner or vertical pipe (refer to Table 4) then the hole MUST
be accuratel y cut and the rubber wea th er seal trimmed.
5” diameter
flue hole
Section
through wall
Note: Check all of the hole
positions before drilling.
INSTALLATION