


76 Ceiling & Floor, Ceiling Suspended (50Hz, R22)
15. Installation
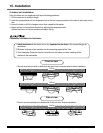
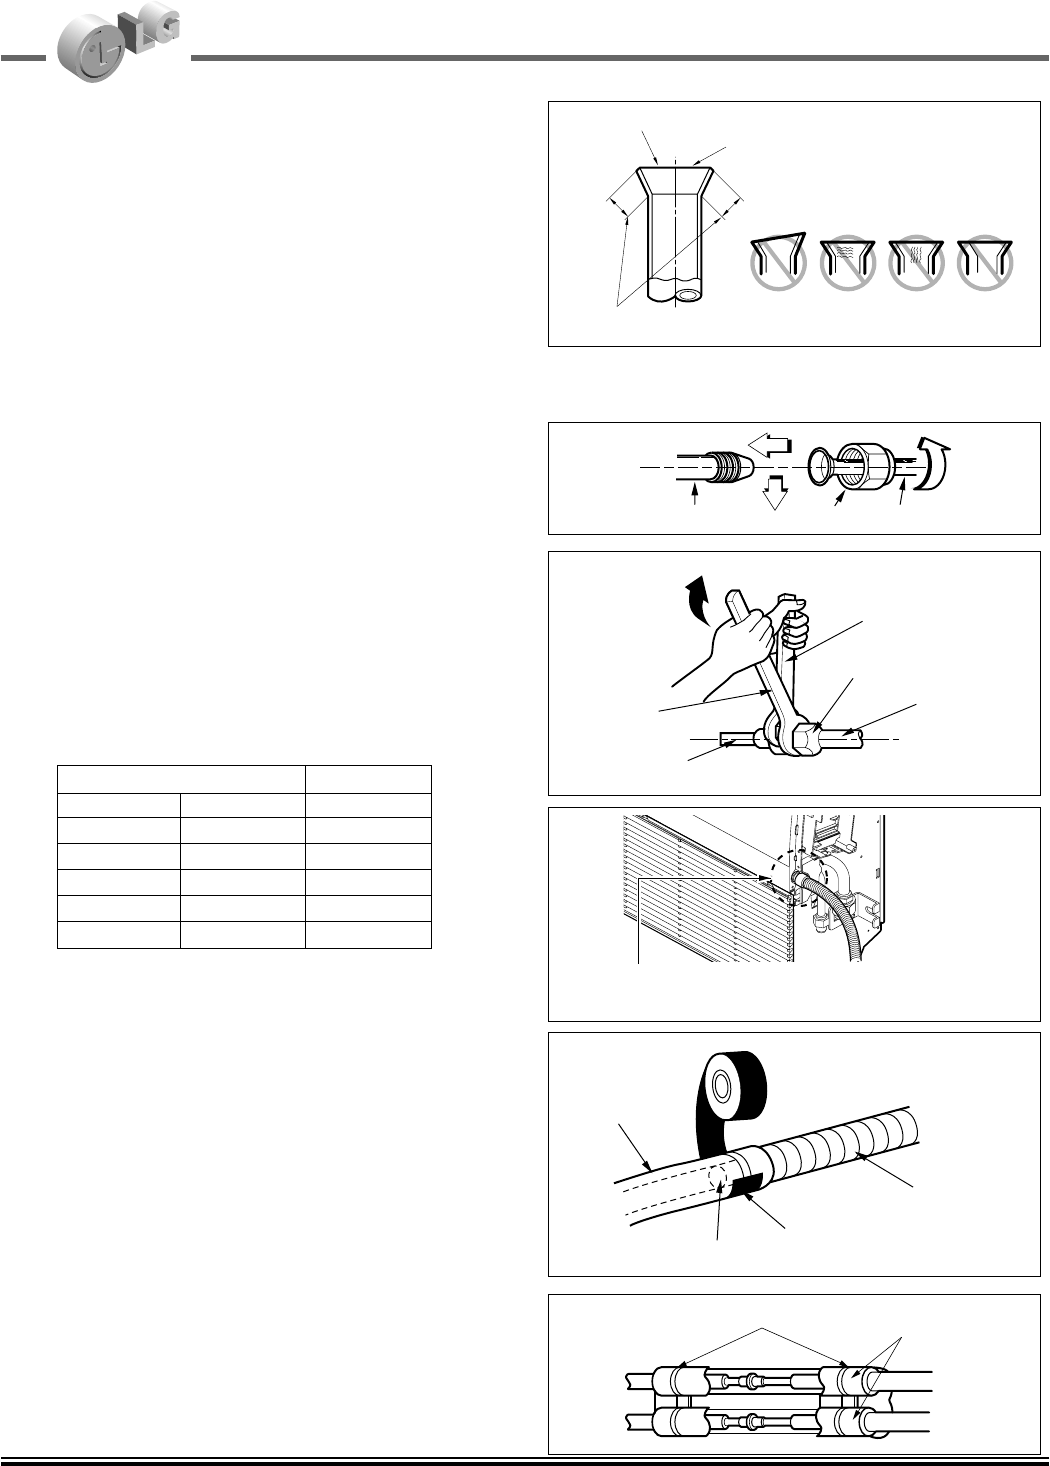
Check
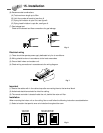
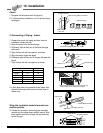
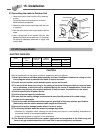
1. Compare the flared work with the figure by.
2. If a flared section is defective, cut it off and do flaring
work again.
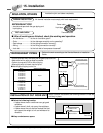
4) Connecting of Piping - Indoor
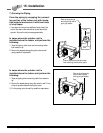
1. Prepare the indoor unit piping and drain hose for
installation thought the wall.
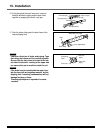
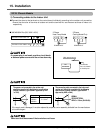
2. Align the center of the liquid side pipe.
3. Sufficiently tight the flare nut of the liquid side pipe
with hands.
4. Tight the flare nut with two spanner, as shown.
5. Align the center of gas side pipes.
6. Sufficiently tight the flare nut of the gas side pipe with
hands.
7. Tight the flare nut with two spanner as shown.
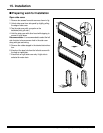
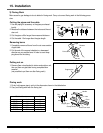
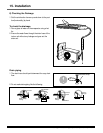
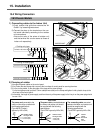
8. If drain pipe need to be extended at the indoor side
attach the drain pipe with indoor unit drain hose as
shown in fig.
Wrap the insulation material around con-
nection portion
9. Overlap the connection connecting pipe insulation
material and the indoor pipe insulation martial. Bind
them together with the vinyl tape. So that here may
not be any gap.
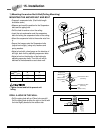
Inclined
Inside is shiny without scratches
Smooth all round
Even length
all round
Surface
damaged
Cracked Uneven
thickness
= Improper flaring =
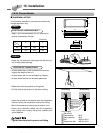
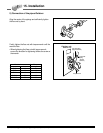
mm inch kg
.
m
Ø6.35 1/4 1.8
Ø9.52 3/8 4.2
Ø12.7 1/2 5.5
Ø15.88 5/8 6.6
Ø19.05 3/4 6.6
Outside diameter Torque
Indoor unit tubing Flare nut Pipes
Wrench
Indoor unit tubing
Connection pipe
Flare nut
Open-end wrench (fixed)
Vinyl tape
Adhesive
Drain hose
Indoor unit drain hose
(narrow)
Plastic bands
Insulation material
❈ Seal properly the joint of drain hole and drain pipe with
adhesive tape to prevent leakage of water drops.