DIRECT VENT TERMINATION
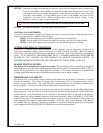
There are two types of direct vent termination that can be used with the Bayvue DV appliance:
Horizontal Termination
Vertical Termination
VENT TERMINALS
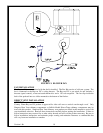
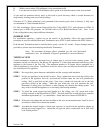
There are four types of vent terminals available for the Bayvue DV appliances. Three of these vent
terminal types apply to horizontal terminations.
Standard Horizontal Terminal
14” Snorkel, Horizontal Terminal
36” Snorkel, Horizontal Terminal
Vertical Terminal
STANDARD HORIZONTAL TERMINAL
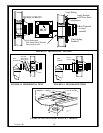
All horizontal terminations require a minimum of 24" of vertical flue measured from the top of the stove.
SNORKEL TERMINAL (14" OR 36")
For installations close to the ground you must use a snorkel (extended terminal) that has the vertical rise
built into it. The 36" snorkel is designed for below grade installation. WARNING: Direct vent terminals
will not be recessed into a wall or siding.
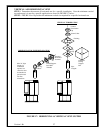
VERTICAL TERMINAL
Vertical terminals are measured from the top of the stove and can be no more than a maximum of 34 feet
from stove to flue cap. Where floors or attic space are penetrated by chimney vent pipe, safety requires
that a round support box/fire stop be installed to ensure minimum clearances to any combustible material is
maintained.
CHIMNEY PIPE
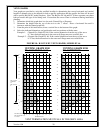
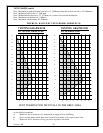
When planning the installation, it is necessary to select the proper length of vent pipe for a particular
requirement. The Venting Graphs provided on the following pages will aid the installer in determining the
proper relationship between vertical and horizontal side wall venting. These Venting Graphs should assist
the installer in determining the various vent pipe lengths allowed for a specific installation. It is also
important to note the wall thickness. Select the amount of vertical rise desired for "vertical -to- horizontal"
type installations. To determine the length of a pipe required for vertical installation, measure the distance
from the application flue outlet to ceiling, the ceiling thickness, the vertical rise in an attic, or second story,
and allow for sufficient vent height above the roof-line. For two story applications, fire stops are required
at each floor level. If an offset is needed in the attic, additional pipe and elbows will be required.
STANDARD HORIZONTAL VENT
STEP 1. Set the gas appliance in the desired location. Check to determine if wall studs are in the way
where the venting system is to be attached. If wall studs become obstructions to venting, adjust the
appliance location, if possible, to minimize the requirement to cut wall studs.
Version 1.0h
24
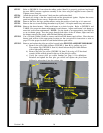
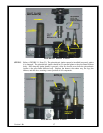
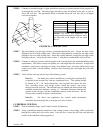
STEP 2. All direct vent chimney pipe and fittings are designed with special twist-lock connections. To
allow easy connection to the venting system, a twist lock adapter has been built into the Bayvue DV.
Assemble the desired combination of black pipe and elbows to the appliance adapter with pipe seams
oriented towards the wall or floor, as much out of view as possible.


