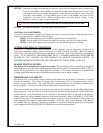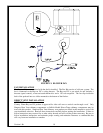
STEP 14 Open the gas supply and perform gas leak test. One of the best methods used to check for gas
leaks is soap bubbles. Soap bubbles are made by mixing liquid detergent with a little water
and shaking vigorously to create soap bubbles. Cover the gas pipe joint or valve component
with these soap bubbles. If soap bubbles grow in size or the bubbles are blown off the
connection, a gas leak exists. Make necessary repairs and retest until no change in soap
bubbles is seen at any joint or valve connection.
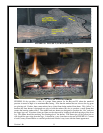
STEP 15 Re-light the appliance. Check the flame control operation.
NATURAL GAS CONVERSION
Conversion from propane to natural gas follows the same 15 steps listed above using the parts from a
natural gas conversion kit. Adhere to the following:
NOTE: Conversion kits are to be installed by qualified service technicians.
NOTE: Do not install a kit IF conversion items are missing; check kit for all parts needed.
NOTE: A Torx T20 Tamper-Proof screwdriver may be ordered separately if needed.
INTAKE AND EXHAUST CONDITIONS
WARNING: (Safety relief valves) Operation of this appliance with an improperly installed or an
improperly maintained venting system could result in carbon monoxide poisoning. Make sure that all
safety relief valves are closed and free from obstruction at all times. This is crucial in terms of operational
safety. IT IS STRONGLY RECOMMENDED THAT A CARBON MONOXIDE DETECTOR BE
PLACED IN THE VACINITY OF THIS PRODUCT TO ENSURE MAXIMUM SAFETY. IF
BATTERY OPERATED DETECTORS ARE USED, REPLACE THE BATTERY ANNUALY.
SEALED VENTING SYSTEM
The Bayvue DV is designed for a sealed vent system. This means that all flue connections, including all
seams and joints, are to be sealed with high temperature silicone rated for a minimum of 600
O
F (316
O
C) to
ensure that a proper draft occurs during appliance operation. If it becomes necessary to disassemble the
venting, proper care must be used to reassemble and reseal the vent air intake assembly.
THERMOSTAT/FAN CIRCUIT
The Bayvue DV is pre-wired to accept a millivolt wall thermostat and includes as standard, a room air
blower fan assembly. This blower is equipped with a three-prong 120 VAC grounded power cord that
protects against shock hazard. This plug should be connected directly into a properly grounded three-
prong receptacle. Do not cut or remove the grounding pin from the blower’s plug.
The room air blower fan system is activated once the power cord explained in the preceding paragraph has
been plugged in. The fan circuit is activated along with the heat sensing thermo-disc and the fan speed
control rheostat. A wall thermostat can be connected to the terminal block on the back of the pedestal.
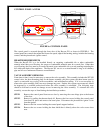
Simply remove the factory installed jumper and wire in the thermostat. Refer to FIGURE 12. CAUTION:
Label all wires prior to disconnection when servicing the controls or the blower system. Wiring errors can
cause improper and dangerous operational conditions. ALWAYS verify proper operation of the Bayvue
DV product after any servicing. Should any problems or operational issues be noted after servicing has
been completed, DO NOT USE THE SYSTEM until corrections have been made.
Version 1.0h
18
WARNING: DO NOT USE AN OPEN FLAME TO CHECK FOR GAS LEAKS


