


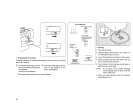
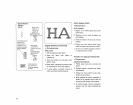
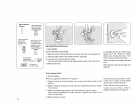
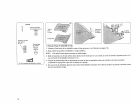


Set the Machine
R_glages
Stilch wtdth control
Must be adjusted
Largeur du potm
(doltatrer_gl_e)
W1DTH
!
G
Top thread tension
control 2 Io 6
Tenston du fil
d' atguilte, 2 i_6
Stilch length control
Any number (not
necessary toadius1)
Longueur du point,
al_ chotx Ipas de
reglage obligatotre)
Orop feed leve_
Cammande des
griffes d' entra_nement
A: Zigzag 1oo[
A:A pomt zzgzag
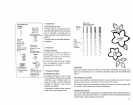
Zigzag Stitches (Continued)
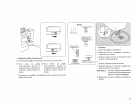
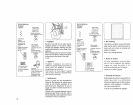
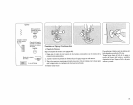
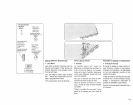
Q Sew a Button
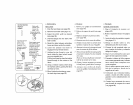
Drop the feed dogs (see page 66).
1. Match the center of the buttonholes to the center of the slot on the presser foot.
2. Adjust the stitch width so that needle will drop in each hole.
3. Lower the toot to hold the button in place,
Turn the hand wheel by hand so that needle will enter either hole of the button,
4. Stitch several times.
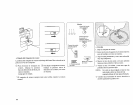
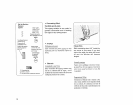
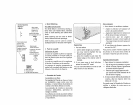
To strengthen the shank, cut the threads
leaving an 8-tail. Bring the needle
thread down through the hole in the
button and wind it around the shank.
Draw the thread to the bottom side and
knot.
When finished, raise the teed dogs (see
page 66).
74
Points zigzags (Suite)
• Pose des boutons
Rentrez tes griffes d' entrabzement (votr page 67).
t. Alignez te centre des trous du bouton avee ie centre de ia fente i_ mYme le pzed
presseur.
2. R_glez le S_lecteur de Iargeur de point pour que l'atguille descende dans ehaque
trou du botttotL
3. Abatssez le pied presseur pour que celtti-ci maintienne le bonton en place.
Faites tourner manueItement te volant pour qne l' atguille entre dans l'un ou
l'autre trou da bouton,
4. Effectuez phtsteurs mqares.
Pourfaire un e tige sous le bouton, coupez
ies ills d 8 po.. Glissez le fiI d'atguille
dans ttn trou et entourez la queue.
Passez 1efil sous le t_ssu et nouez-le.
Zorsque volts avez termine, sortez, les
griffes d' entrabtement (voir page 67).