7.0 Installation
22
© Baxi Heating UK Ltd 2009
7.2 Flue System (cont.)
8. It is recommended that the Pull Cone Flue Adaptor
(part no. 720111801) is used as shown to ease the
fitting of the flue into the chimney and prevent damage
to the adaptor.
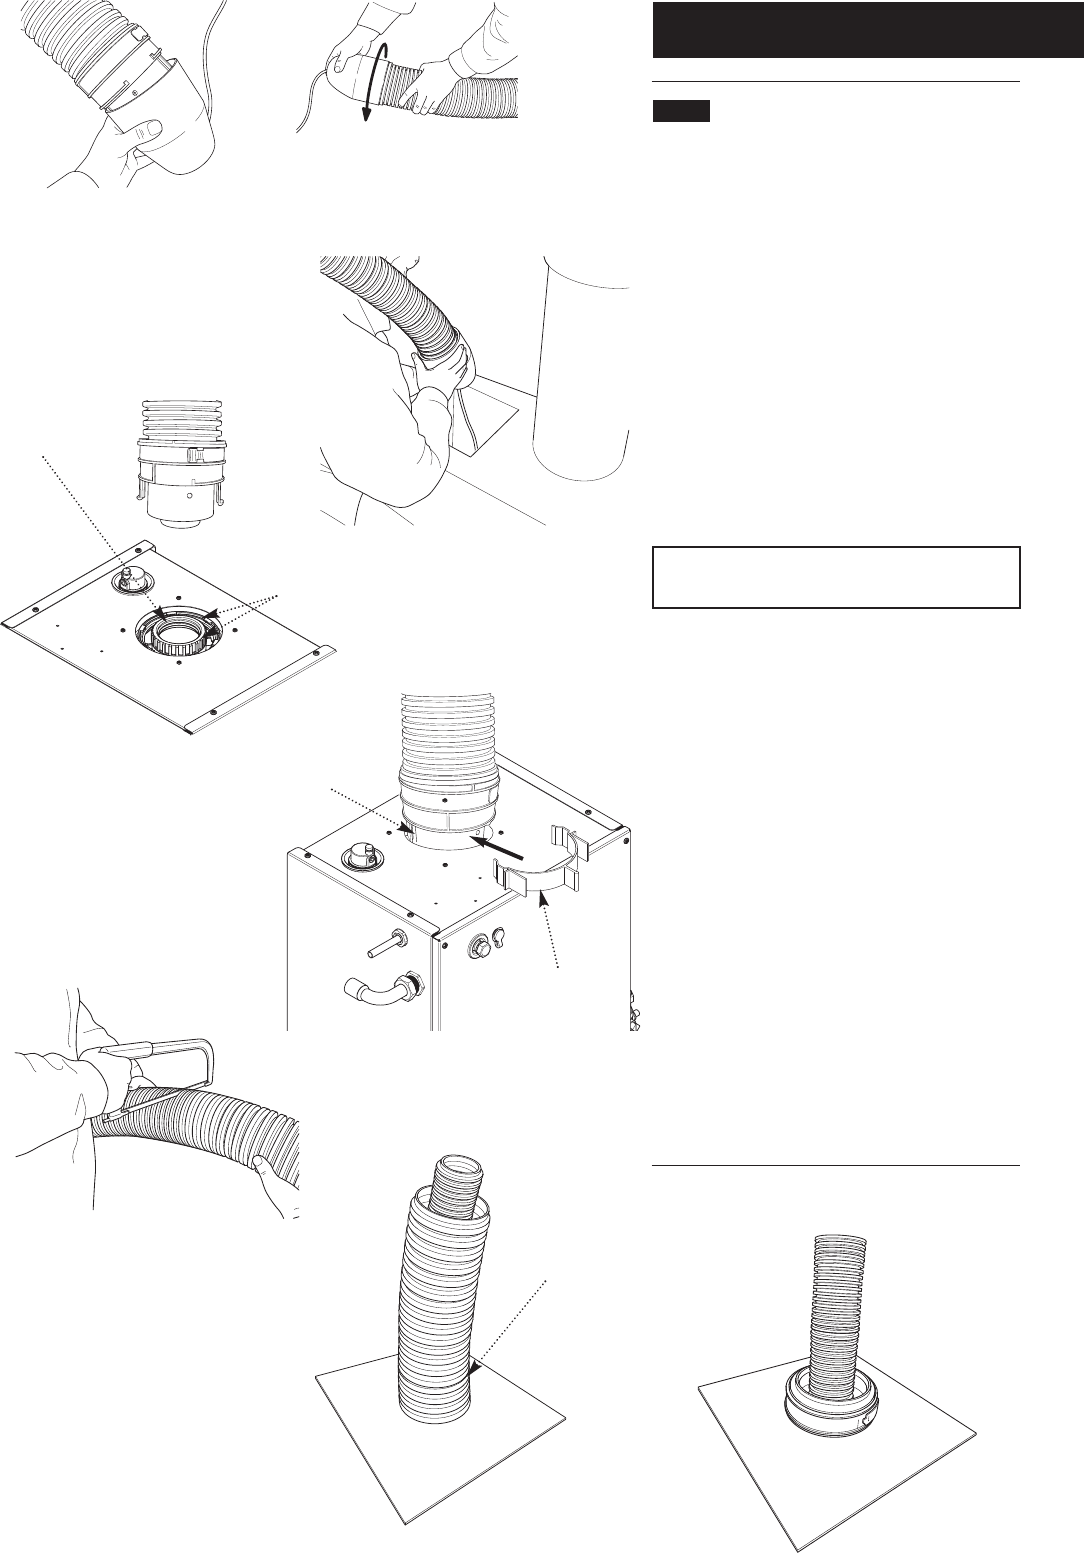
9. The cone has two internal lugs that engage on the
boiler adaptor in a bayonet action (Figs. 21 & 22).
10. A suitable weight should then be tied to the guide
rope fixed to the cone. The weight can then be passed
into the chimney and will draw the guide rope down
(Fig. 23).
11. Once the Pull Cone is visible in the builders opening
it can be removed. It can be re-used indefinitely on
other installations.
Note: It is recommended that the boiler is installed
at this point. See Sections 8.3 to 8.7
12. Remove the plastic plug from the boiler flue outlet.
Grasp the adaptor and locate it into the boiler, ensuring
the two large barbs lock into position under the boiler
top panel (Fig. 24) Fit the ‘C’ clip to the adaptor to
secure the flue. It must fit into the barbs and clip
securely into place (Fig. 24a).
13. There will now be an excess of flue and air duct
protruding from the chimney.
14. Cut the excess concentric ducts to leave
approximately 300 to 500mm protrudung from the
chimney and pass the square closure plate over the air
duct (Figs. 25 & 26).
15. Cut the 100mm air duct ONLY that 5 ‘ribs’ are
above the level of the chimney, taking care not to
damage the 60mm flue duct.
16. In a similar way to fitting the boiler adaptor fit the
air duct clamp to the air duct. This will prevent the duct
falling back into the chimney (Fig. 27).
Fig. 21
Fig. 22
Fig. 23
Fig. 24
Fig. 25
Fig. 26
Fig. 27
Cut to leave
5 ribs visible
Remove plug
from here
Fig. 24a
Barb
NOTE: These seals
factory lubricated
‘C’ Clip


