28
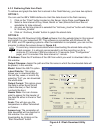
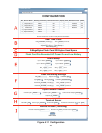
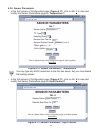
Example: If High/Low is selected, the temperature will be monitored against these two
High and Low values. If temperature goes above High value (082.5), Relay 1 will be
energized, and if temperature goes below Low value (032.5) Relay 1 will be energized.
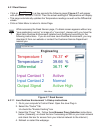
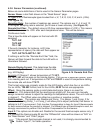
Input 1 Status: Unlatch, Latch, Clear Latch, Chart SP
Input 2 Status: Unlatch, Latch, Clear Latch, Chart SP
Unlatch: The relay in the iSE will be turned on (closed) when the Temperature 1 and/or
Temperature 2 values fall outside of Setpoint range. When the Temperature 1 and/or
Temperature 2 values are back within the range, the relay will be turned off (opened).
Latch: The relay in the iSE will be turned on (closed) when the Temperature 1 and/or Temper-
ature 2 values fall outside of Setpoint range and will remain on until the user turns it off.
Clear Latch: This option will clear the latch, meaning the activated alarm will be disabled.
Chart SP: Selecting this option will add the setpoints to the ”Chart”.
SP1_L, SP1_H and SP2_L, SP2_H: Editable box for Setpoint values. The format is
nnn.n, it must be followed exactly otherwise the modification will not take place for any
modified item in the Alarm Setup.
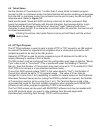
F) Flash Recording
Title: Editable field with up to 16 characters long. The given name will display as a title
on the “Chart” and “Read Sensor” pages either for the real-time data or the stored data.
Degree Unit: The unit of temperature either in degree Fahrenheit or degree Centigrade.
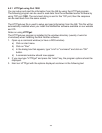
LCD/PWR: The selections are “ON ”, “OFF ”, and “UPS”. Selecting “OFF” will cause
the LCD to turn off during a power outage, provided the battery is connected. The
current consumption is about 1.5 mA or 3 mA depending on “OFF ” or “ON ” selection
respectively. If recording is “ON “, depending on the recording interval, the LCD will be
updated every 10 seconds or 1 minute. Therefore, when the LCD is set to “ON ”, it
could take some time before the LCD is turned on. If recording is not “ON “, the LCD
will be updated every 10 seconds.
Selecting “UPS” puts the iSE into full operational mode when it’s running on the battery
(S5 jumper needs to be installed, see Section 2.4 and 2.7). This means that in case of
power outage, sensing, recording, LCD display, and network communication
capabilities of the iSE will all operate on the battery. Due to heavy power consumption
the battery will not last more than an hour.
Type: The selections are: “Limited”, “Wrap”, or “Nonwrap”.
Limited: You must define the Start Date and Time, and End Date and Time in which
you need the recording to be done.
Wrap: You only need to define the Start Date and Time. The iSE will record data until the
Flash is full, then the iSE will continue to record and overwrite the existing data.
Nonwrap: You only need to define the Start Date and Time. The iSE will record data
until the Flash is full, then the iSE will stop recording.
Interval
: The recording interval at which the temperature is being stored into the Flash
Card. The selections are “10 seconds“ and “1 minute“.
To avoid any miscommunications when downloading the stored data using the
iFlash program or from the “Chart” page, it is strongly recommended to let the
recording run for a minimum of 3 minutes if the time interval is 10 seconds (from
the “Configuration” page), and 15 minutes if the time interval is 1 minute.
Activation:
The selections are “Status/RTC/Alarm”, “Start Recording ”,
“Configuration”, “Stop Recording ”and “Reset”. Refer to previous scenarios #1 and #2
at the beginning of this Section 4.3.5 for more details.


