Page 41
Accessory Terminals
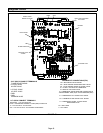
One line voltage “ACC” 1/4” spade terminal is provided on
the furnace integrated control. See figure 65 for integrated
control configuration. This terminal is energized when the
indoor blower is operating. Any accessory rated up to one
amp can be connected to this terminal with the neutral leg
of the circuit being connected to one of the provided neutral
terminals. If an accessory rated at greater than one amp is
connected to this terminal, it is necessary to use an exter
nal relay.
An unpowered, normally open (dry) set of contacts with a
1/4” spade terminal “HUM” are provided for humidifier con
nections and may be connected to 24V or 120V. Any hu
midifier rated up to one amp can be connected to these ter
minals. In 120V humidifier applications the neutral leg of
the circuit can be connected to one of the provided neutral
terminals. This terminal is energized in the heating mode.
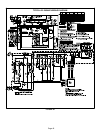
Install the room thermostat according to the instructions
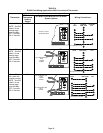
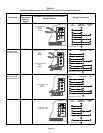
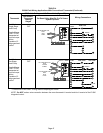
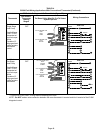
provided with the thermostat. See figure 64 for thermostat
designations. If the furnace is being matched with a heat
pump, refer to the FM21 installation instruction or appropri
ate dual fuel thermostat instructions.
Indoor Blower Speeds
1 - When the thermostat is set to “FAN ON,” the indoor
blower will run continuously on the field selectable fan
speed (“LOW HEAT” is default) when there is no cool
ing or heating demand.
2 - When the EL296UHE is running in the heating mode,
the indoor blower will run on the 'LOW HEAT” or “HIGH
HEAT” speed per demand.
3 - When there is a cooling demand, the indoor blower will
run on the “LOW COOL” or “HIGH COOL” speed per
demand.
Generator Use - Voltage Requirements
The following requirements must be kept in mind when
specifying a generator for use with this equipment:
D The furnace requires 120 volts +
10% (Range: 108
volts to 132 volts).
D The furnace operates at 60 Hz +
5% (Range: 57 Hz to
63 Hz).
D The furnace integrated control requires both polarity
and proper ground. Both polarity and proper grounding
should be checked before attempting to operate the
furnace on either permanent or temporary power.
D Generator should have a wave form distortion of less
than 5% THD (total harmonic distortion).
On-Board Links and Diagnostic Push
Button (Figure 65)
WARNING
Carefully review all configuration information pro
vided. Failure to properly set DIP switches, jumpers
and on-board links can result in improper operation!
On-Board Link W914 Dehum
On-board link W914, is a clippable connection between ter
minals R and DS on the integrated control. W914 must be
cut when the furnace is installed with a thermostat which
features humidity control. If the link is not cut, terminal “DS”
will remain energized not allowing the blower to reduce to
low cool speed upon a call for dehumidification.
On-Board Link W951 Heat Pump (R to O)
On-board link W951 is a clippable connection between ter
minals R and O on the integrated control. W951 must be cut
when the furnace is installed in applications which include a
heat pump unit and a thermostat which features dual fuel
use. If the link is left intact, terminal “O” will remain ener
gized eliminating the HEAT MODE in the heat pump.
On-Board Link W915 2 Stage Compr (Y1 to Y2)
On-board link W915 is a clippable connection between ter
minals Y1 and Y2 on the integrated control. W915 must be
cut if two-stage cooling will be used. If the Y1 to Y2 link is
not cut the outdoor unit will operate in second-stage cool
ing only.
Diagnostic Push Button
The diagnostic push button is located adjacent to the
seven-segment diagnostic LED. This button is used to en
able the Error Code Recall “E” mode and the Flame Signal
“F” mode. Press the button and hold it to cycle through a
menu of options. Every five seconds a new menu item will
be displayed. When the button is released, the displayed
item will be selected. Once all items in the menu have been
displayed, the menu resumes from the beginning until the
button is released.


