


Mighty Mule 352
29
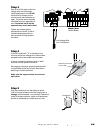
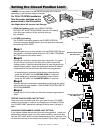
Fully Open Position
Fully Closed Position
Setting the Closed Position Limit
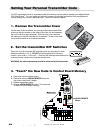
1
ON
2 3 4
15
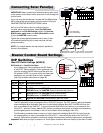
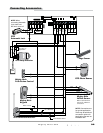
CHARGING
POWER
STATUS
RF
PULL-PUSH
MODE1
MODE2
LOCK/BEACON
OFF 120
MIN MAX
STALL FORCE
CLOSE TIME
SET
LIMIT
LEARN
REMOTE
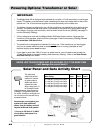
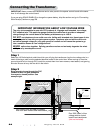
AUX OUT
SOLAR
PANEL
18VAC
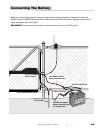
RECR
GRN
BLK
RED
EXIT
SAFETY
EDGE
CYCLE
COMMON
LINK
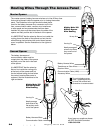
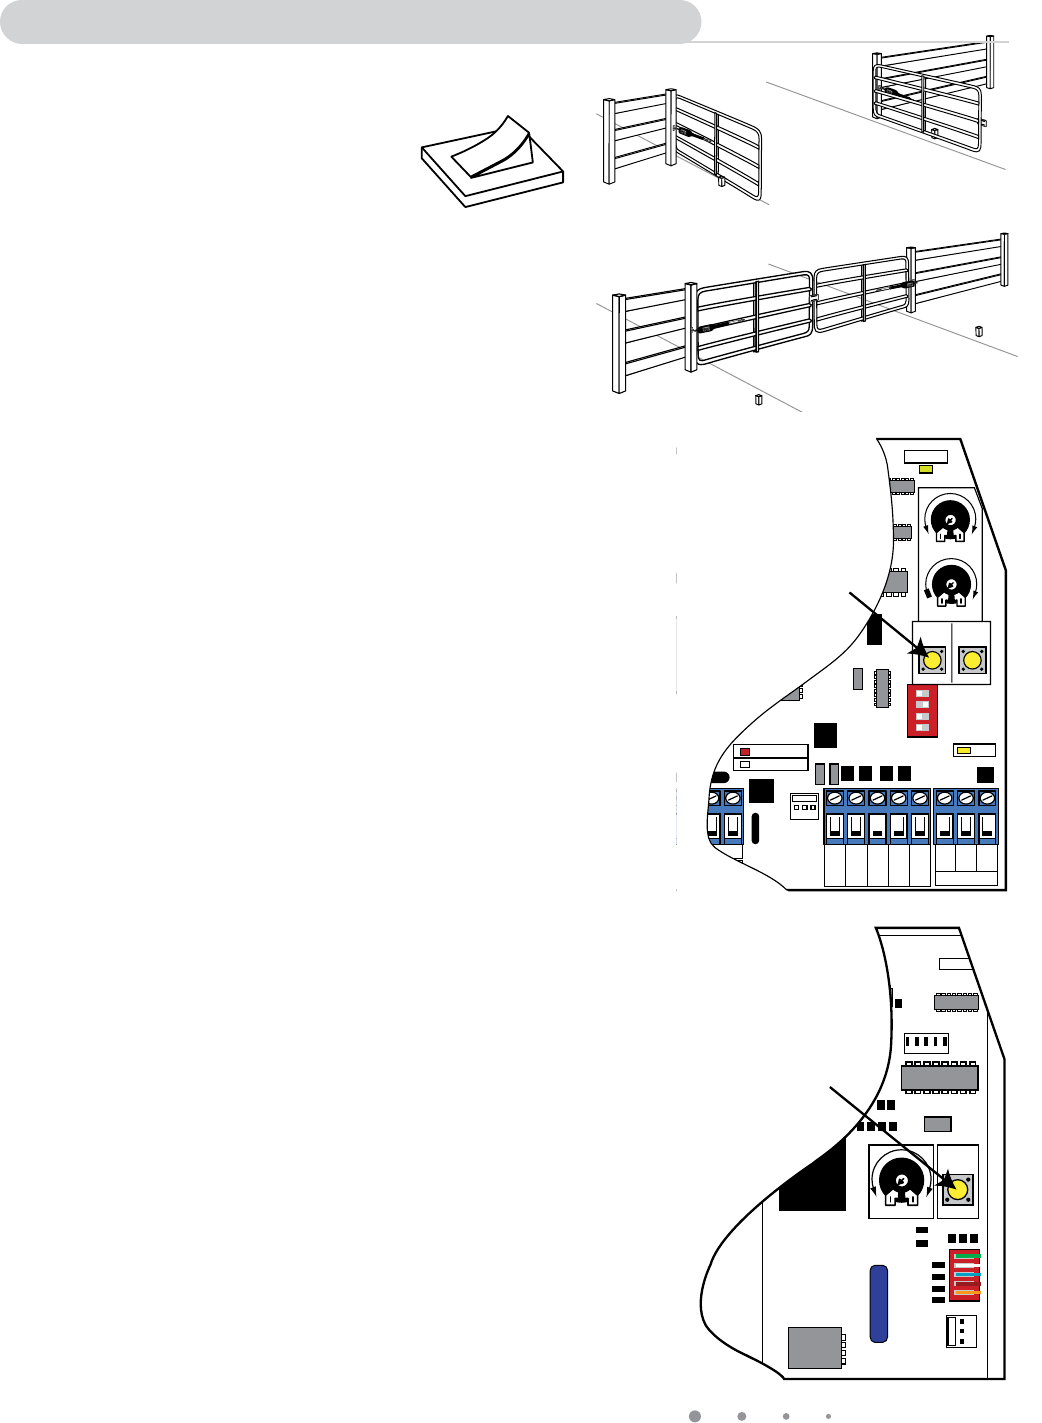
SET LIMIT Button
MASTER CONTROL BOARD
SET LIMIT Button
SECOND CONTROL BOARD
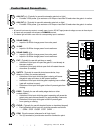
15
STATUS
MIN
MAX
STALL FORCE
SET
LIMIT
LINK
ON/OFF
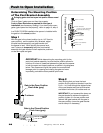
Turn the power switches on the
opener arms to the ON position
For PULL-TO-OPEN Installation
* NOTE: You may need to set the stall force slightly off of minimum
depending on the size and weight of the gate.
Your Mighty Mule 352 has two Limit Settings
1) OPEN Limit setting: (gates in the OPEN POSITION /
FACTORY SET & NOT ADJUSTABLE) The open limit setting
is the fully open position. At this point the arms are
fully retracted.
2) CLOSED Limit setting:
The CLOSED Limit setting (gates in the CLOSED POSITION)
To achieve optimum closed position, you are required to complete
the following FOUR STEPS:
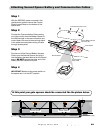
Step 1
While programming, be sure the gate is in the OPEN POSITION and
the operator is mounted upside-down with “SET LIMIT" PROGRAM
BUTTON visible on the control board.
Step 2
Activate your opener by pressing the entry transmitter. Your gates
should now be moving from the fully open position toward the
closing position. Press the transmitter again to stop the gate at the
desired closed position. Note: whichever gate reached its desired
closed position first that will be the first one to be programmed.
• If the second arm is stopped at the desired closed position,
press the 'SET LIMIT' on the SECOND ARM for 5 seconds.
• If the master arm is stopped at the desired closed postion,
press the 'SET LIMIT' on the MASTER ARM for 5 seconds.
Step 3
Save the setting by pressing the transmitter and allowing the gate to
return to the fully open position. YOUR CLOSED POSITION LIMIT IS
NOW PROGRAMMED.
Step 4
Repeat step 2-3 for the other arm that has not been programmed in
step 2.
TESTING YOUR CLOSED LIMIT SETTING:
Press your entry transmitter and allow your gate to close. If CLOSED
position is not correct or needs to be changed you will need to CLEAR
your CLOSED LIMIT (see below) setting and follow steps 1 through 3
again.
CLEARING PROGRAMMED CLOSED LIMIT SETTING:
If you make a mistake and set the limit at the wrong position – press your
transmitter to return the gate to its fully opened position, then press and
hold the "SET LIMIT" button on the corresponding arm for 5 seconds. This
will clear the memory for the closed limit position. Follow Steps 1-3 again.