


16
Mighty Mule 352
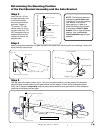
Mounting the Master Opener
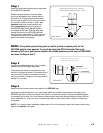
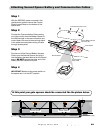
Step 11
Attach the opener to the securely bolted post bracket assembly and gate bracket using clevis pins, bushings, and
hairpin clips, or optional Pin Locks (see Accessory Catalog). Verify that the opener is level and adjust the post bracket
assembly if necessary.
Level Opener
Gate In Open Position
Post Bracket Assembly
bolted to fence post
Clevis Pin, Bushing, and Hairpin Clip
Clevis Pin, Bushing, and Hairpin Clip
Gate Bracket bolted
to gate cross member
Fence Post
LEVEL horizontal cross member
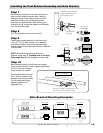
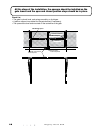
Mounting the Second Opener
Step 12
Install the second opener on the remaining gate leaf by repeating Step 3 through Step 11, starting on page
13. After you have mounted the second opener, proceed to Installing the Positive Stops.
1Z]aSR>]aWbW]\
Ab]^>ZObSa
5ObS6W\US
0/BB3@G0=F
5ObS6W\US
BVSUObSZSOTQO\]^S\
c^b]Ò[Of
=^bW]\OZ5`]c\RAb]^
PS\SObVUObS
BVSUObSZSOTQO\]^S\
c^b]Ò[Of
;/AB3@5/B3A31=<25/B3
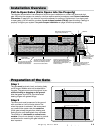
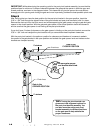
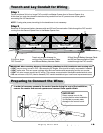
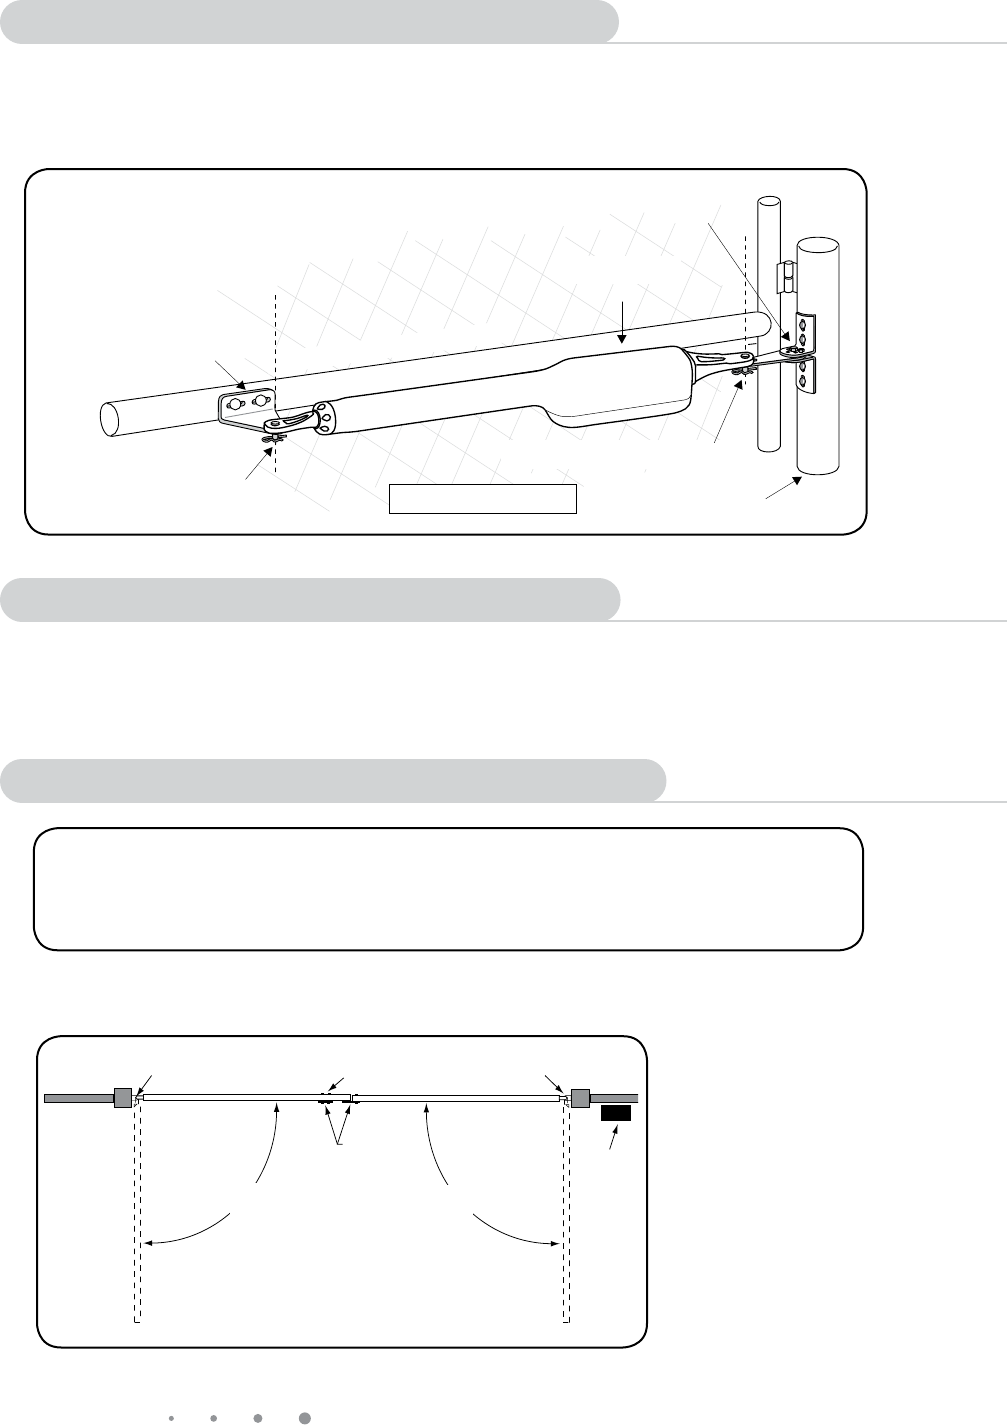
Installation of the Closed Position Stops
The Mighty Mule® 352 Gate Openers firmly hold the gates in the closed position using
positive stops. The positive stops help stabilize the gate leaves in the closed position.
To further enhance stability and security, we strongly recommended using an optional
Mighty Mule® Automatic Gate Lock (see Accessory Catalog) with your dual gate.
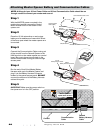
IMPORTANT: You need to
determine which side of the
driveway you will place the battery.
The MASTER gate and gate opener
should be mounted on the same
side as the battery. The gate and
gate opener on the opposite side
of the driveway from the MASTER
and battery will be referred to as the
SECOND gate and gate opener.
Illustration A