


8
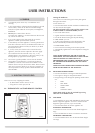
6. FLAME FAILURE DEVICE
6.1 This is a safety feature incorporated on this appliance which
automatically switches off the gas supply if the pilot goes
out and fails to heat the thermocouple.
7. RUNNING IN
7.1 ThesurfacecoatingonthemetalusedinyourGAZCOfire
will "burn off" during the first few hours of use producing a
harmless and temporary odour. This will disappear after a
short period of use. If the odour persists, ask your installer
for advice.
8. SERVICING
8.1 The fire must be serviced every 12 months by a qualified
Gas Engineer. In all correspondence always quote the
Model number and the Serial number which may be found
on the data badge.
9. VENTILATION
9.1 Any purpose provided ventilation should be checked
periodically to ensure that it is free from obstruction.
10. INSTALLATION DETAILS
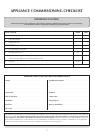
10.1 Your installer should have completed the commissioning
sheet at the front of this book. This records the essential
installation details of the appliance. In all correspondence
always quote the Model number and Serial number.
11. HOT SURFACES
11.1 Parts of this appliance become hot during normal use.
• Regardallpartsoftheapplianceasa‘workingsurface’
• Provideasuitablefireguardtoprotectyoungchildren
and the infirm
12. FIRE WILL NOT LIGHT
12.1 If you cannot light the Studio:
• CheckthattheemergencyshutoffswitchisintheON
(1) position, see Section 2, Emergency Shut Off
•Checkandchangethebatteriesintheremotehandset
• Checkandchangetheappliancebatteries,Section 4.
Consult your Gazco dealer if the Studio still does not light.
12
AR2124
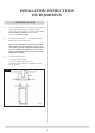
A
D
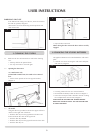
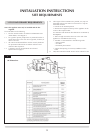
5.6 PutthegrooveinthebaseofLogEintotheindentonthe
rightofLogA.TheleftbranchrestsontheupperendofLog
C, Diagram 13.
13
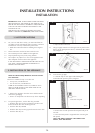
AR2125
A
E
5.7 LogFrestsagainstLogBatitsfarrightend,betweenLog
Bandthesidepanel.ThefrontendofLogFsitsonthe
front panel, see Diagram 14
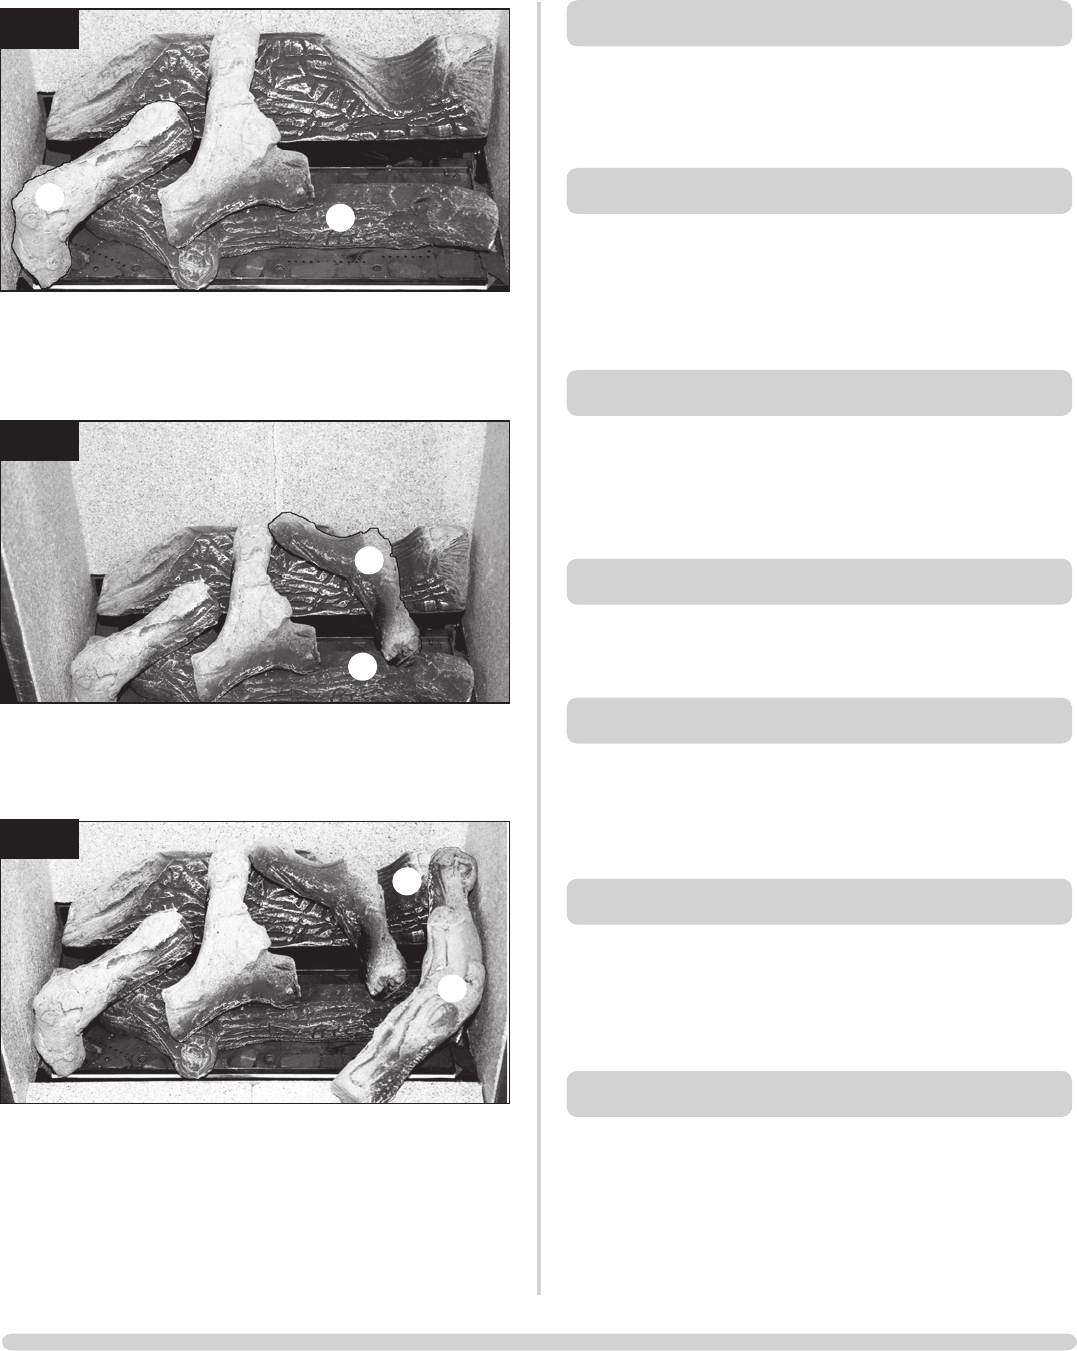
14
AR2126
B
F
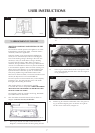
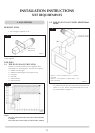
You must ensure the door catches are fully engaged:
• Slidetheallenkeyintothegapbetweenthedoorand
frame and locate the catch of the lower lock
• PushtheallenkeyDOWN
• Slidetheallenkeyintothegapandlocatetheupperlock
• PushtheallenkeyUP
USER INSTRUCTIONS