


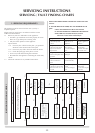
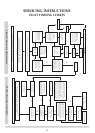

32
SERVICING INSTRUCTIONS
REPLACING PARTS
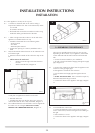
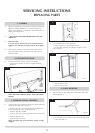
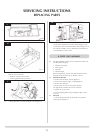
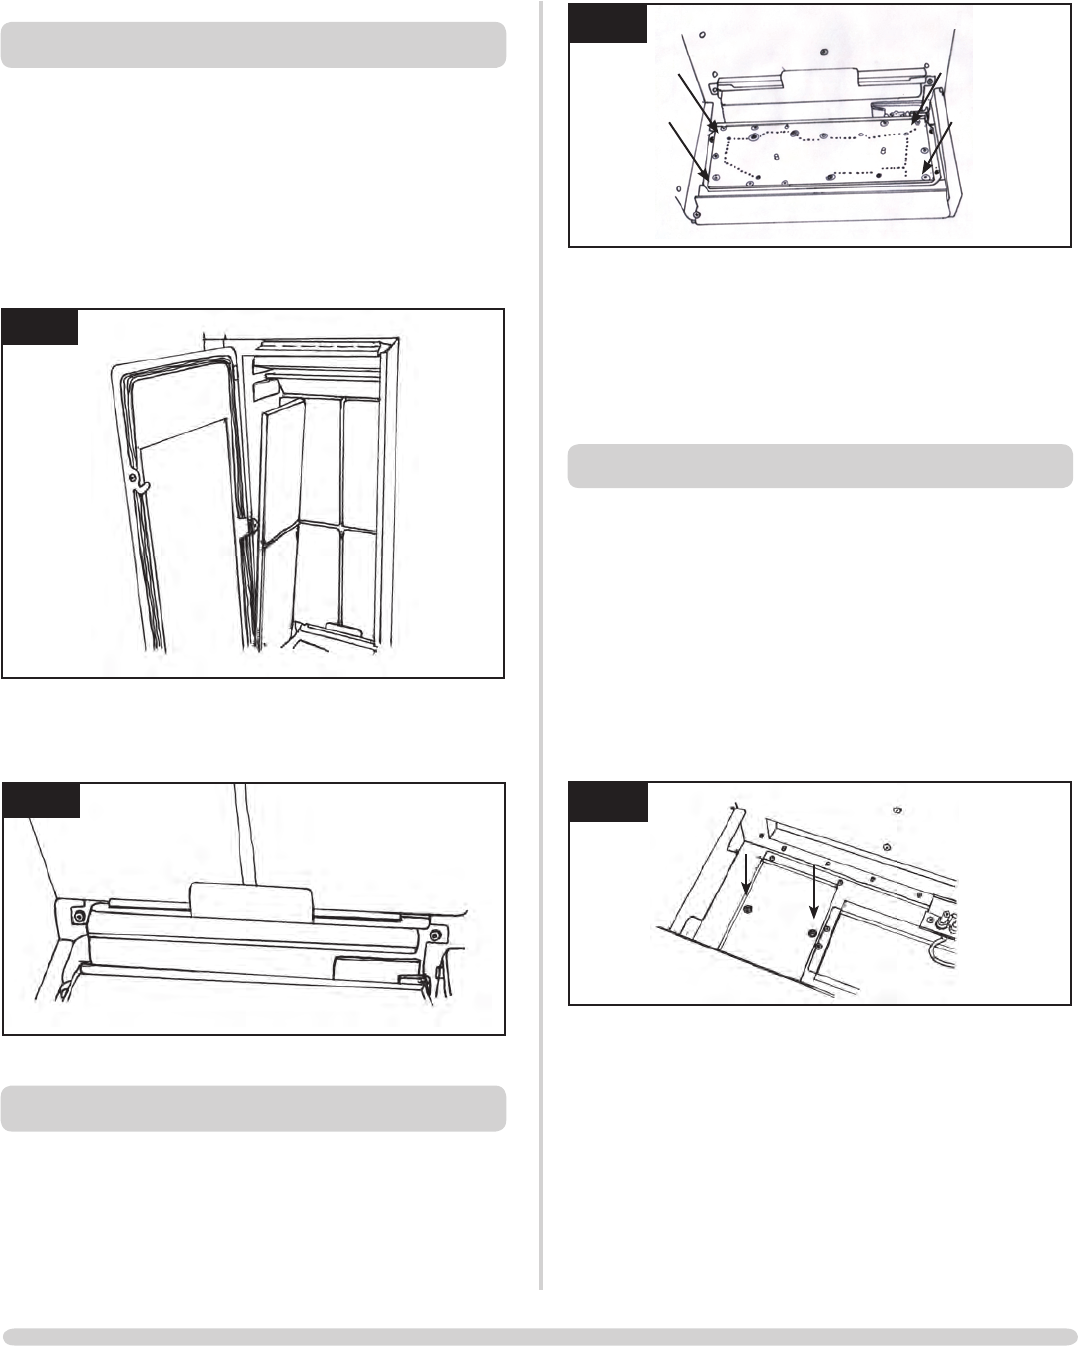
5. VERMICULITE PANELS
5.1 TAKE CARE WHEN HANDLING THE VERMICULITE
PANELS, THEY ARE FRAGILE.
Note: Make sure you support the back panel before removing
the second side panel in case the back falls forward
• Undotheclipsatthetopofthesidepanels
Whilesupportingtherearpanel:
• Removeeachsidepanelandplacetooneside
• Removethebackpanel
5
AR2138
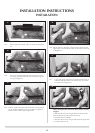
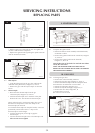
• Removethefrontlowerpanels
5.2 • Reassembleinreverseorder,ensuringthebottomedge
of the back panel is behind the Air Baffle, Diagram 6
6
AR2139
• Replacethesidepanels
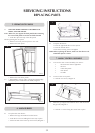
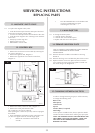
6. MAIN BURNER
6.1 To replace the main burner:
• Removethelogsandembersfromtheburner
• Undothefourscrewsholdingtheburnertrayinplace
• Lifttheleftsideoftheburnerupandoutfirst,Diagram7
7
AR2117
6.2 To replace the burner:
•Lowertheright-handsideovertheinjector
•Lowertheleftsidedown
•Insertthefourfixingscrewsandtighten
NOTE: Before replacing the burner, make sure the silicone seal
around the injector is intact.
7. MAIN CONTROL ASSEMBLY
7.1 To access the main control assembly, first remove:
• thedecorativeframeifapplicable
• thedoor
• vermiculitepanels
• mainburner
• airbaffle
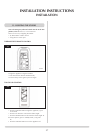
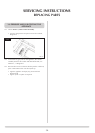
7.2 To remove the access panel:
• Undothetwoscrews,Diagram8
8
AR2129
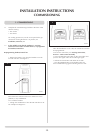
7.3 Isolate the gas supply at the isolation device and disconnect
the gas inlet, Diagram 9.
• Undothe13screwsfixingthecontrolunitinplace