


– 32 –
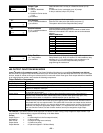
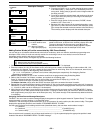
REPEAT OPTION
0-4 X
Repeat Option
0 = do not repeat
1 = repeat weekly
2 = repeat biweekly (every
other week)
3 = repeat every third week
4 = repeat every fourth week
Press [∗] to continue.
Enter the desired repeat option for this schedule.
e.g., To make a schedule that happens everyday you would
select all days with a repeat count of 1. To make a schedule that
runs for one week then stops, select everyday with a repeat
count of 0.
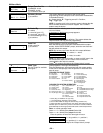
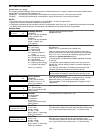
RANDOMIZE
0=NO 1=YES X
Randomize
0 = no
1 = yes
Press [∗] to continue and
return to ENTER SCHED
NO. prompt to program the
next schedule.
(For events 01 and 11)
If selected, the scheduled start and stop times will vary within 60
minutes of the “hour” time. For example, if a schedule is set to
start at 6:15pm, it will do so the first time 6:15pm arrives, but on
subsequent days it will start anytime between 6:00 and 6:59 p.m.
NOTE: Do not use the random option if the start and stop times
are within the same “hour” setting, otherwise unpredictable
results may occur (e.g., the randomized stop time may occur
before the start time).
AVS SYSTEM ENABLE and QUICK PROGRAMMING COMMANDS
Applies to an AVS system using an ECP connection to the control.
1. Install the AVS module according to its instructions.
2. Use one of the control’s AVS Quick Program commands as follows (see Quick Program Command Results below for
results of each command):
• installer code + [#] + 0 + 3: enable AVS operation without panel sounds on the AVST speaker
• installer code + [#] + 0 + 4: enable AVS operation and enable panel sounds on the AVST speaker
3. Use data field ∗55 Dynamic Signaling Priority to select the desired reporting paths (phone line and/or GSMV) and path for
AAV communication.
4. To undo the Quick Command programming, use the following commands:
• installer code + [#] + 0 + 5: remove all options that were set if [#] + 03 quick command was performed
• installer code + [#] + 0 + 6: remove all options that were set if [#] + 04 quick command was performed
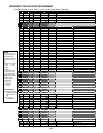
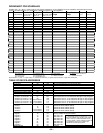
Quick Program Command Results
When either the #03 or #04 Quick Program command is used, the following are automatically programmed and no longer
available for other control panel purposes.
Pre-Programmed #03 Command #04 Command
Output Function No.
(∗80 mode)
FA148CP
22 (zone type 60, relay 07)
23 (zone type 61, relay 08)
24 (zone type 62, relay 08)
FA168CPS
46 (zone type 60, relay 15)
47 (zone type 61, relay 16)
48 (zone type 62, relay 16)
FA148CP
Same as #03 plus:
17 (zone type 14, relay 05)
18 (zone type 22, relay 05)
19 (zone type 39, relay 06)
20 (zone type 33, relay 06)
21 (zone type 22, relay 06)
FA168CPS
Same as #03 plus:
41 (zone type 14, relay 13)
42 (zone type 22, relay 13)
43 (zone type 39, relay 14)
44 (zone type 33, relay 14)
45 (zone type 22, relay 14
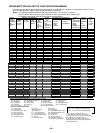
Output Relay No.
(∗79 mode)
07 (addr 08, relay pos 2)
08 (addr 08, relay pos 1)
15 (addr 11, relay pos 2)
16 (addr 11, relay pos 1)
Same as #03 plus:
05 (addr 08, relay pos 4)
06 (addr 08, relay pos 3)
Same as #03 plus:
13 (addr 11, relay pos 4)
14 (addr 11, relay pos 3)
Protection Zone
(∗56/∗58 mode)
4229 zn 24 (zt 81, addr 08) 4229 zn 48 (zt 81, addr 11) Same as #03 command Same as #03 command
Device Address address 08 (AVS module) address 11 (AVS module) Same as #03 command Same as #03 command
Data Field ∗91
AAV enabled AAV enabled AAV enabled AAV enabled
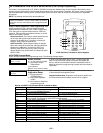
SETTING THE REAL-TIME CLOCK
IMPORTANT: The Real-Time Clock must be set before the end of the installation.
NOTE: All partitions must be disarmed before the date/time can be set.
1. Master Code + [#] + [6] [3]
2. Press [∗] when the time/date is displayed.
A cursor appears under the first digit of the hour.
To move cursor ahead, press [
∗
]. To go back, press [#].
• Enter the 2-digit hour setting.
• Enter the 2-digit minute setting.
• Press [1] for PM or [2] for AM.
• Enter the last two digits of the current year.
• Enter the 2-digit month setting.
• Enter the 2-digit day setting.
3. To exit, press [∗] when cursor is at the last digit, or wait 30 seconds.