


– 18 –
∗
∗∗
∗56 ZONE PROGRAMMING MENU MODE
(press *56 while in Program mode) The Zone Programming Worksheet is on page 36.
Zones and Partitions
Each protection zone needs to be programmed with various attributes using *56 Zone Programming mode or
✱
58 Expert
Programming Mode. Using this mode, enter the zone number to be programmed and make appropriate entries at the
prompts. Finally, Confirm the serial number of wireless transmitter zones.
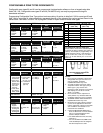
The FA168CPS system can control two independent areas of protection (known as partitions) for use by independent users, if
desired, by simply assigning zones to one or the other partition during zone programming. The FA168CPS, by default,
automatically distributes users between the two partitions. The master user can change the user number distributions.
Zones can also be assigned to a common partition, which is an area shared by users of both partitions (such as a lobby in a
building). This allows either partition to arm, while leaving the common partition disarmed for access into the other partition.
The following describes the functioning of the FA168CPS common partition:
• The common zone sounds and reports alarms only when both partitions are armed. If only one partition is armed, the
system ignores faults on the common zone.
• Either partition may arm its system if the common zone is faulted, but once armed, the other partition will not be able to arm
unless the common zone is first bypassed or the fault is corrected.
• Faults on the common zone are displayed on common zone keypads, and will also appear on another partition’s keypad
when that partition is armed.
• Either partition can clear and restore the common zone after an alarm.
∗
∗∗
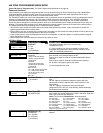
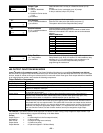
∗56 Menu Mode
PROMPT
VALID ENTRIES EXPLANATION
SET TO CONFIRM?
0 = NO 1 = YES 0
Confirm?
0 = no
1 = yes
[∗] to continue
This display appears upon entry into this mode.
The default is 0 (No).
If 1 (Yes) is entered, you will be prompted to confirm each
transmitter after entering the serial and loop numbers (at the
“XMIT TO CONFIRM” prompt later).
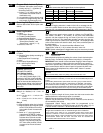
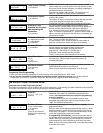
Enter Zn Num.
(00 = Quit) 10
Zone Number
FA168CPS:
wired 01-08 (and 09-48†);
wireless 09-48; RF button
zones 49-64
FA148CP:
wired 01-06 (and 07-22†);
wireless 09-34; RF button
zones 49-56
Both Controls:
91 = addr. device report enable
92 = duress report enable
95, 96, 99 =emerg. zones
[∗] to continue
00 to quit
Enter the zone number that you wish to program. Zone 10 has
been entered in the example display at left.
Enter a report code for zone 91 to enable addressable device
reporting.
Enter a report code for zone 92 to enable duress reporting.
95, 96, 99 are emergency (panic) key zones.
† if zone expanders are used.
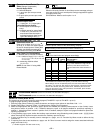
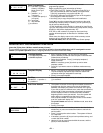
Zn ZT P RC In: L
10 00 1 10 RF: 1
Summary Screen
[∗] to continue
“IN: L” appears for wireless zones and indicates input type and
loop.
“IN: AD” appears for hardwire expansion zones (AW) and
indicates the module’s address (AD), which is based on the
zone number.
“HW: RT” appears for hardwire zones and indicates
configuration (EOL, NO, NC, zone doubling, double-balanced)
and response time selection.
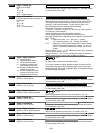
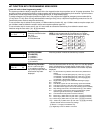
10 Zone Type
Perimeter 03
Zone Type (ZT)
See table at right.
Each zone must be assigned to a zone type, which defines the
wa
y
in which the s
y
stem responds to faults in that zone. Enter the
Zone Type code from the list below:
Note: If 00 is entered, Delete Zone ? will be displayed.
00 = Not used 07 = 24-Hr Audible 20 = Arm–STAY*
01 = Entry/exit #1 08 = 24-Hr Aux 21 = Arm–AWAY*
02 = Entry/exit #2 09 = Fire 22 = Disarm*
03 = Perimeter 10 = Interior w/Delay
23 = No Alarm Resp
04 = Interior Follower 12 = Monitor Zone 24 = Silent Burglary
05 = Day/Night 14 = Carbon Monoxide 77 = Keyswitch
06 = 24-Hr Silent 16 = Fire w/Verify 81 = AAV Mon. Zone
*5800 button-type transmitters only
10 Partition
1
Partition No. (P)
(FA168CPS)
1-3 = partition
(3 = common)
[∗] to continue
Enter the Partition number for this zone. Partition 1 is shown
entered.