


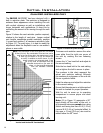
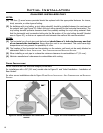
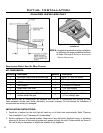
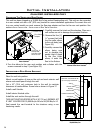

Figure 28: Cathedral Ceiling Support Box Leveling.
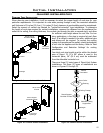
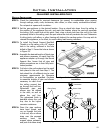
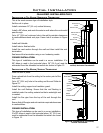
Figure 29: Cathedral Ceiling Support Box
Installation.
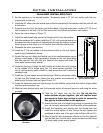
STEP 6. Complete the cathedral ceiling installation
by following the same procedures outlined
in Steps 4 through 9 for INITIAL INSTALLATION
- VERTICAL INSTALLATION.
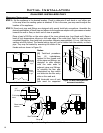
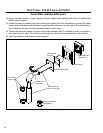
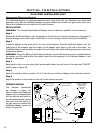
FREESTANDING DIRECT VENT KIT WITH COUPLER:
KIT COMPONENTS:
Quantity Description Quantity Description
1 Horizontal direct vent termination cap 1 Ø6” (17 cm) 90° elbow
2 Flue collar adapters (only one used) 4 Wire spacers
4 T-20 Torx screws 3 Decorative rings
1 Wall thimble 1 4 oz tube RTV silicone
1 Inside nish trim collar 20
9
/16” tech screws
8 1” wood screws 1 Vinyl siding deector
1
5’ (190 cm) length of Ø4” (10 cm)
double walled ex pipe
2
24” (61 cm) section of Ø6”
(17 cm) straight pipe
Please ensure that all components are supplied with this kit. If components are missing or have
been damaged, contact your dealer, distributor, or courier company. Do not attempt the installation if
components are missing or damaged.
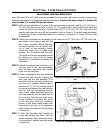
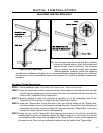
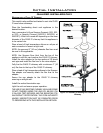
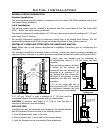
INSTALLATION INSTRUCTIONS:
1. Decide on a location for the unit that will meet any or all local code requirements. Refer “Planning
Your Installation” and “Clearances to Combustibles”.
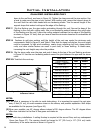
2. Set the appliance in the desired location. Determine if any wall studs, electrical wiring, or plumbing
pipes are in the way of the venting system as it passes through the wall. If obstructions are found in
the wall it may be necessary to adjust the location of the appliance.
22
Initial Installation
QUALIFIED INSTALLERS ONLY