


Site Preparation and Installation
23 Liebert
®
Mini-Mate2
™
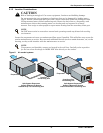
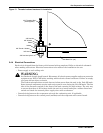
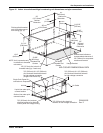
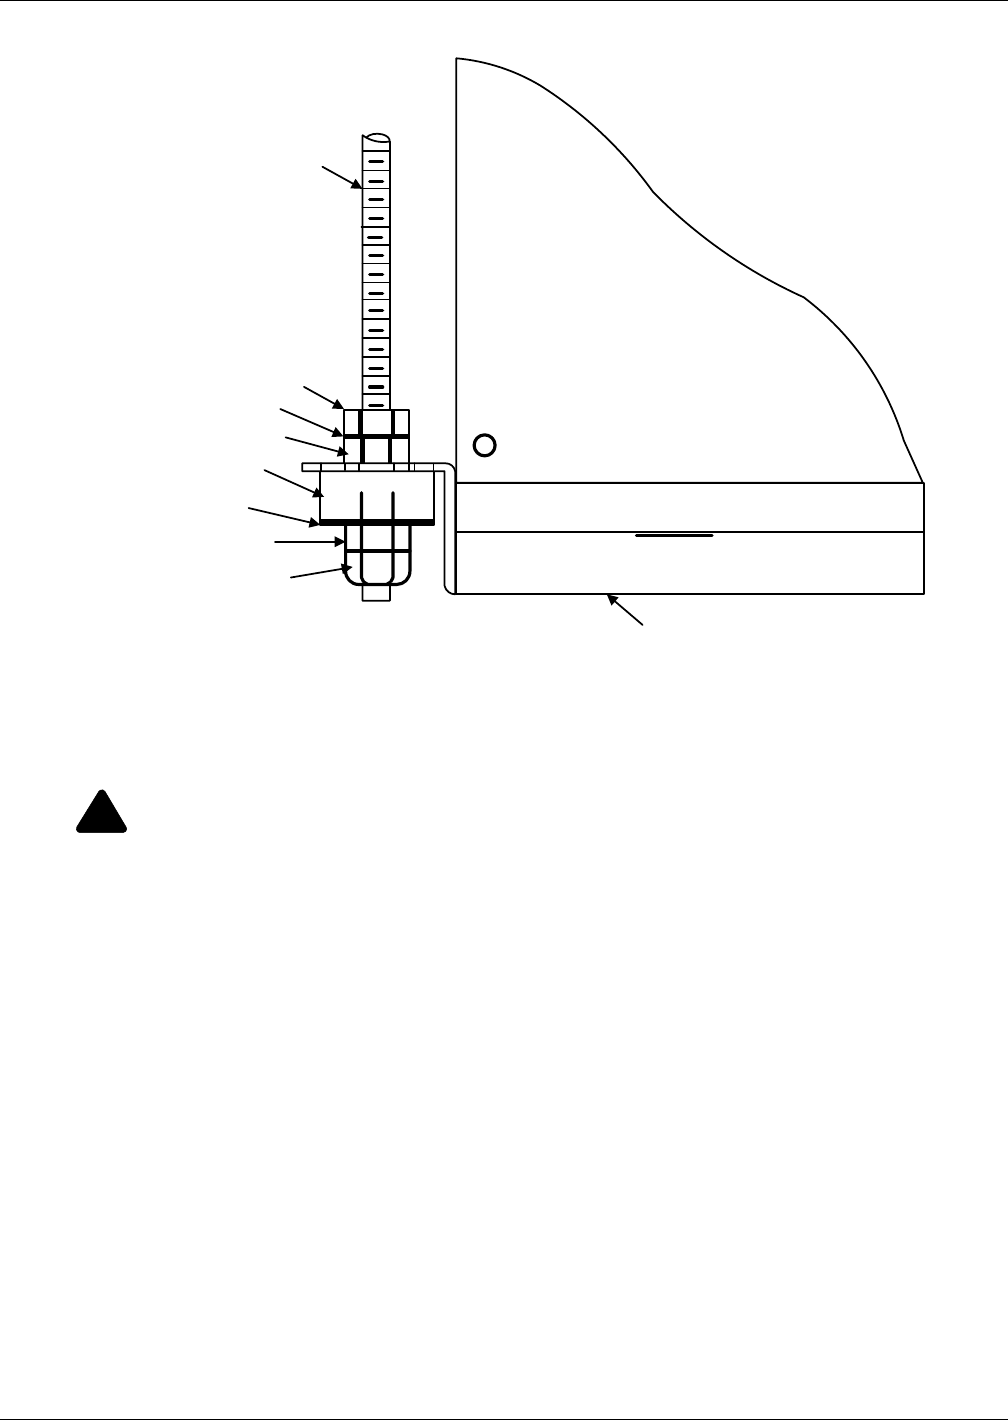
Figure 13 Threaded rod and hardware kit installation
5.4.4 Electrical Connections
Each unit is shipped from the factory with internal wiring completed. Refer to electrical schematic
when making connections. Electrical connections to be made at the installation site are:
• Power supply to each ceiling unit.
• Control wiring between the evaporator unit and the condensing unit, if applicable.
• Control wiring between the control panel (wallbox) and the evaporator unit control board.
!
WARNING
Arc flash and electric shock hazard. Disconnect all electric power supplies and wear protective
equipment per NFPA 70E before working within electric control enclosure. Failure to comply
can cause serious injury or death.
The Liebert microprocessor control does not isolate power from the unit in the Unit Off mode.
Some internal components require and receive power even during the Unit Off mode. The line
side of the disconnect switch on the front of the unit contains live high voltage. The only way
to ensure that there is NO voltage inside the unit is to install and open a remote disconnect
switch and check the internal power supply wires with a voltmeter.
3/8" Threaded Rod
(field-supplied)
3/8" Hex Nut
3/8" Washer
Sleeve
Isolator
3/8" Fender Washer
3/8" Hex Nut
3/8" Hex Nut Nylock
Unit Base Pan (ref)