


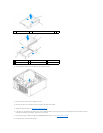
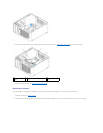
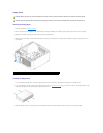
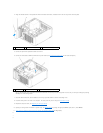


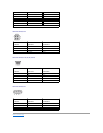
4. Align the shoulder screws on the optical drive with the shoulder screw slots, and slide the drive into the bay until it clicks into place.
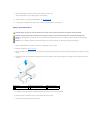
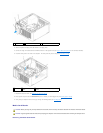
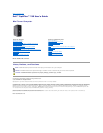
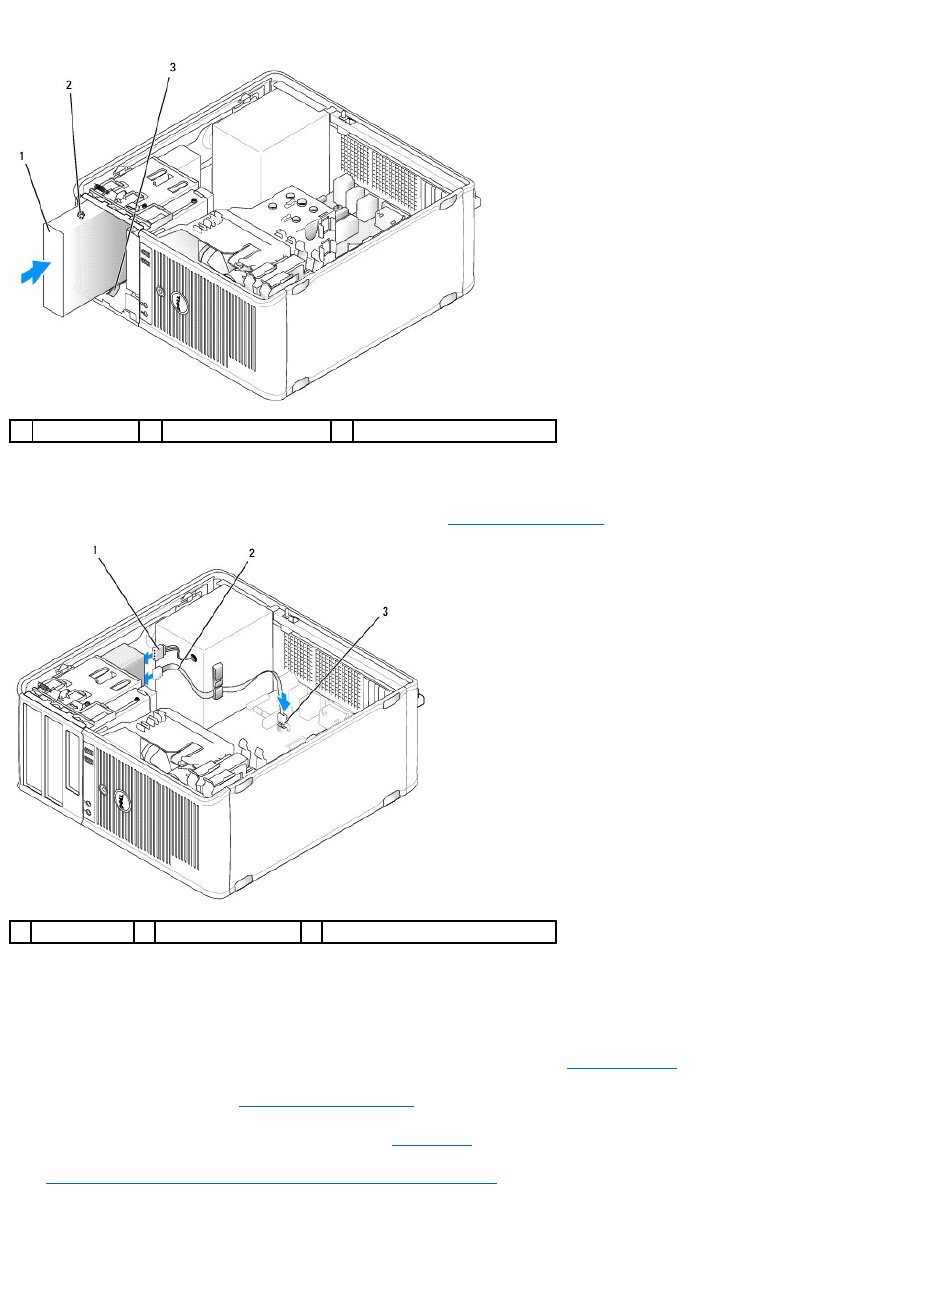
5. Connect the power and optical drive cables to the drive.
6. Connect the drive cable to SATA2 or SATA3 on the system board (see System Board Components for mini tower computers).
See the documentation that accompanied the drive and controller card to verify that the configuration is correct for your computer. Change any settings
necessary for correct configuration.
7. Check all cable connections, and fold cables out of the way to provide airflow for the fan and cooling vents.
8. Install the drive panel to the front of the computer. The drive panel only fits one way (see Drive-Panel Inserts).
9. Replace the computer cover (see Replacing the Computer Cover).
10. Update your configuration information in system setup (see System Setup) by setting the appropriate Drive option (0 or 1) under Drives.
11. Verify that your computer works correctly by running the Dell Diagnostics (see Dell Diagnostics).
2
1
3
1
optical drive
2
shoulder screws (3)
3
shoulder screw slots (2)
1
power cable
2
optical drive cable
3
optical drive connector (SATA)