


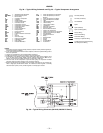
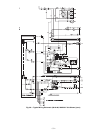
—26—
II. LUBRICATION
A. Compressors
Each compressor is charged with the correct amount of oil at
the factory. Conventional white oil (Sontex 200LT) is used.
White oil is compatible with 3GS oil, and 3GS oil may be
used if the addition of oil is required. See compressor name-
plate for original oil charge. A complete recharge should be
four ounces less than the original oil charge When a com-
pressor is exchanged in the field it is possible that a major
portion of the oil from the replaced compressor may still be
in the system. While this will not affect the reliablity of the
replacement compressor, the extra oil will add rotor drag and
increase power usage. To remove this excess oil, an access
valve may be added to the lower portion of the suction line at
the inlet of the compressor. The compressor should then be
run for 10 minutes, shut down and the access valve opened
until no oil flows. This should be repeated twice to make sure
the proper oil level has been achieved.
B. Fan Shaft Bearings
For size 155 units, bearings are permanently lubricated. No
field lubrication is required. For size 180 and 240 units,
lubricate bearings at least every 6 months with suitable
bearing grease. Extended grease line is provided for far side
fan bearing (opposite drive side). Typical lubricants are
given below:
*Preferred lubricant because it contains rust and oxidation inhibitors.
C. Condenser and Evaporator-Fan Motor Bearings
The condenser- and evaporator-fan motors have
permanently sealed bearings, so no field lubrication is
necessary.
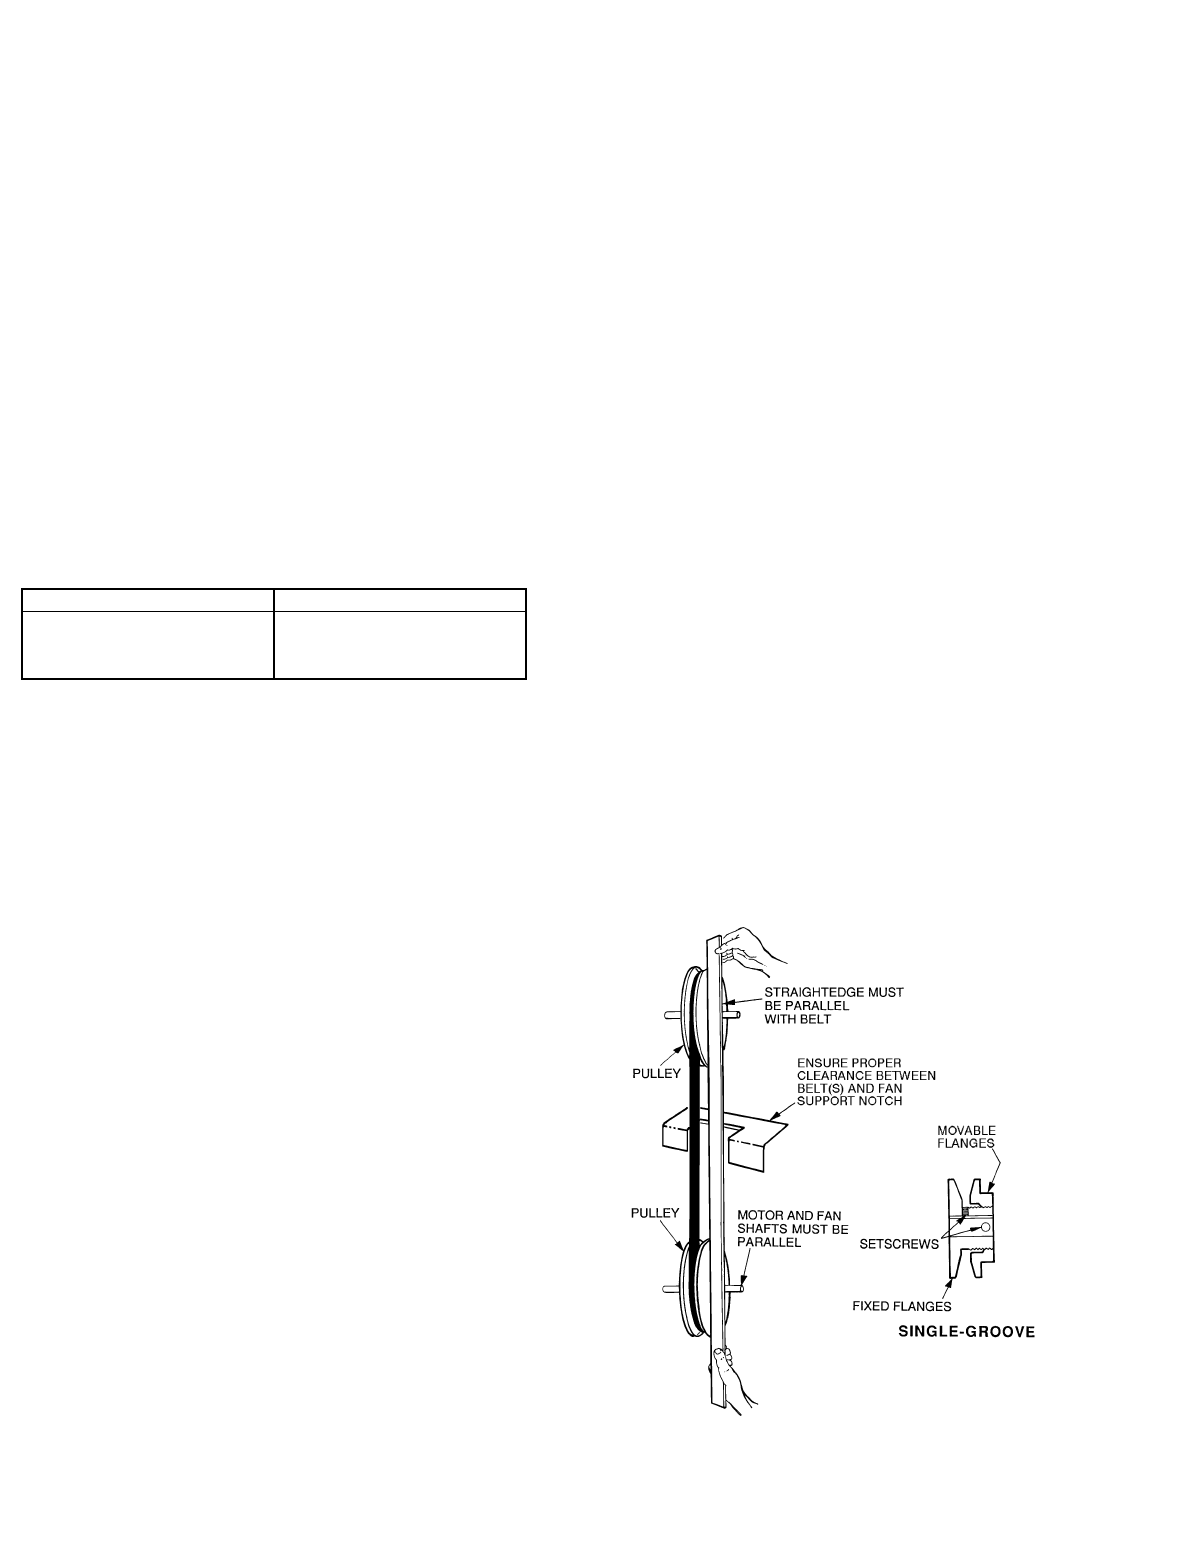
III. EVAPORATOR FAN PERFORMANCE ADJUSTMENT
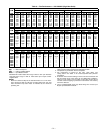
(Fig. 30-32)
Fan motor pulleys are factory set for speed shown in Table 1.
To change fan speeds:
1. Shut off unit power supply.
2. Size 155 only:
Loosen belt by loosening carriage nuts holding motor
mount assembly to fan scroll side plates (A and B).
Size 180, 240 only:
Loosen nuts on the 2 carriage bolts in the mounting
base. Install jacking bolt and plateunder motor base
(bolt and plate are shipped in installer’s packet).
Using bolt and plate, raise motor to top of slide and
remove belt. Secure motor in this position by tighten-
ing the nuts on the carriage bolts.
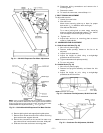
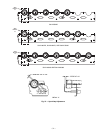
3. Loosen movable-pulley flange setscrew (see Fig. 30).
4. Screw movable flange toward fixed flange to increase
speed and away from fixed flange to decrease speed.
Increasing fan speed increases load on motor. Do not
exceed maximum speed specified in Table 1.
See Table 11 for air quantity limits.
5. Set movable flange at nearest keyway of pulley hub
and tighten setscrew. (See Table 1 for speed change
for each full turn of pulley flange.)
6. Replace and tighten belts (see Belt Tension Adjust-
ment section on page 27).
To align fan and motor pulleys:
1. Loosen fan pulley setscrews.
2. Slide fan pulley along fan shaft.
3. Make angular alignment by loosening motor from
mounting plate.
IV. EVAPORATOR FAN SERVICE AND REPLACEMENT
A. 581A155 Units (See Fig. 31)
NOTE: To remove belts only, follow Steps 1-6.
1. Remove filter and supply-air section panels.
2. Remove unit top panel.
3. Loosen carriage nuts A and B holding motor mount
assembly to fan scroll side plates.
4. Loosen screw C.
5. Rotate motor mount assembly (with motor attached)
as far as possible away from evaporator coil.
6. Remove belt.
7. Rotate motor mount assembly back past original
position toward evaporator coil.
8. Remove motor mounting nuts D and E (both sides).
9. Lift motor up through top of unit.
10. Reverse above procedure to reinstall motor.
11. Check and adjust belt tension as necessary.
B. 581A180 and 240 Units (See Fig. 32)
The 581A180 and 240 units use a fan motor mounting sys-
tem that features a slide-out motor mounting plate. To
replace or service the motor, slide out the bracket.
1. Remove the evaporator-fan access panel and the
heating control access panel.
2. Remove the center post (located between the evapora-
tor fan and heating control access panels) and all
screws securing it.
3. Loosen nuts on the 2 carriage bolts in the motor
mounting base.
4. Using jacking bolt under motor base, raise motor to
top of slide and remove belt. Secure motor in this
position by tightening the nuts on the carriage bolts.
5. Remove the belt drive.
MANUFACTURER LUBRICANT
Texaco
Regal AFB-2*
Mobil
Mobilplex EP No. 1
Sunoco
Prestige 42
Texaco
Multifak 2
Fig. 30 — Evaporator-Fan Alignment and Adjustment