


27
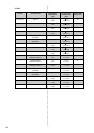
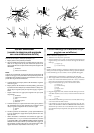
CONTENTS
KNOWING YOUR
SEWING MACHINE
STRAIGHT AND
ZIGZAG STITCHING
BUILT-IN STITCHES
BUTTONHOLE AND
BUTTON SEWING
USING ATTACHMENTS
AND APPLICATIONS
MAINTENANCE
INDEX
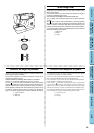
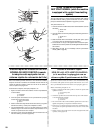
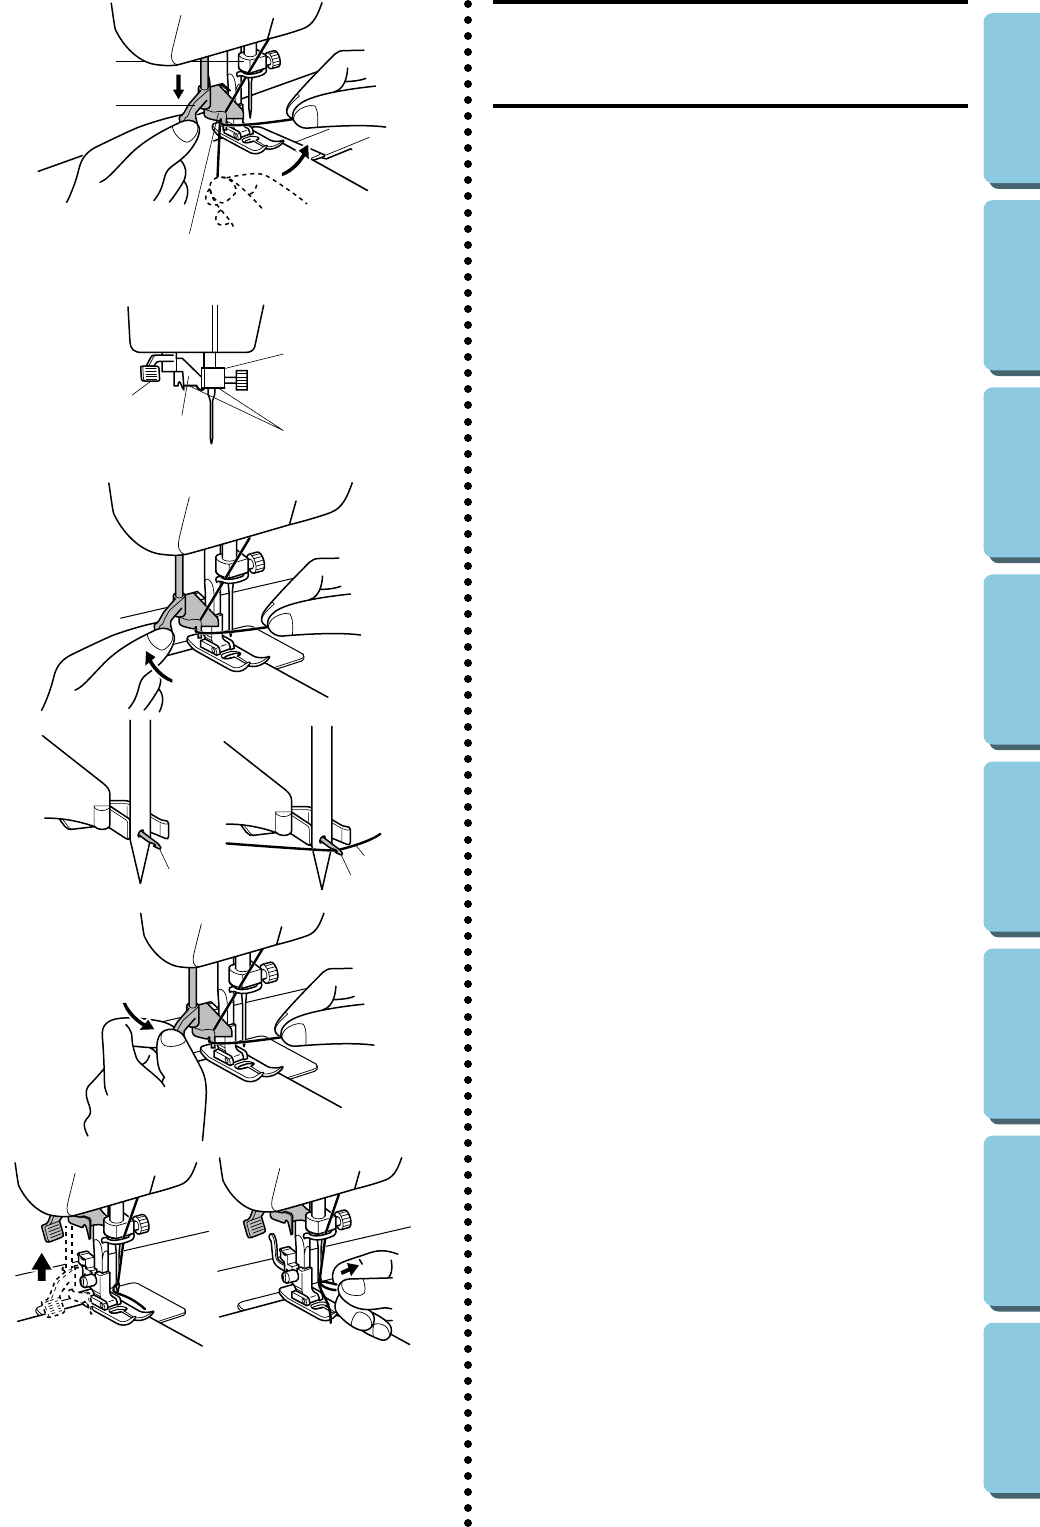
Using the Needle Threader
(when the machine is equipped with a
needle threader)
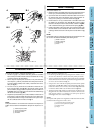
Turn power switch to “O”.
1. Lower the presser foot lever.
2. Turn the balance wheel toward you (counterclockwise) until the
bottom of the needle holder aligns with the bottom of the needle-
threading-hook holder.
1 Needle holder
2 Needle threader lever
NOTE:
When using the needle threader, be sure to align the bottom of the
needle holder with the bottom of the holder for the needle-threading
hook before lowering the needle threader lever. Otherwise, the hook
may be damaged.
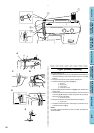
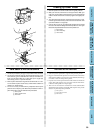
3. While lowering the needle threader lever, hook the thread onto the
guide.
4. Pull down the needle threader lever as much as possible, then ro-
tate the lever toward the back of the machine (away from you).
Make sure that the hook passes through the eye of the needle and
grabs the thread.
• Hold the thread in front of the needle in order to make sure that the
hook grabs it.
1 Needle holder
2 Needle threader lever
3 Guide
4 Hook holder
5 Align
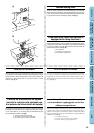
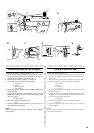
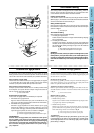
5. While lightly holding the thread, rotate the needle threader lever
toward the front of the machine (toward you). The hook will pull
the thread through the needle.
6 Hook
7 Thread
6. Raise the needle threader lever and pull out about 5 cm (2") of
thread through the needle toward the back of the sewing machine.
• Only use the needle threader with needle sizes #70 to #100. In
addition, refer to the CHART OF SEWING FABRICS, NEEDLES AND
THREAD COMBINATIONS to check that the appropriate thread
and needle are being used. When using transparent nylon thread,
use needles of sizes #90 to #100.
1
2
3
5
4
2
1
6
6
7