


23
CONTENTS
KNOWING YOUR
SEWING MACHINE
STRAIGHT AND
ZIGZAG STITCHING
BUILT-IN STITCHES
BUTTONHOLE AND
BUTTON SEWING
USING ATTACHMENTS
AND APPLICATIONS
MAINTENANCE
INDEX
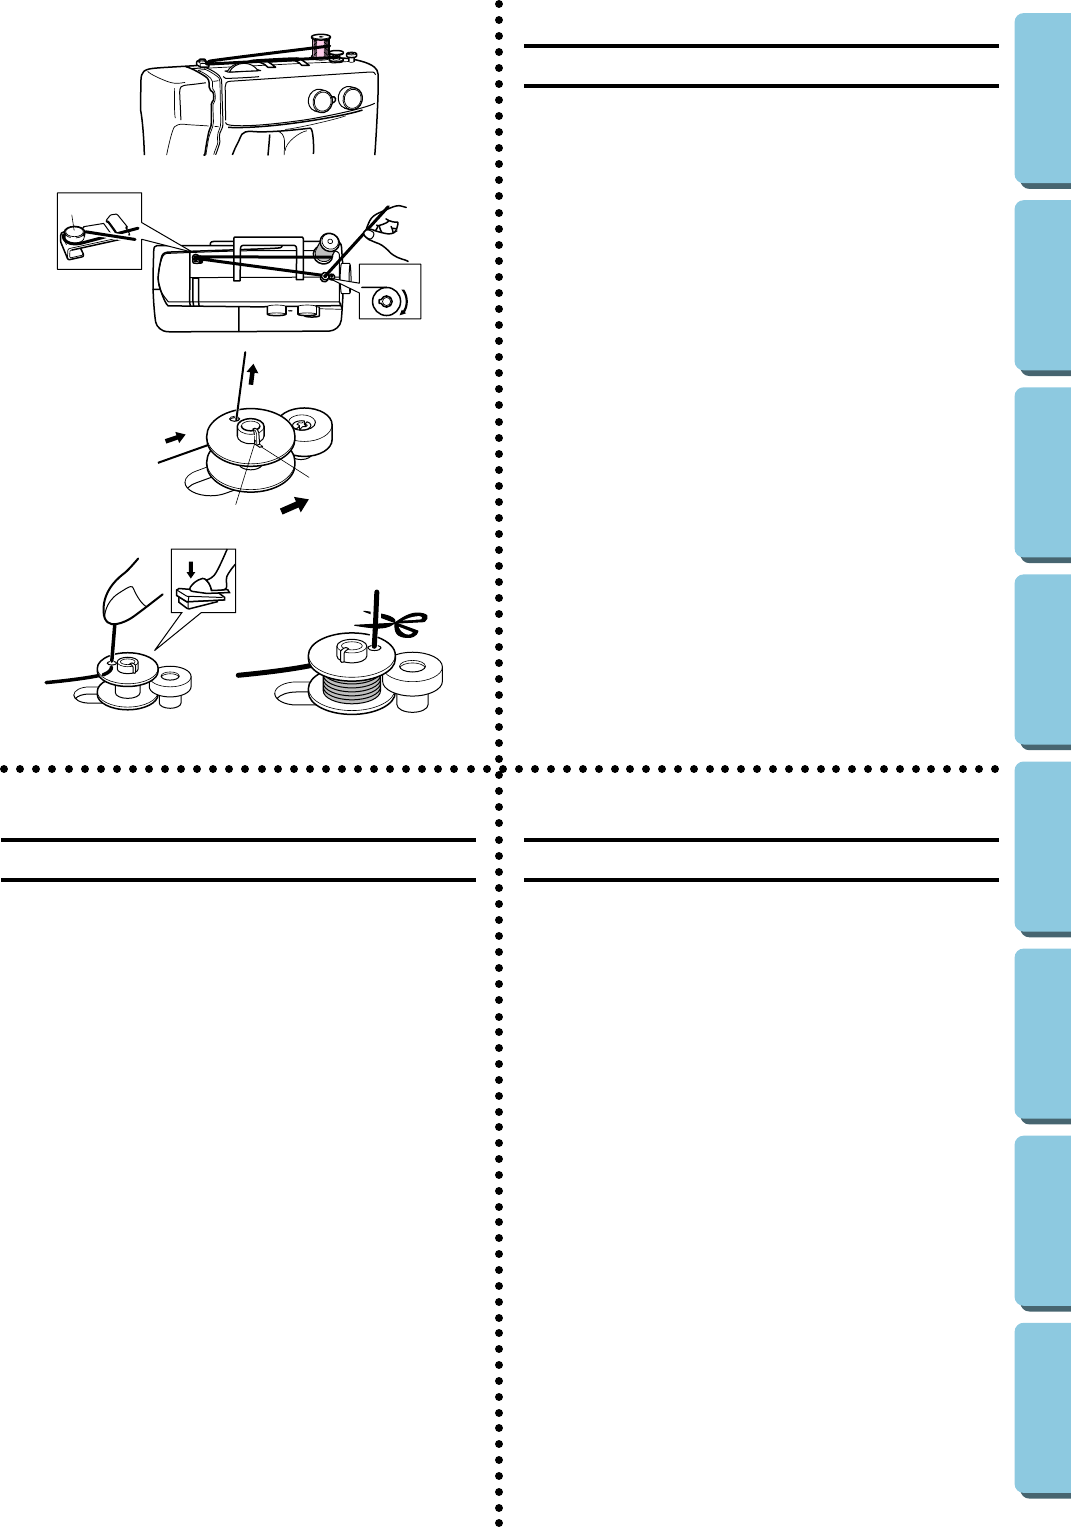
THREADING THE MACHINE
Winding the Bobbin
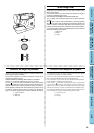
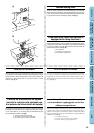
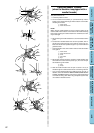
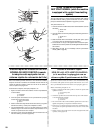
1. Place the spool of thread on the spool pin and pass the thread
around the bobbin winding tension disc.
1 Bobbin winding tension disc
2 Bobbin winding
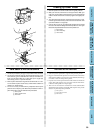
2. Pass the end of the thread through the hole in the bobbin from the
inside.
3. While turning the bobbin clockwise, slide it over the bobbin wind-
ing shaft so that the shaft spring slides into the slit in the bobbin.
Then, slide the shaft to the right.
3 Spring
4 Slit
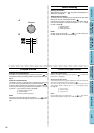
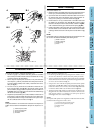
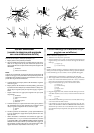
4. While holding the end of the thread, gently press on the foot con-
troller to wind the thread around the bobbin a few times, then stop
the machine.
5. Trim the excess thread sticking out from the top of the bobbin and
continue winding the thread onto the bobbin by pressing down on
the foot controller.
NOTE:
The machine stops automatically when the bobbin is full.
6. When the machine stops, cut the thread, push the shaft to the left
and remove the full bobbin from the shaft.
CAUTION:
Although the needle bar does not move when the bobbin winding
shaft is slid toward the bobbin presser, the balance wheel will con-
tinue to turn. Therefore, do not touch the balance wheel while the
bobbin is being wound.
3
4
2
1
ENHEBRADO DE LA MÁQUINA
Bobinado de la canilla
1. Coloque un carrete de hilo en el portacarretes y pase el hilo por
el disco de tensión de bobinado de la canilla.
1 Disco de tensión de bobinado de la canilla
2 Bobinado de la canilla
2. Pase el extremo del hilo por el orificio de la canilla a partir del
interior.
3. Mientras gira la canilla en sentido de las manecillas de un reloj,
deslice el eje hacia el eje de bobinado de tal forma que el muelle
impulsor del eje se deslice dentro de la ranura de la canilla. Des-
lice el eje hacia la derecha.
3 Muelle
4 Ranura
4. Sujetando el extremo del hilo, presione suavemente el pedal para
que el hilo efectúe un par de vueltas alrededor de la canilla y
pare la máquina.
5. Deshaga el exceso de hilo arriba de la canilla. Siga bobinando el
hilo en la canilla presionando el pedal.
NOTA:
La máquina se para automáticamente cuando la canilla está llena.
6. Cuando la máquina se pare, corte el hilo, empuje el eje hacia la
izquierda y retire la canilla llena del eje.
ATENCIÓN:
Aunque la barra de la aguja no se desplace cuando el eje de
bobinado de la canilla se desliza hacia el apretador de la canilla,
la ruedecilla va a seguir girando y no puede ser tocada mien-
tras la canilla está bobinando.
PROCEDURE DI INFILATURA
Avvolgimento della spoletta
1. Collocare il rocchetto di filo sul porta-rocchetto e far passare il filo in-
torno al disco di tensione avvolgimento spoletta.
1 Disco di tensione avvolgimento spoletta
2 Avvolgimento spoletta
2. Far passare l’estremità del filo attraverso la fessura della spoletta proce-
dendo dall’interno.
3. Ruotando la spoletta in senso orario, inserirla sull’alberino di
avvolgimento in modo che la molla dell’alberino si innesti nella scana-
latura della spoletta. Quindi spostare l’alberino verso destra.
3 Molla
4 Scanalatura
4. Tenendo l’estremità del filo, premere leggermente sul reostato per far
compiere al filo qualche giro intorno alla spoletta, quindi arrestare la
macchina.
5. Tagliare il filo in eccesso che fuoriesce al di sopra della spoletta e con-
tinuare ad avvolgere il filo intorno alla spoletta premendo sul reostato.
NOTA:
La macchina si arresta automaticamente quando la spoletta è piena.
6. Quando la macchina si è fermata, tagliare il filo, spingere l’alberino
verso sinistra ed estrarre la spoletta avvolta dall’alberino.
ATTENZIONE:
Quando l’alberino di avvolgimento spoletta è spostato verso il premi-
spolina, la barra dell’ago non si muoverà, ma il volantino continuerà a
girare. Pertanto, evitare di toccare il volantino durante la fase di
avvolgimento della spoletta.