


25
CONTENTS
KNOWING YOUR
SEWING MACHINE
STRAIGHT AND
ZIGZAG STITCHING
BUILT-IN STITCHES
BUTTONHOLE AND
BUTTON SEWING
USING ATTACHMENTS
AND APPLICATIONS
MAINTENANCE
INDEX
2
4
1
3
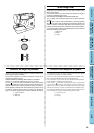
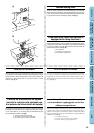
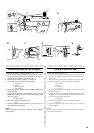
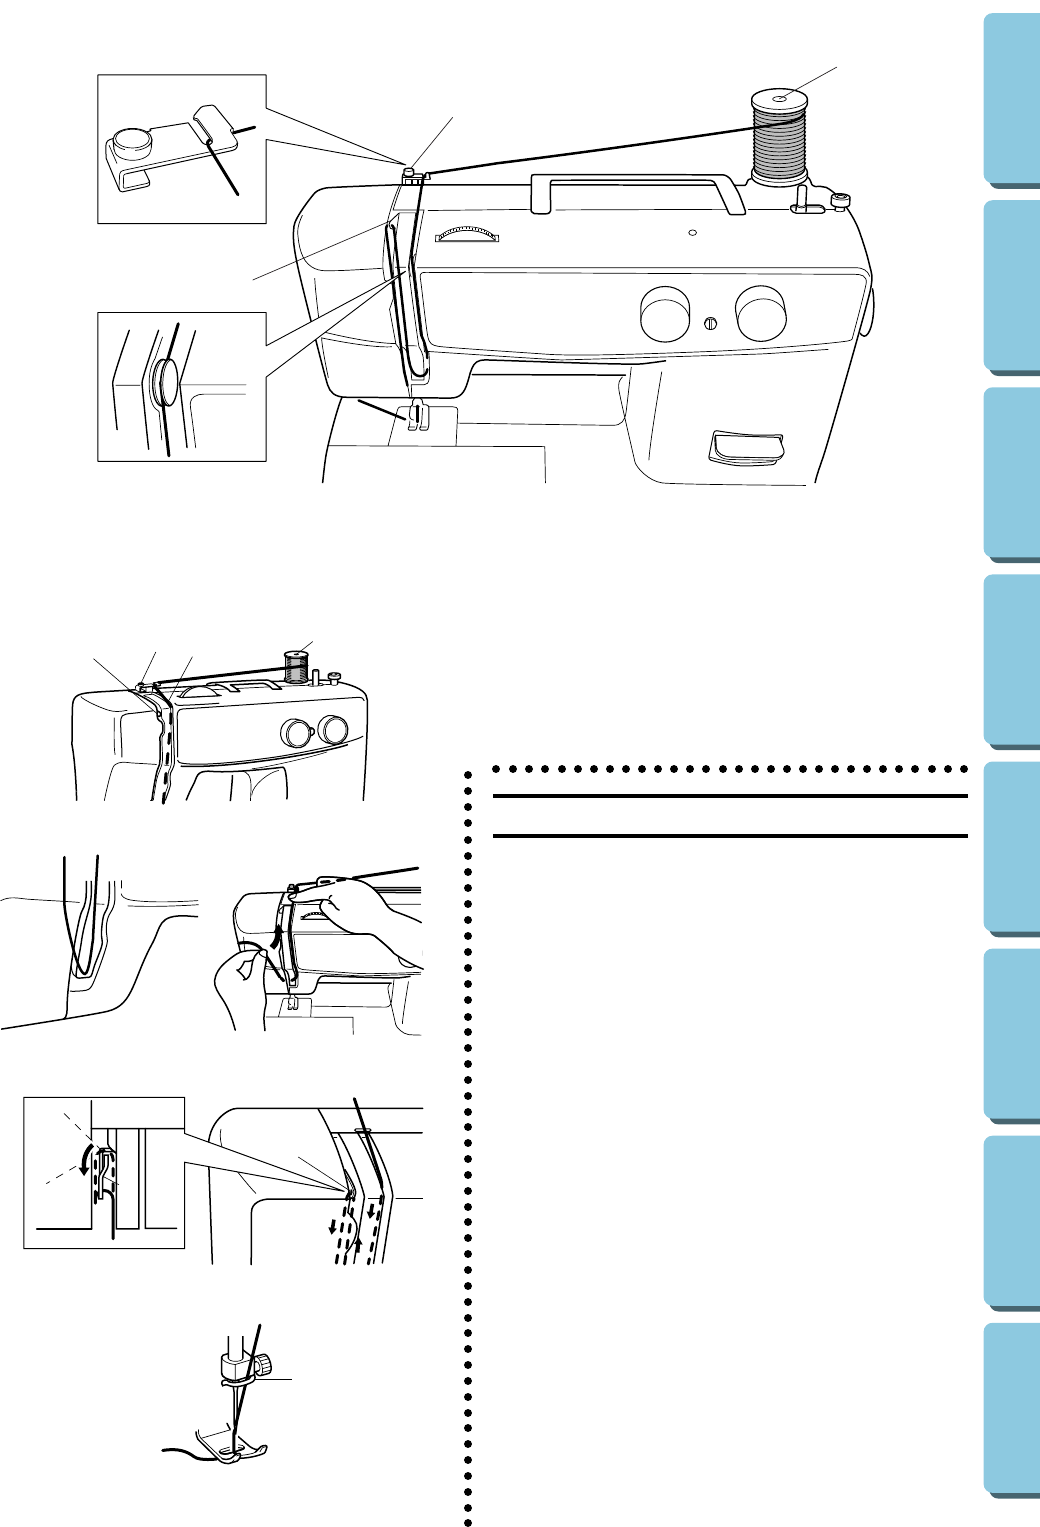
Upper (Needle) Threading
Turn power switch to “O”.
1. Raise the presser foot lever and turn the balance wheel toward you
(counterclockwise) to raise the thread take-up lever to its highest
position.
2. Pull up the spool pin and place a spool of thread on it.
3. Pass the thread through guides. (See fig. A.)
1 Spool pin
2 Thread guide
3 Tension discs
4 Thread take-up lever
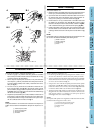
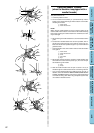
4. While holding the thread as shown in fig. B, C, pull it between the
tension discs.
5. Guide the thread to the back of the thread take-up lever and around
to the left (fig. D). Bring the thread through the slit by pulling it
toward you and into the eyelet.
5 Thread take-up lever
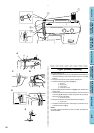
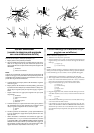
6. Bring the thread down and pass it behind the thread guide.
6 Thread guide
7. Thread the needle from front to back and pull out about 5 cm (2")
of thread as shown in fig. E.
NOTE:
Incorrectly feeding the thread may cause it to break, skip stitches or
wrinkle the fabric.
5
6
E
A
BC
D
5
2
4
3
1