


42
CONTENTS
BEFORE USE
SEWING
UTILITY STITCHES MAINTENANCE
SEWING CHART
PATTERNS
(PROGRAMMED IN
MACHINE)
A
6
5
1
6
5
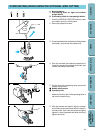
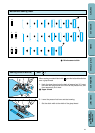
BUTTONHOLE STITCHING
11
12
13
14
15
A
A
11:Rounded buttonhole on light to medium weight fabric
*2
12:Squared buttonhole for light and medium weight fab-
rics *1
13:Squared heavy-duty buttonhole with reinforced bar
tacks in medium to heavyweight fabrics *3
14:Stretch buttonhole with reinforced bar tacks in light to
medium weight stretch fabrics, medium to heavyweight
tightly woven fabrics, heavyweight fabrics with stretch
fabrics *2
15:Keyhole buttonhole in heavyweight fabrics for larger
flat buttons *2
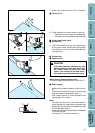
Note
Before sewing a buttonhole on your project, practice on a scrap piece of the same type of fabric.
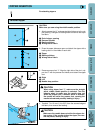
1. Mark the position and length of the buttonhole on the fabric.
* The maximum buttonhole length is 30 mm (1-3/16'') (diameter
+ thickness of the button)
* Thick thread (#30) cannot be used with the “
13
” and “
14
”
buttonhole styles.
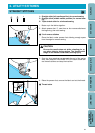
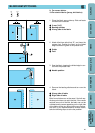
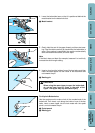
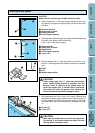
2. Attach buttonhole foot “A”. Pull out the button holder plate on
the presser foot, and insert the button that will be put through
the buttonhole, then tighten the button holder plate around the
button.
* The size of the buttonhole is decided by the button holder plate
holding the button.
1 Button holder plate
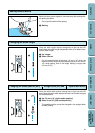
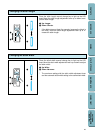
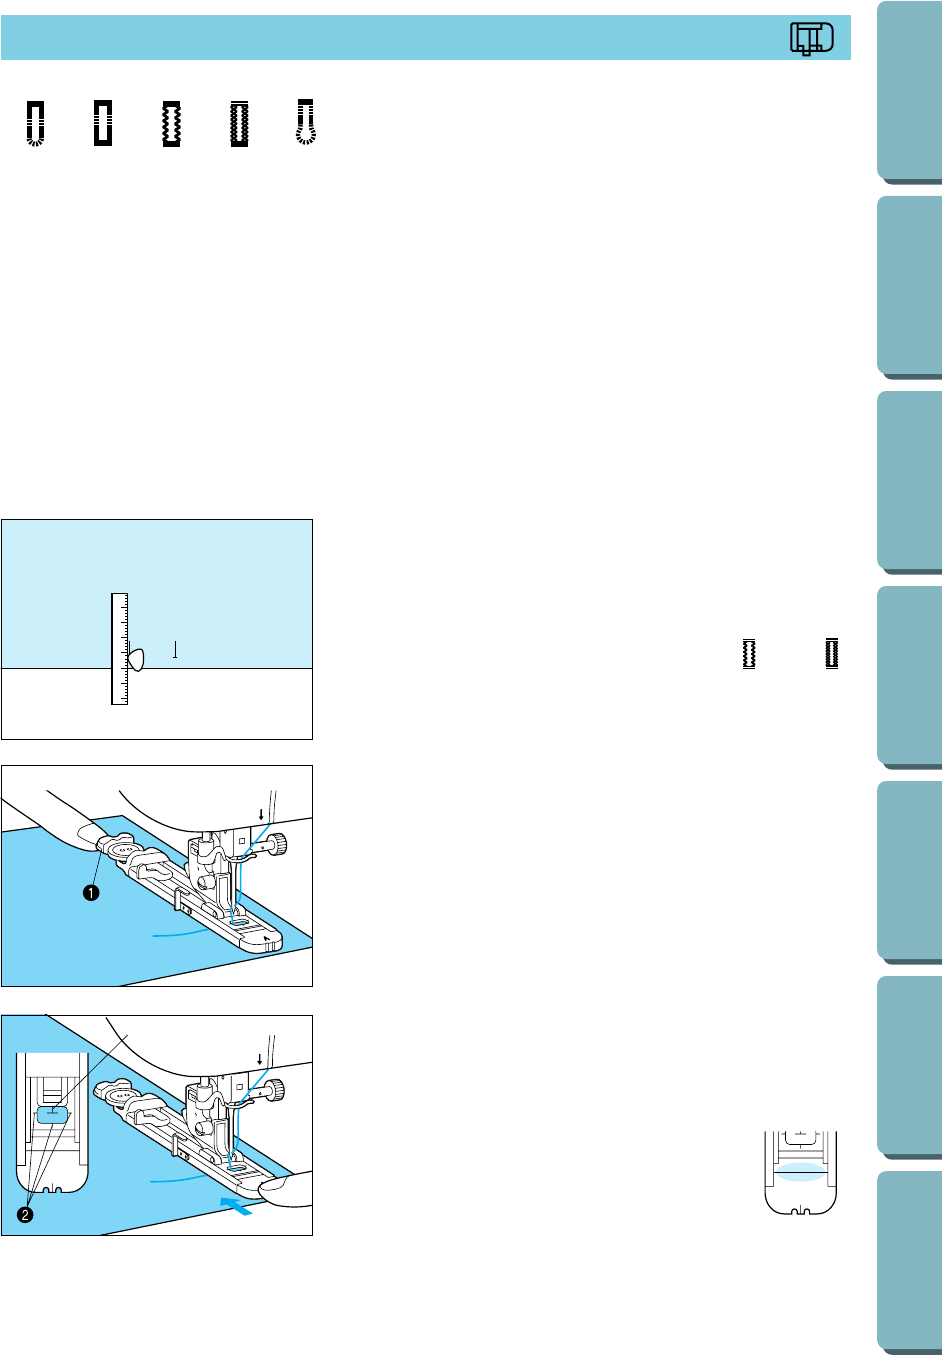
3. Align the presser foot with the mark on the fabric, and lower
the presser foot lever.
1 Mark on the fabric
2 Mark on the presser foot
*1 For use on low stress or decorative applications
*2 For use on average stress applications
*3 For use on high stress or utility applications
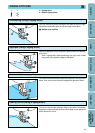
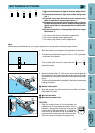
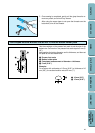
CAUTION
• Slide the outside frame of the buttonhole foot
backward as far as possible as shown in the il-
lustration, making sure that there is no gap be-
hind the part of the foot marked “A”. If the button-
hole foot is not slid back as far as possible, the
buttonhole will not be sewn with the correct size.
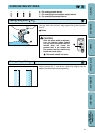
• Pass the thread underneath the presser foot.