


25
CONTENTS BEFORE USE
SEWING
UTILITY STITCHES MAINTENANCE
SEWING CHART
PATTERNS
(PROGRAMMED IN
MACHINE)
NEEDLE
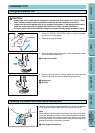
Installing the needle securely
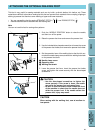
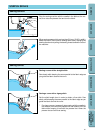
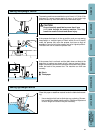
1. Push the “NEEDLE POSITION” button to raise the needle,
and then turn off the power.
2. Lower the presser foot.
3. Loosen the needle clamp screw with a screwdriver.
4. Pull out the needle.
Checking the needle
CAUTION
• Turn the main power switch to OFF before changing the needle. If the main power is left
on and the “START/STOP” button or another operation button is pressed accidentally, the
machine will start and injury may result.
• Use only sewing machine needles for home use. Other needles may bend or break and
cause injury.
• Never sew with a bent needle. A bent needle will easily break and cause injury.
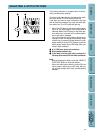
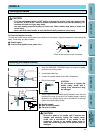
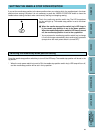
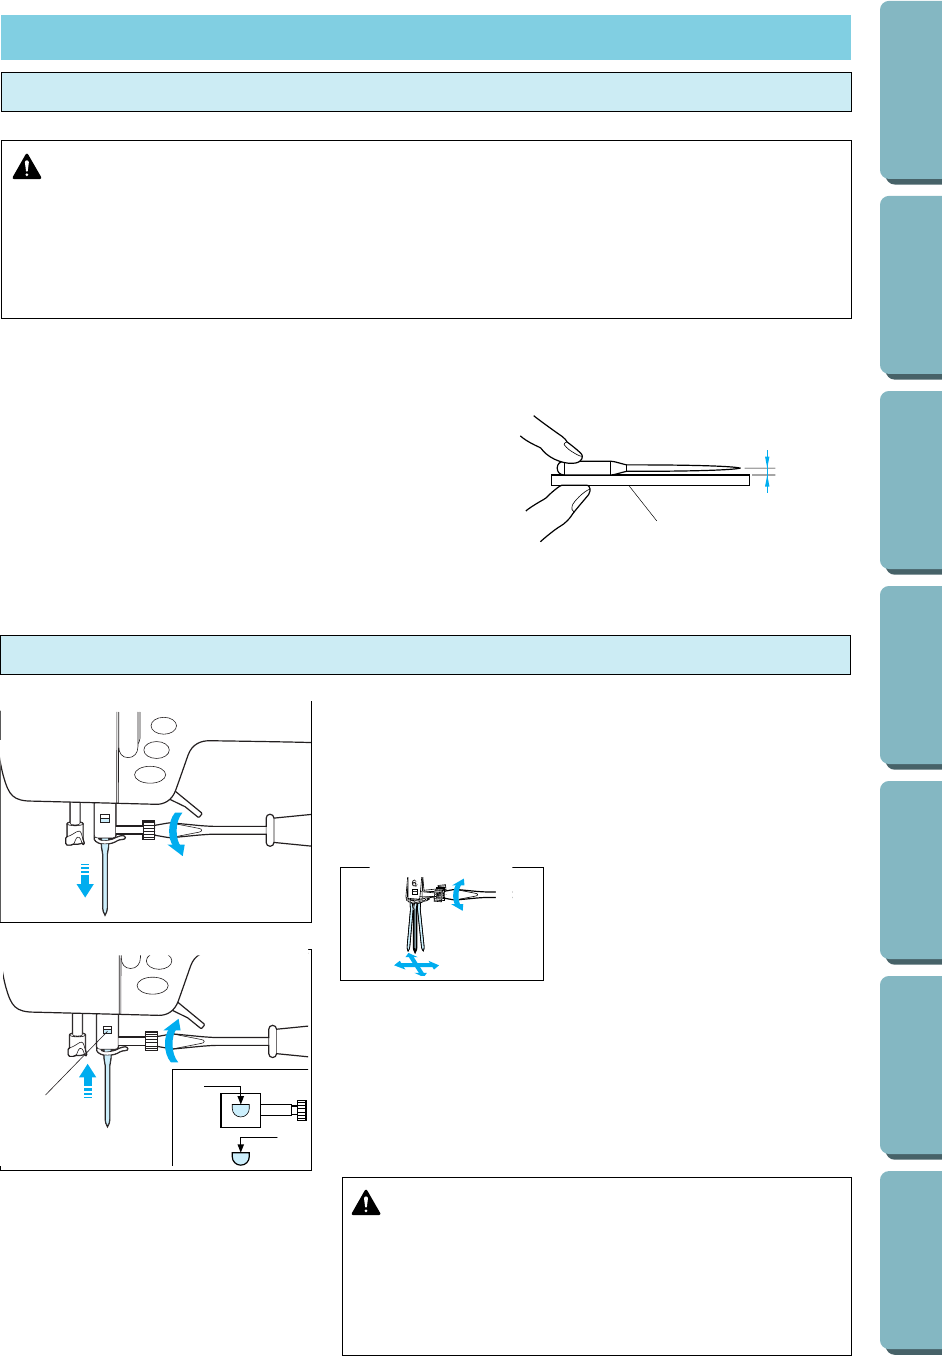
To Check the Needle Correctly:
To check the needle, place the flat side of the needle on a flat surface. Check the needle from the top and the
sides. Throw away any bent needles.
1 Parallel space
2 Level surface (bobbin cover, glass, etc.)
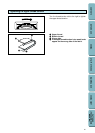
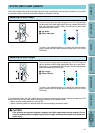
5. With the flat side of the needle facing the back, insert the new
needle all the way to the top of the needle stopper (viewing
window) in the needle clamp. Use a screwdriver to securely
tighten the needle clamp screw.
1 Needle stopper
2 Hole for setting needle
3 Flat side of needle
CAUTION
Be sure to push in the needle until it touches the
stopper, and securely tighten the needle clamp
screw with a screwdriver. If the needle is not
completely inserted or the needle clamp screw is
loose, the needle may break or the machine may be
damaged.
CAUTION
Do not loosen or tighten the
needle clamp screw with a
strong force, otherwise it may
be damaged
6
6
1
* Place a level surface under the needle
1
2
2
3