22
CONTENTS BEFORE USE
SEWING
UTILITY STITCHES MAINTENANCE
SEWING CHART
PATTERNS
(PROGRAMMED IN
MACHINE)
PRESSER FOOT
Changing the presser foot
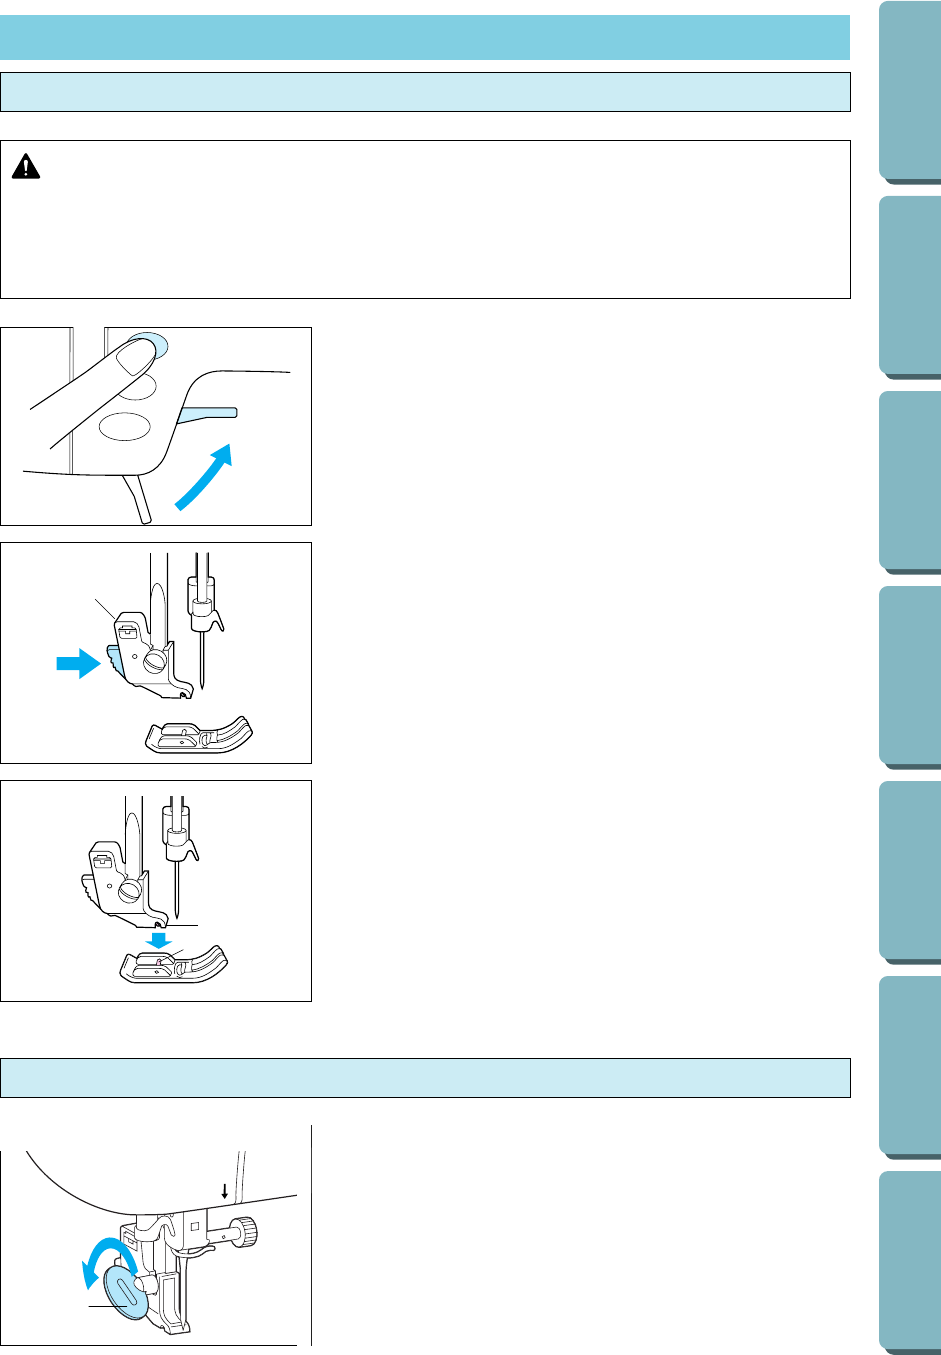
1. Press the “NEEDLE POSITION” button to raise the needle,
and then turn off the power.
2. Raise the presser foot lever.
3. Press the black button at the back of the presser foot holder,
and remove the presser foot.
1 Presser foot holder
4. Place the presser foot pin directly below the holder-end and
lower the presser foot lever to attach the presser foot.
1 Holder-end
2 Foot pin
Use the included disc-shaped screwdriver to loosen the screw of
the presser foot holder, and remove the presser foot holder.
Note
When reattaching the presser foot holder, first attach the presser
foot to the presser foot holder. Then, lower the presser foot lever,
install the presser foot holder and securely tighten the presser
foot holder screw. The thread tension may be inaccurate if the
presser foot holder is incorrectly attached.
1 Disc-shaped screwdriver
Removing the presser foot holder (while cleaning, etc.)
2
1
6
1
5
1
CAUTION
•
Always turn off the power before changing the presser foot. If the power is on and the “Start/
Stop” button or another button is pressed, the machine will start and may cause injury.
•
Always use the correct presser foot for the selected stitch pattern. If the wrong presser foot is
used, the needle may strike the presser foot and bend or break, and may cause injury.
•
Only use presser feet for this machine. Using other presser feet may lead to accident or injury.


