28
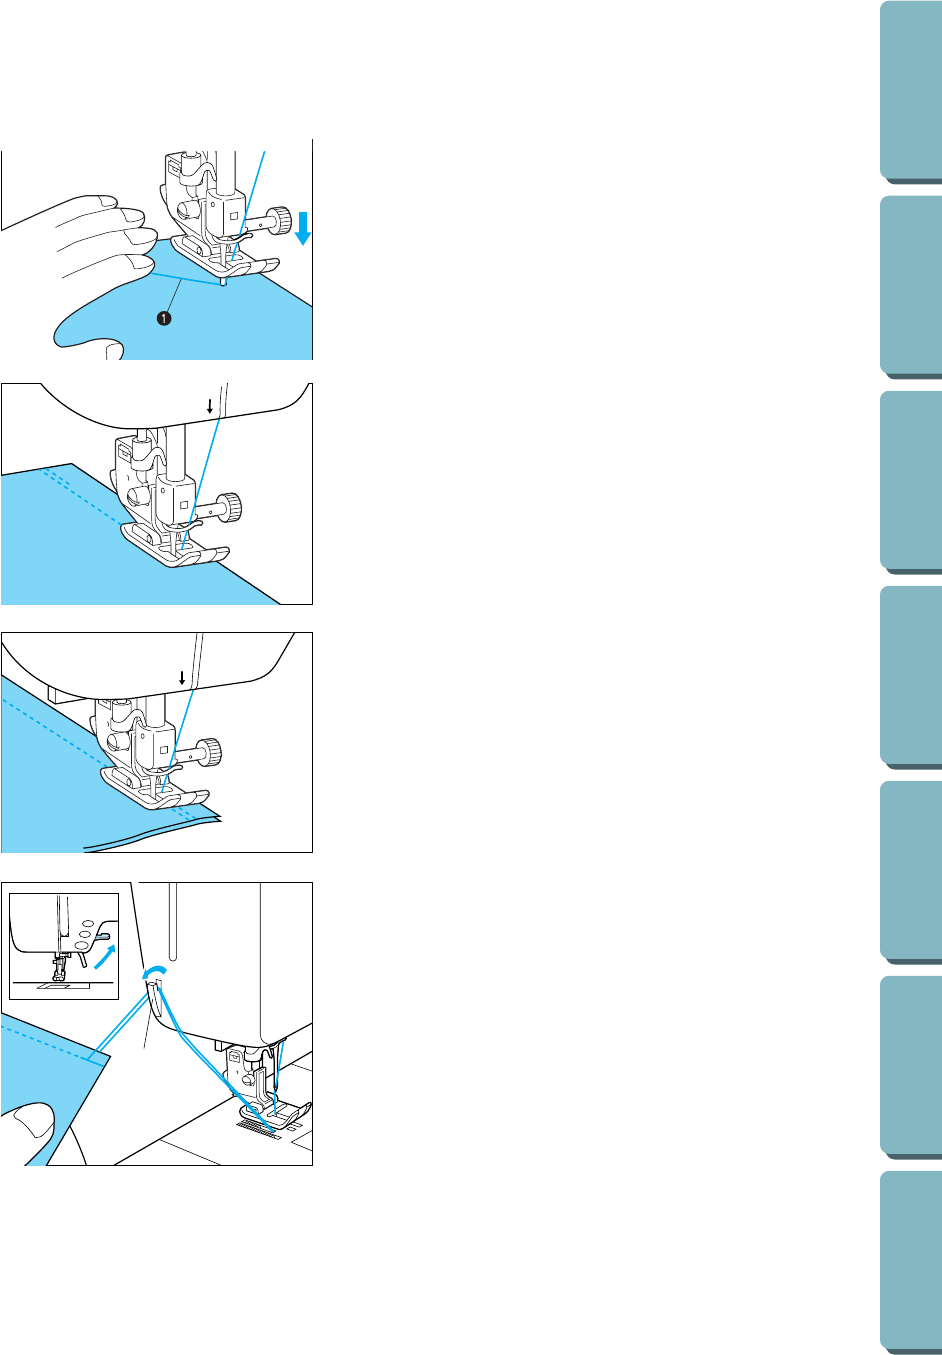
5. When sewing is completed, press the “REVERSE STITCH”
button to sew a few reverse stitches.
* If the needle stop position is set to the down position (the nee-
dle stop position switch key’s LED lamp is lit), press the “NEE-
DLE POSITION” button to raise the needle.
6. Raise the presser foot, remove the fabric and cut the thread.
1 Thread cutter
4. Lower the presser foot. Press the “REVERSE STITCH” but-
ton to sew a few reverse stitches, and then press the “START/
STOP” button. The machine will start sewing at a slow speed.
* Reverse stitches are sewn while the “REVERSE STITCH”
button is pressed.
* The sewing speed cannot be adjusted while reverse stitches
are sewn.
6
5
6
5
1
3. While pressing down on the thread and the fabric with your
left hand, turn the balance wheel with your right hand to move
the needle to the sewing start position.
1 Thread
* You can begin sewing without drawing up the bobbin thread.
6
CONTENTS BEFORE USE
SEWING
UTILITY STITCHES MAINTENANCE
SEWING CHART
PATTERNS
(PROGRAMMED IN
MACHINE)


