


24 en | Installation MIC612 Thermal Camera
F.01U.249.416 | 2.0 | 2012.09 Installation Manual Bosch Security Systems, Inc.
To install the power supply, follow these steps:
1. Select the mounting position of the MIC PSU so that it cannot be interfered with either
intentionally or accidentally. Bosch recommends using a lockable cabinet.
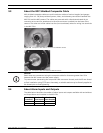
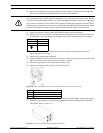
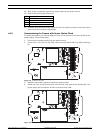
2. Locate the four (4) mounting holes of the power supply enclosure. (Figure 4.4 displays
one of the holes.) See the dimensional drawing in the appendix for hole locations. The
dimensions shown are for the mounting holes only. The other 4 holes shown are for
securing the lid and are for reference only.
3. Drill four (4) holes in the mounting surface for the mounting anchors appropriate for M6
screws (not supplied).
4. Loosen the four (4) captive Phillips head screws on the top of the lid of the power supply
enclosure (item 2, Figure 4.4). Lift the lid and set it upside down next to the enclosure.
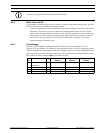
Figure 4.4 Holes for screws for mounting enclosure mounting; holes for screws for enclosure lid
5. Secure the enclosure to the mounting surface using four (4) M6 stainless steel screws
and washers (not supplied), which fit through the large holes in the enclosure, as shown
in Figure 4.4.
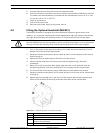
6. Unscrew the four (4) M3 screws on the internal high voltage input head-end shield
(marked with "Danger") covering the mains cable terminal HD1; retain the screws.
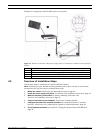
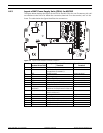
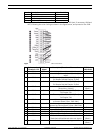
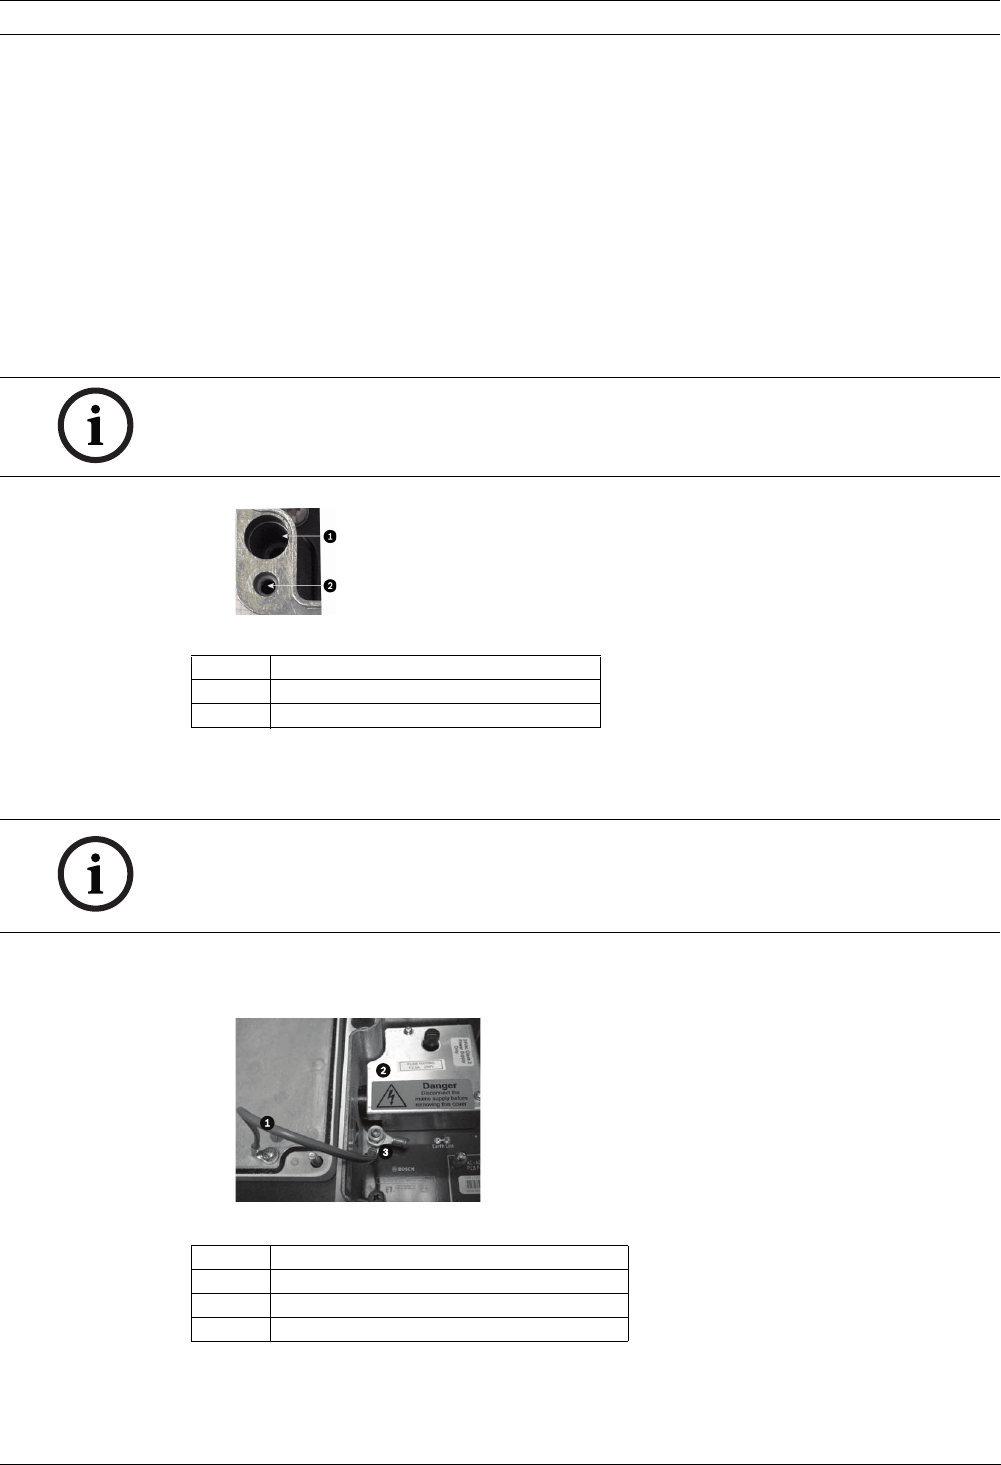
Figure 4.5 Enclosure showing shield and earth core cable between earth terminal post and enclosure lid
7. Remove the internal shield and set it nearby, outside of the PSU enclosure. You can now
access the hole for the power cable and the M20 blanking plug covering the hole.
NOTICE!
Do not stretch or cut, or otherwise disturb, the earth core cable (shown in the figure below)
to the inside of the lid and to the earth termination post.
Number Description
1 Hole for mounting screw in enclosure
2 Hole for lid screw in enclosure
NOTICE!
If you are securing the power supply enclosure in a vertical position (for example, on a wall),
one person should hold the enclosure lid while another secures the enclosure body in place,
to avoid damage to any part of the enclosure, and/or injury to the installer(s).
Number Description
1 Earth core cable to enclosure lid
2 Internal shield
3 Earth termination post