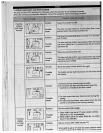
The
start
and
stop
button
was
pressed
when
the
butto
hole
stitch
(Stitch
No.1)
is
NOT
selected
and
with
the
buttonhole
lever
DOWN.
I
Connect
the
foot
control
plugs
correctly.
2
Do
riot
press
the
start
and
stop
button
when
the
machine
is
connected
to
the
foot
control.
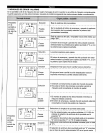
1
The
foot
control
has
been
disconnected
during
the
sewing.
2
The
start
and
stop
button
was
pressed
when
the
foot
control
is
connected
to
the
sewing
machine.
Set
the
correct
stitch
length
1
Stitch
width
is
not
set
at
114fl
when
stretch
stitches
(Stitch
No.11-20)
are
selected.
2
Stitch
width
is
set
to
H4
when
Stitch
No.1
or
stitch
No.3-10
are
selected.
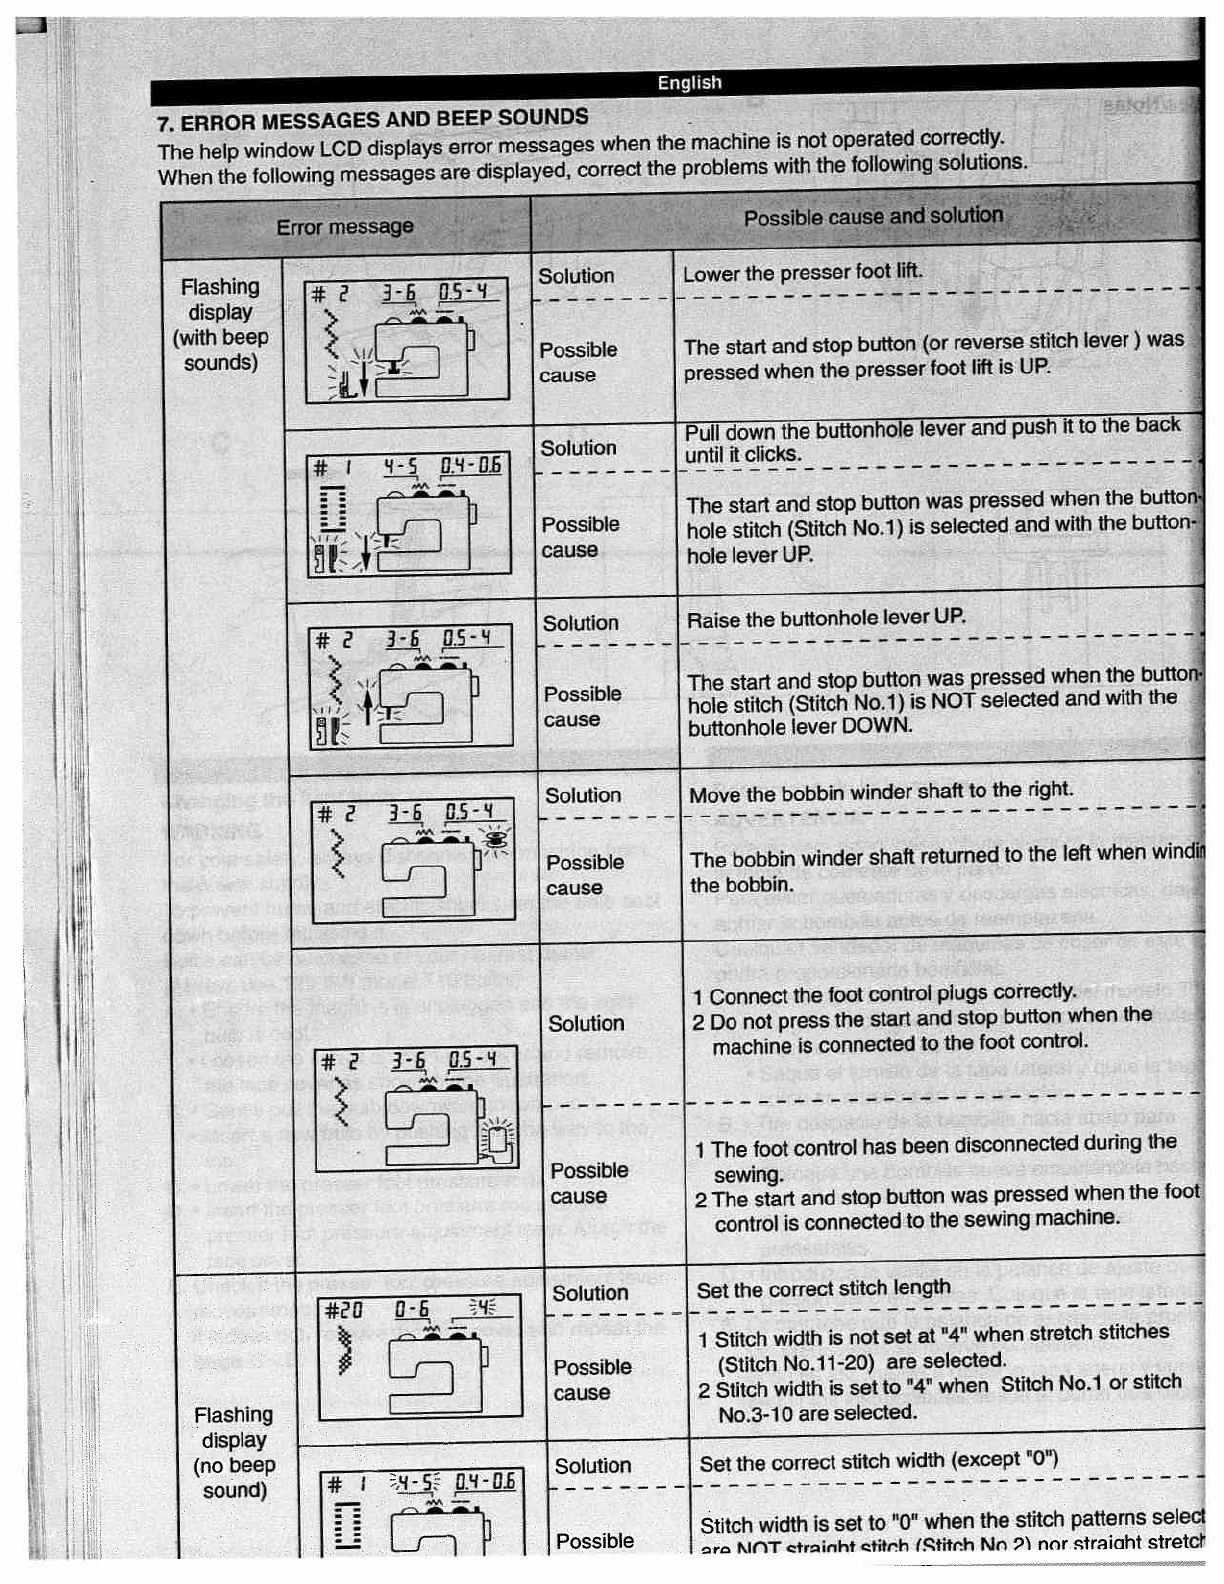
7.
ERROR
MESSAGES
AND
BEEP
SOIJNDS
The
help
window
LCD
displays
error
messages
when
the
machine
is
not
operated
correctly.
When
the
following
messages
are
displayed,
correct
the
problems
with
the
following
sotutions.
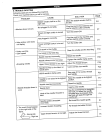
Flashing
______
display
________
(with
beep
sounds)
Solution
Possible
cause
Lower
the
presser
foot
lift
The
start
and
stop
button
(or
reverse
stitch
lever)
was
pressed
when
the
presser
foot
lift
is
UP.
S
I
Pull
down
the
buttonhole
lever
and
push
it
to
the
bacl
-DL
°‘“°untHftclicks,
!
1i
.
The
start
and
stop
button
was
pressed
when
the
butto
Possible
hole
stitch
(Stitch
No.1)
is
selected
and
with
the
button
[
[
cause
hole
lever
UP.
Raise
the
buttonhole
lever
UP.
a
-
Solution
Move
the
bobbin
winder
shaft
to
the
right.
••
>
Possible
The
bobbin
winder
shaft
returned
to
the
left
when
wind
J
cause
the
bobbin.
*
Solution
Possible
cause
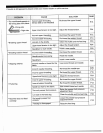
Flashing
display
(no
beep
sound)
Set
the
correct
stitch
width
(except
UOH)
Stitch
width
is
set
to
when
the
stitch
patterns
select
KIflT
ctrinht
tith
(Stitnh
Mn
2
nnr
strniaht
stretc


